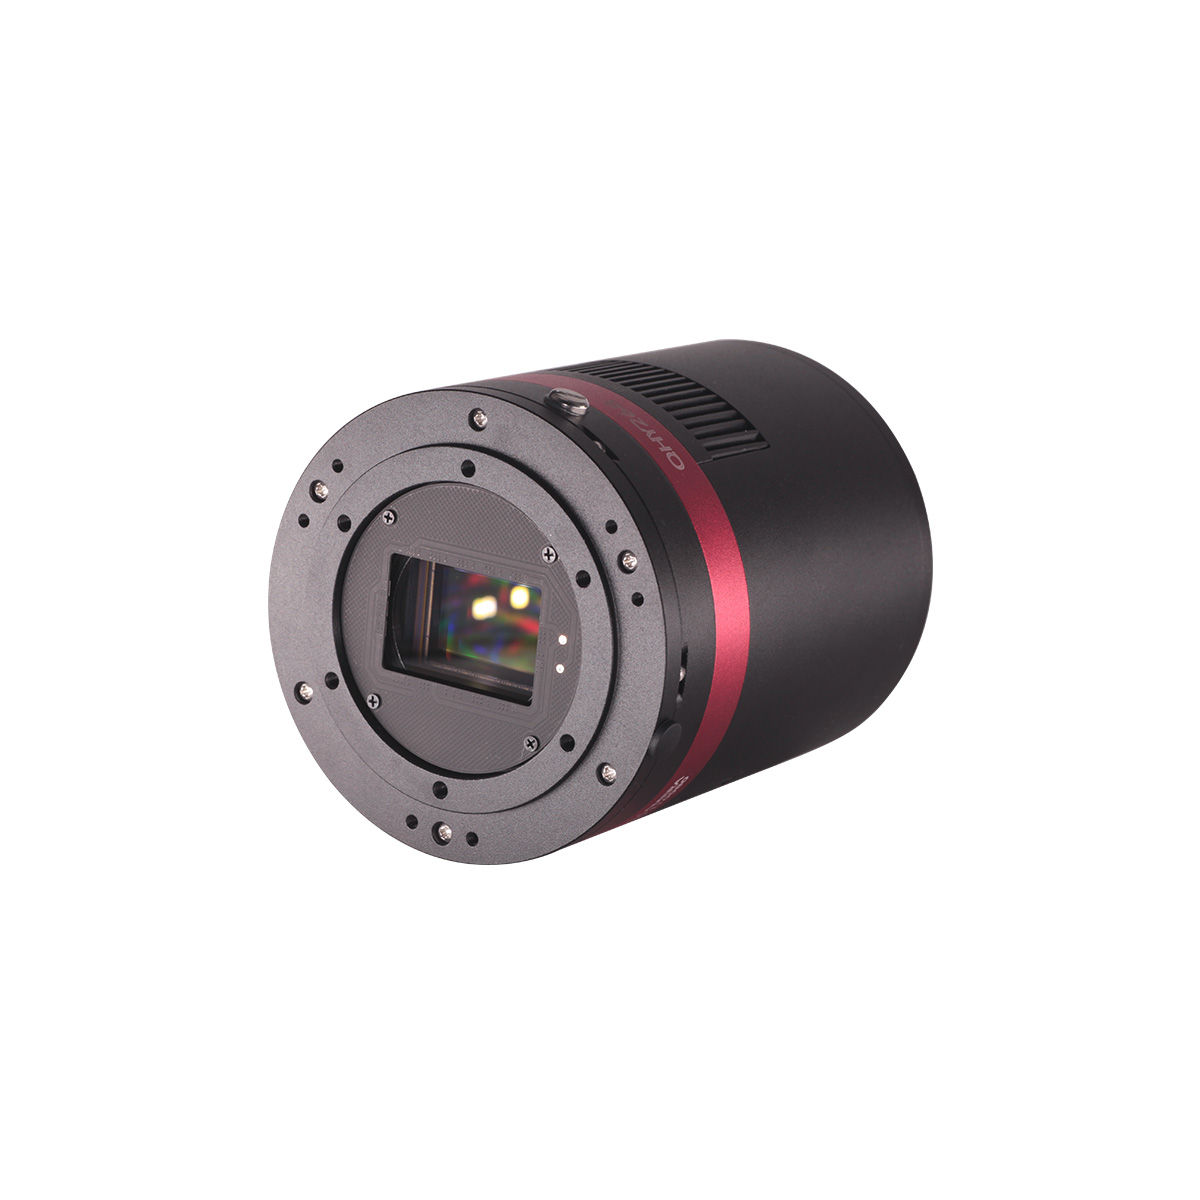

QHYCCD Firmware Upgrade Instructions-QHY411
NOTE:
1 During the upgrade process, be careful not to power off or shoot.
2 Before upgrading, if you have previously kept an older version of the firmware upgrade tool locally, please discard it and use the new firmware update tool (20220824 version) instead.
Download address for the new version upgrade tool:
1 Upgrade Procedure
1.1. Use the USB3.0 cable to connect the camera to the computer. If the camera has 12V power supply port, connect the camera to the 12V power supply.
1.2. Decompress the firmware upgrade zip package. The contents of the zip package usually include:
- A zip package with the name “qhyxxx (product model) xxx_user”, containing the firmware files needed for the upgrade.
- A zip file with the name “QhyccdUsbUPdata_xxx”containing the firmware upgrade tool.
- Documentation: Operating instructions for the upgrade
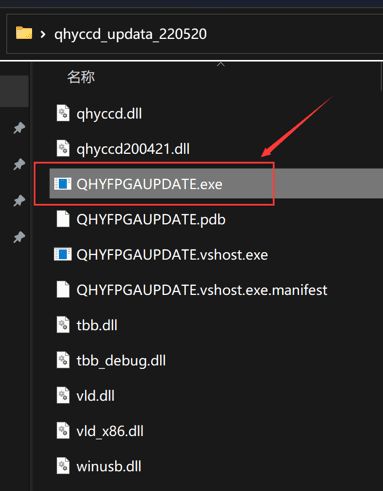
1.3. Open the “QhyccdUsbUPdata_xxx” folder, and open upgrade tool as shown in the following figure.
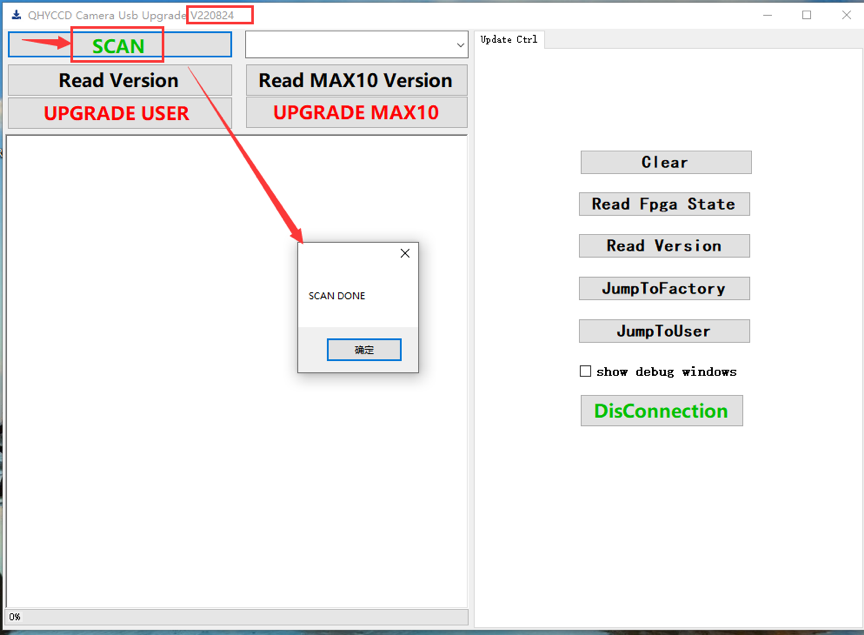
1.4.Click the SCAN button to search the camera. Wait for a moment and the “SCAN DONE” dialog box will pop up. When the scan is complete, select the device model you want to upgrade.
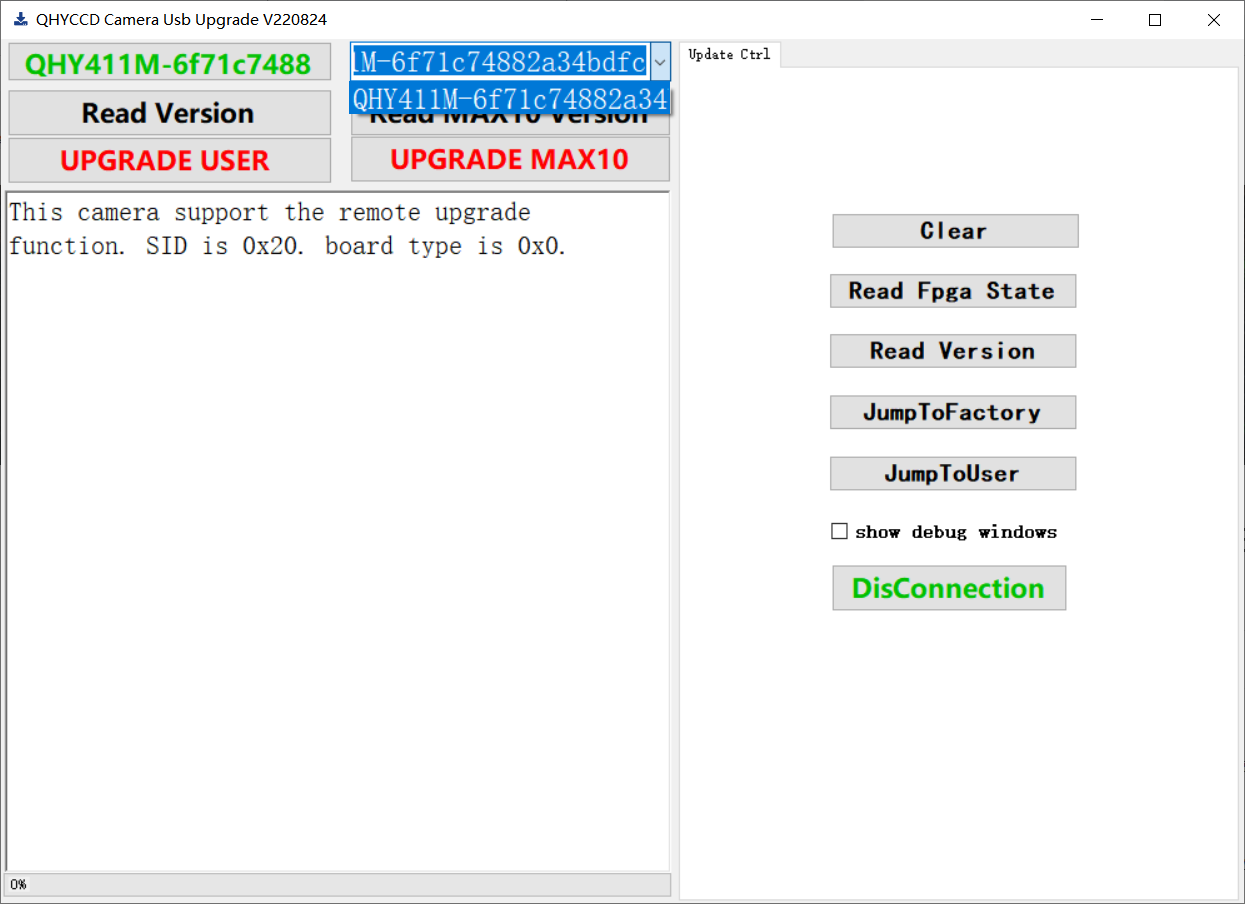
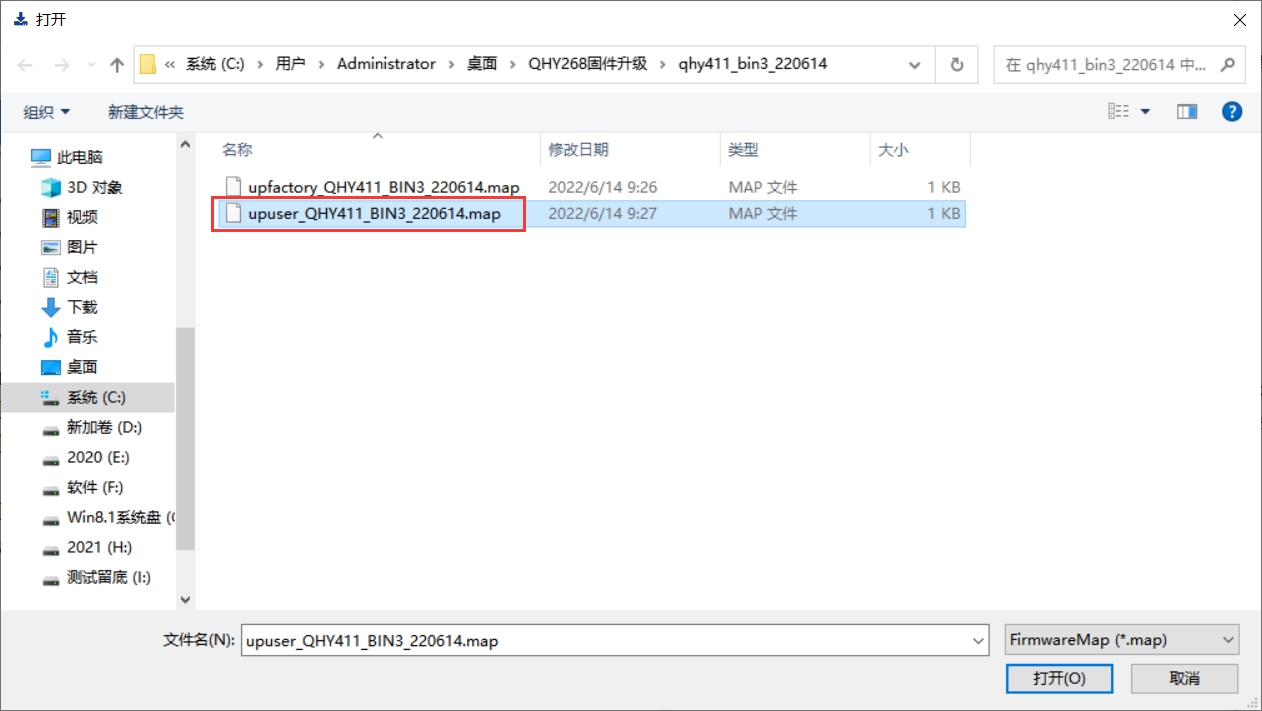
1.5 Click the “UPGRADE USER” button to upgrade the firmware. Follow the prompts and a dialog box will pop up. Some upgrades require one or more files with the suffix “.map”, “.bin” or “.rpd”, just install the the displayed file promoted by the pop-up box. Note that the selected file should contain keywords like “****user(or upuser)***”.
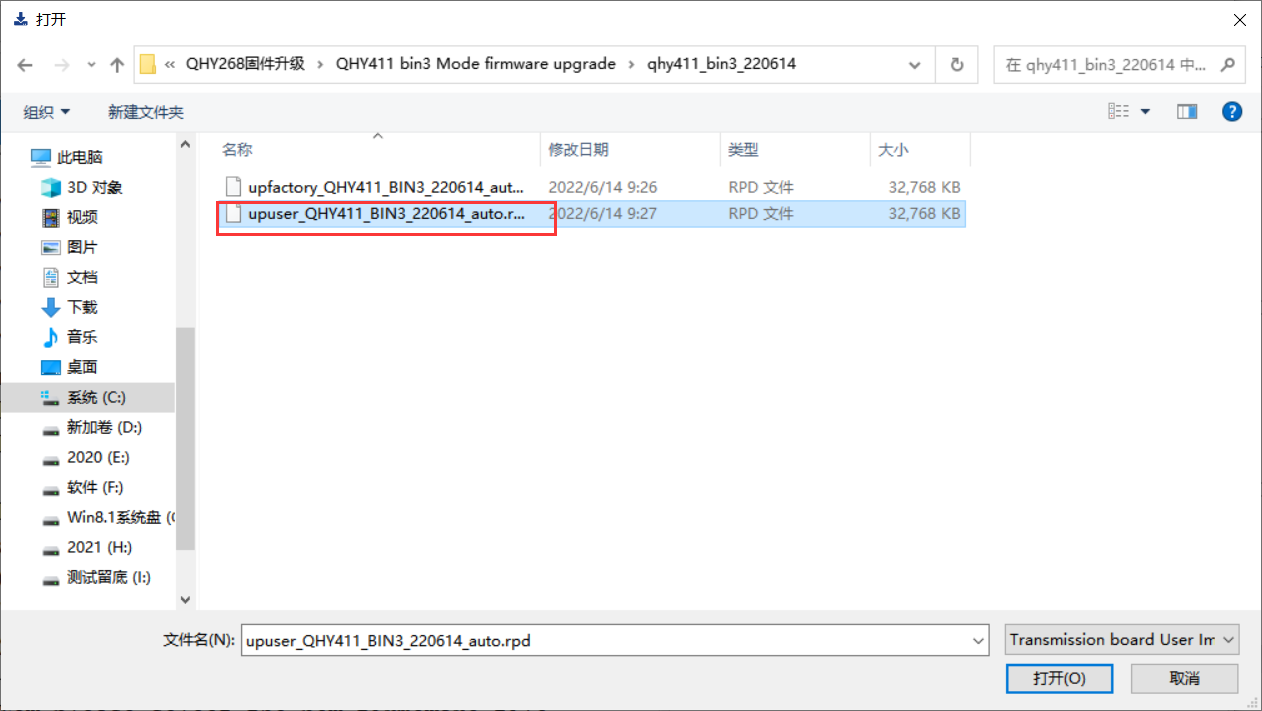
1.6 In case the upgrade requires more than one file, the program will pop up a window again. Then you need to select the other files shown under the firmware folder, such as the “.rpd” suffix file. Note that the file name you choose should still contain the keyword “****user(or upuser)***”.
1.7 Now start to upgrade the firmware, the upgrade progress is displayed in the lower left corner, the upgrade process will be a bit slow, please be patient. Don’t disconnect your camera during this process.
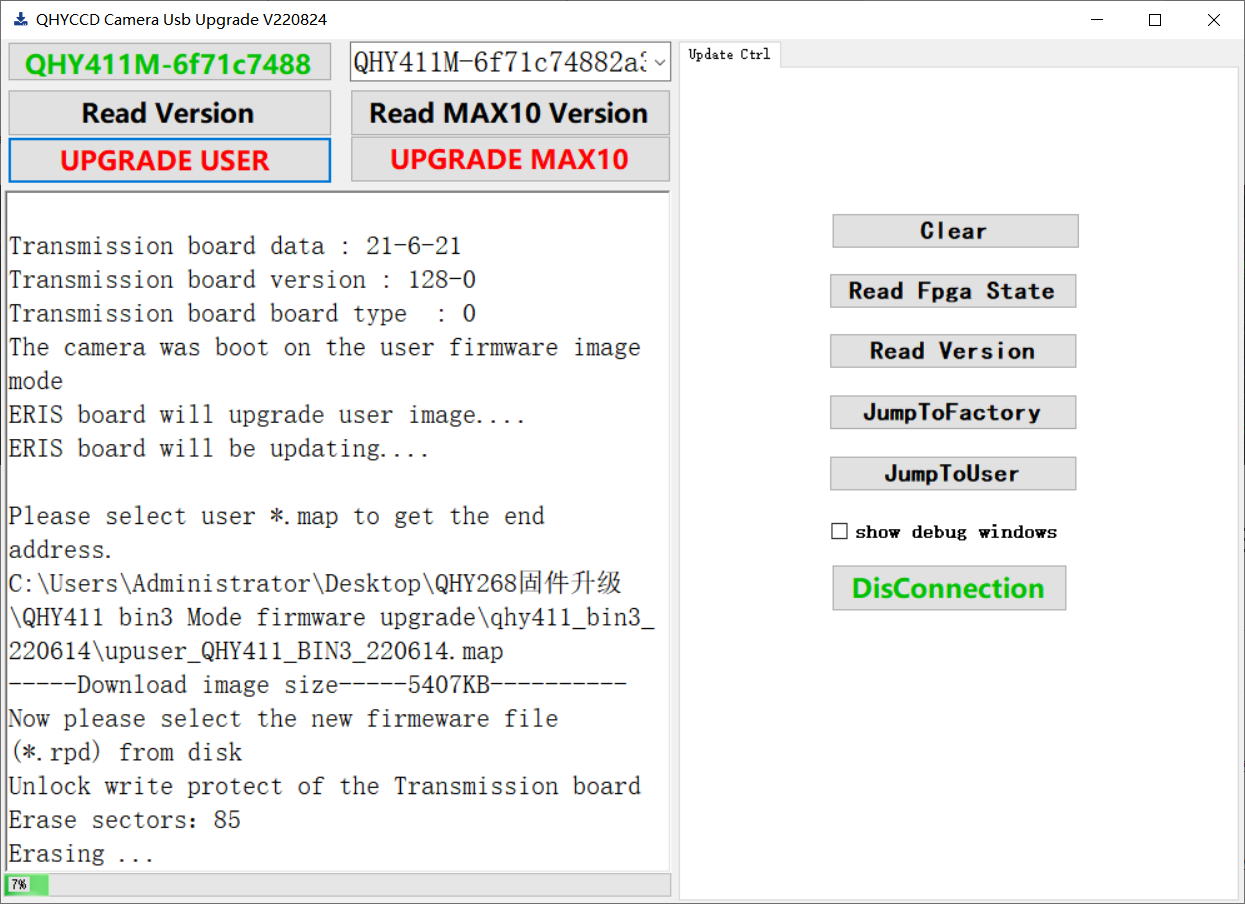
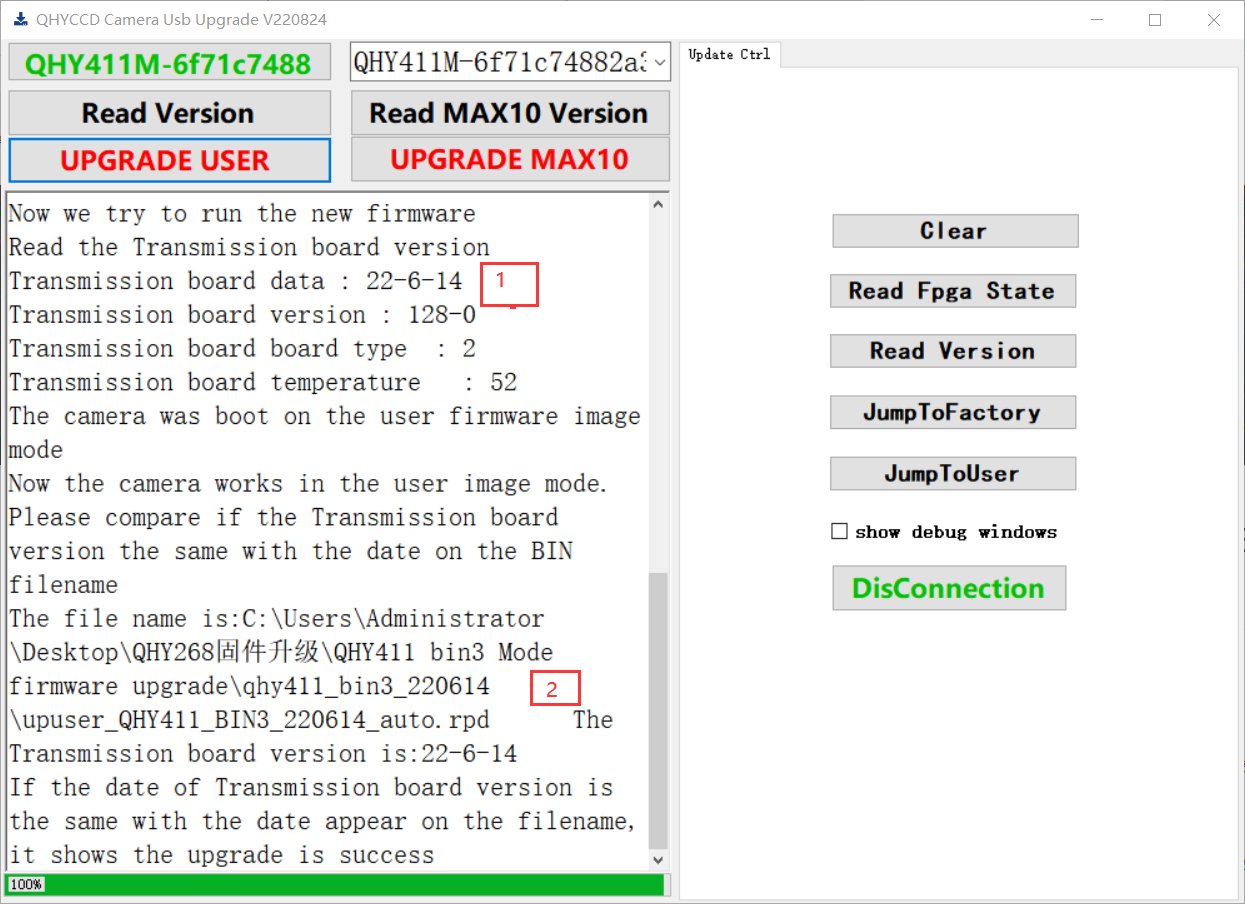
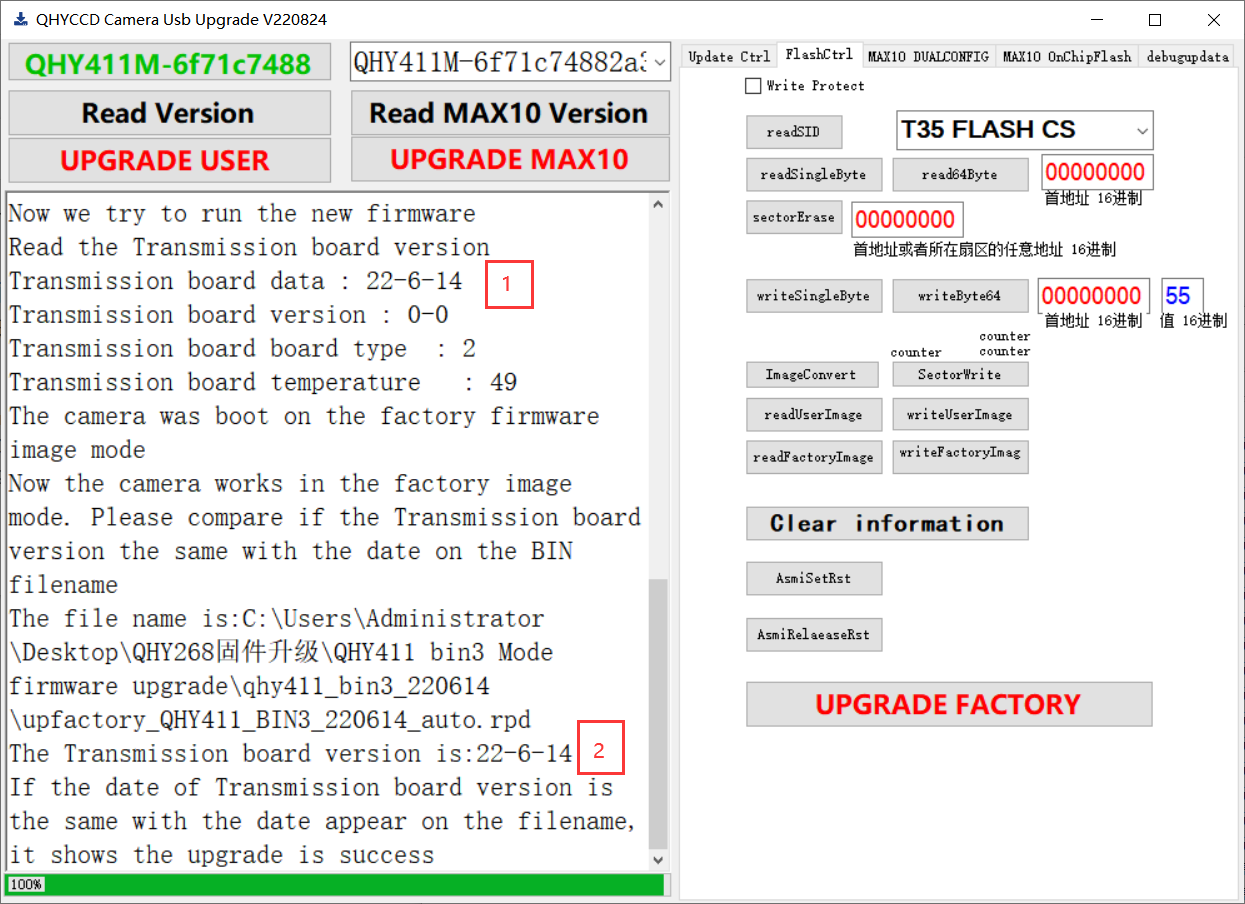
1.8 When the progress reaches 100%, if the number at 1 is the same as the number at 2, the firmware upgrade is complete. Just click the “x” at the top right to exit.
2 Solution for upgrade failure
If the upgrade fails, theoretically, the camera won’t work abnormally.
Try the following steps:
Disconnect all connections to the camera. Power up the camera again and upgrade it according to Chapter 1” Upgrade Procedure”. If it still fails, please contact QHYCCD.
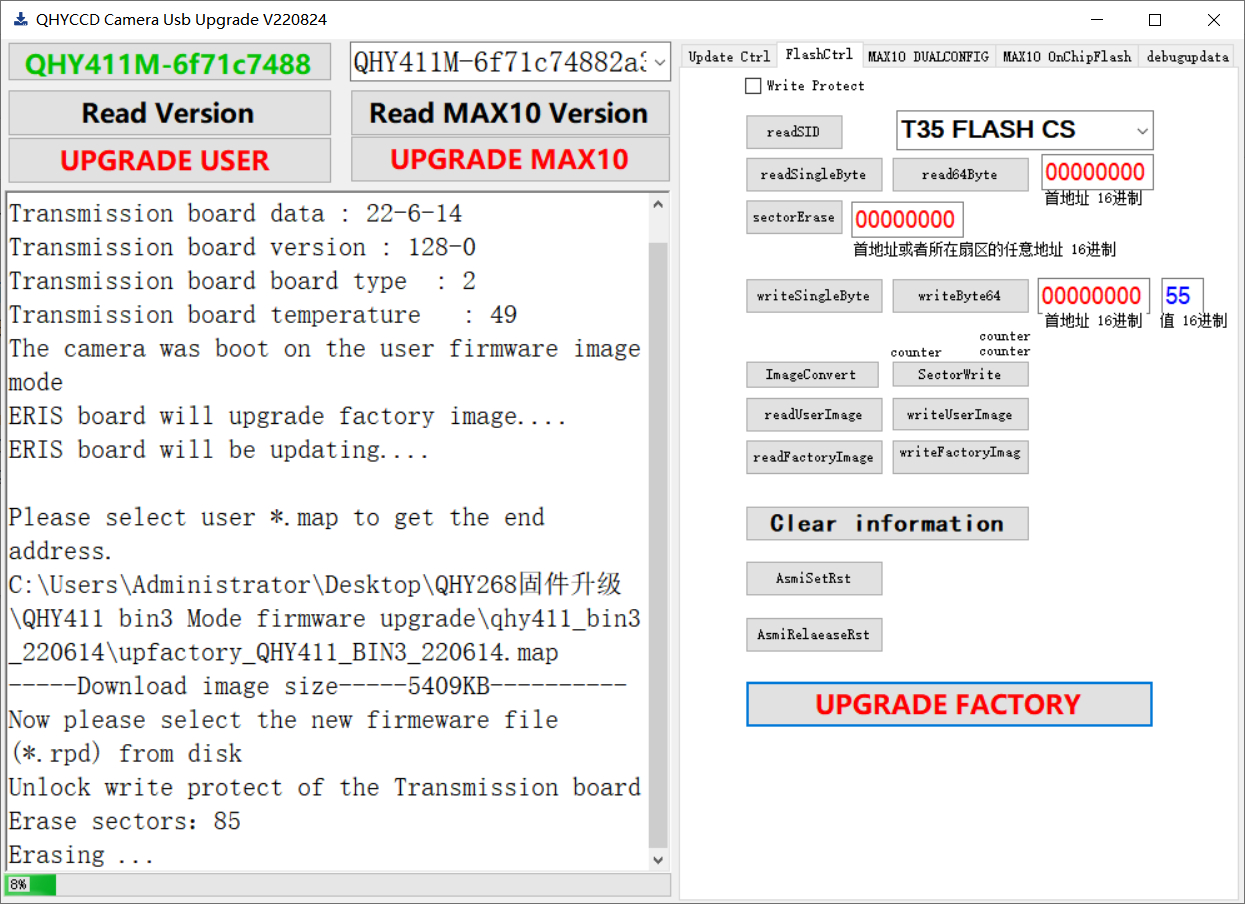
If you use fiber optic, please do not disconnect the USB cable, you also need to upgrade upfactory firmware. Don’t disconnect the USB or power cable during upgrading upfactory firmware, otherwise the upgrade won’t be completed and the camera won’t be able to recover, then you need to return your camera to us to programming the firmware. Before upgrading upfactory firmware, if you have any questions, please contact QHYCCD, we can provide remote upgrade service.
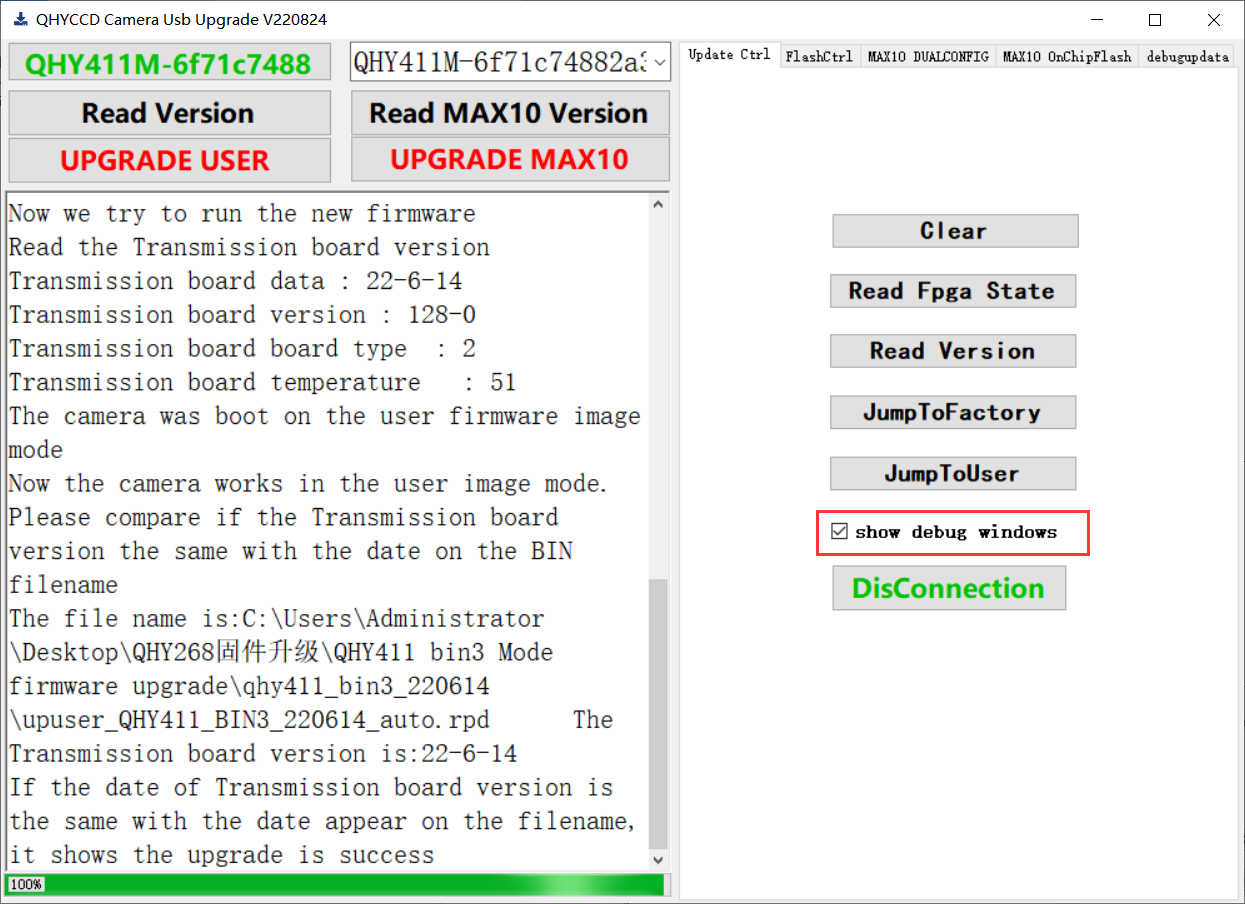
1Check “show debug windows”
2Click “FlashCtrl”
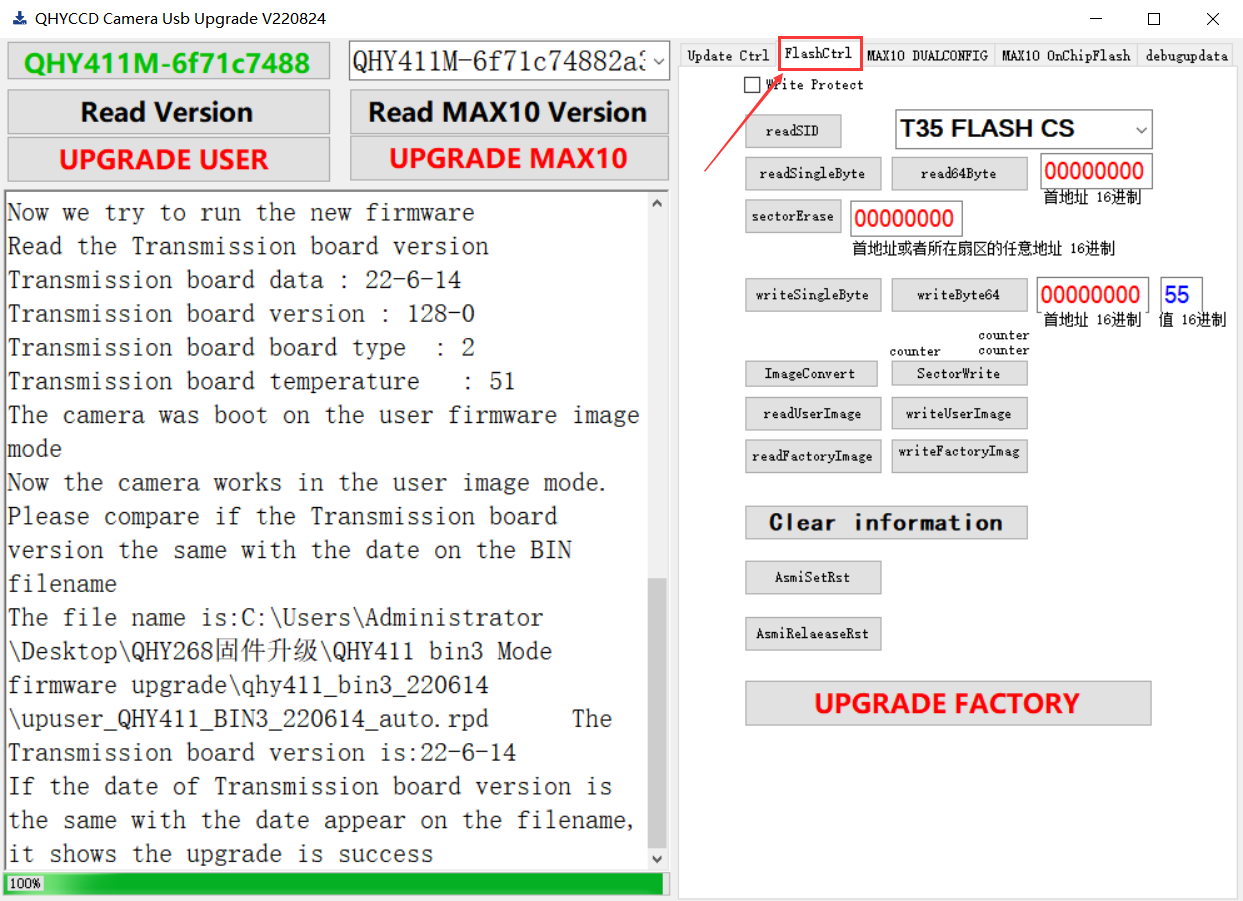
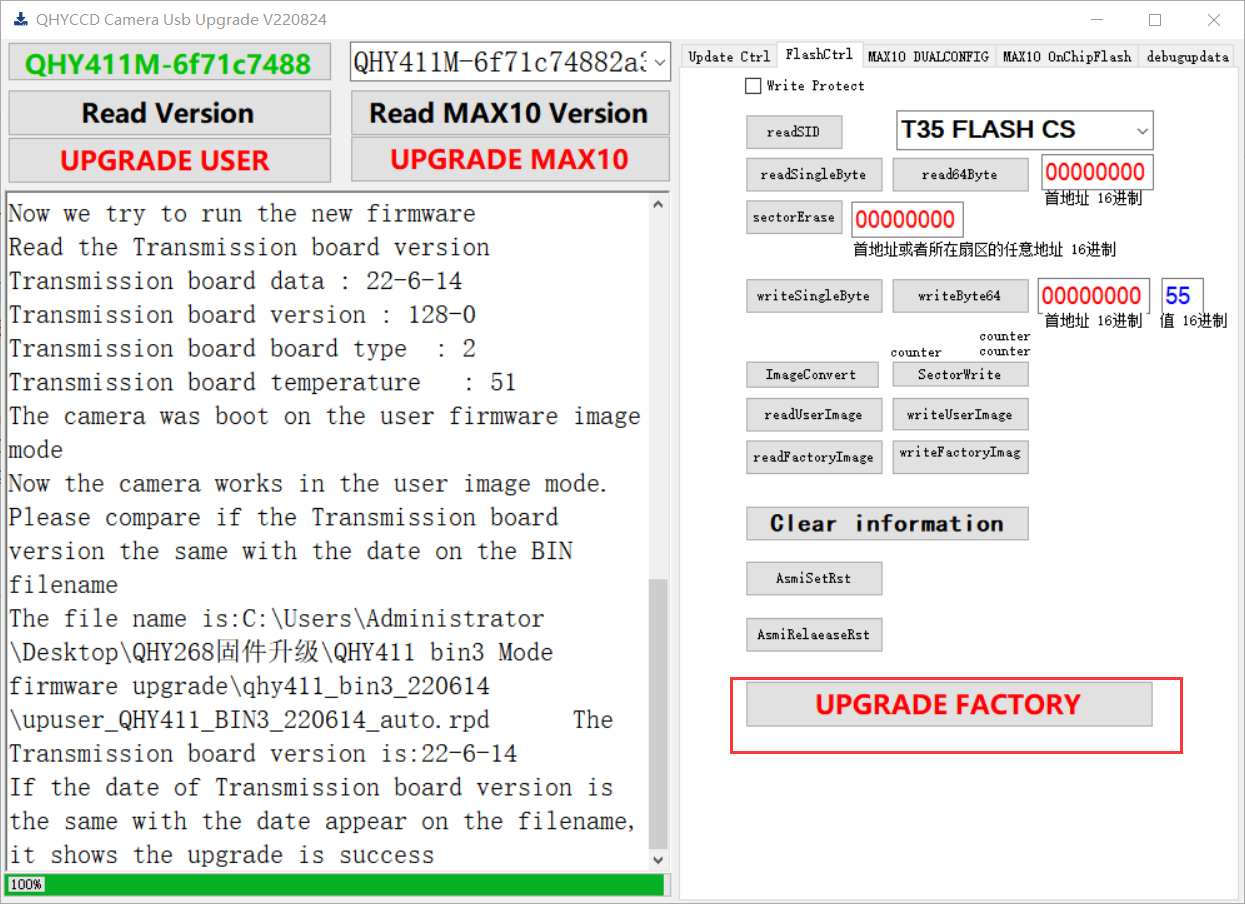
3Click “UPGRADE FACTORY”
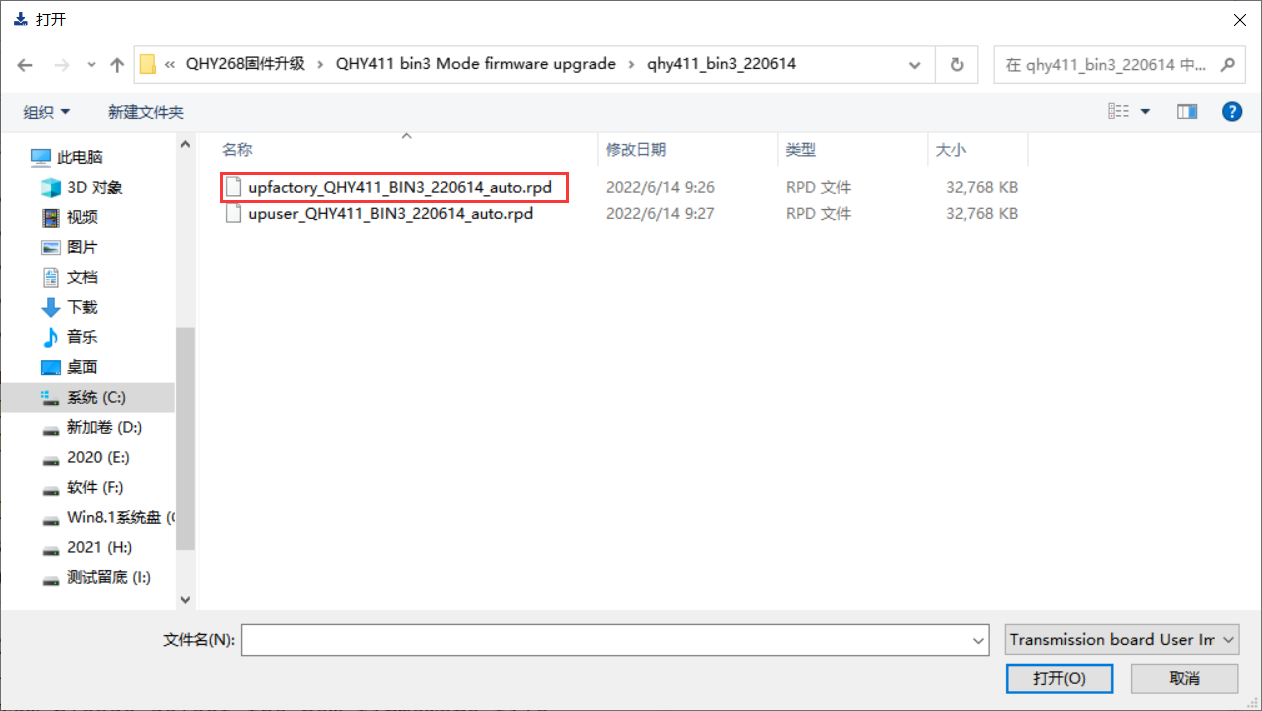
4Click “upfactory_QHY411_BIN3_220614.map”

5Click “upfactory_QHY411_BIN3_220614_auto.rpd”
⑥Now start to upgrade the firmware, the upgrade progress is displayed in the lower left corner, the upgrade process will be a bit slow, please be patient. Don’t disconnect your camera during this process.
⑦ When the progress reaches 100%, if the number at 1 is the same as the number at 2, the firmware upgrade is complete. Just click the “x” at the top right to exit.
3 Other functions (Not required for upgrade, just for reference)
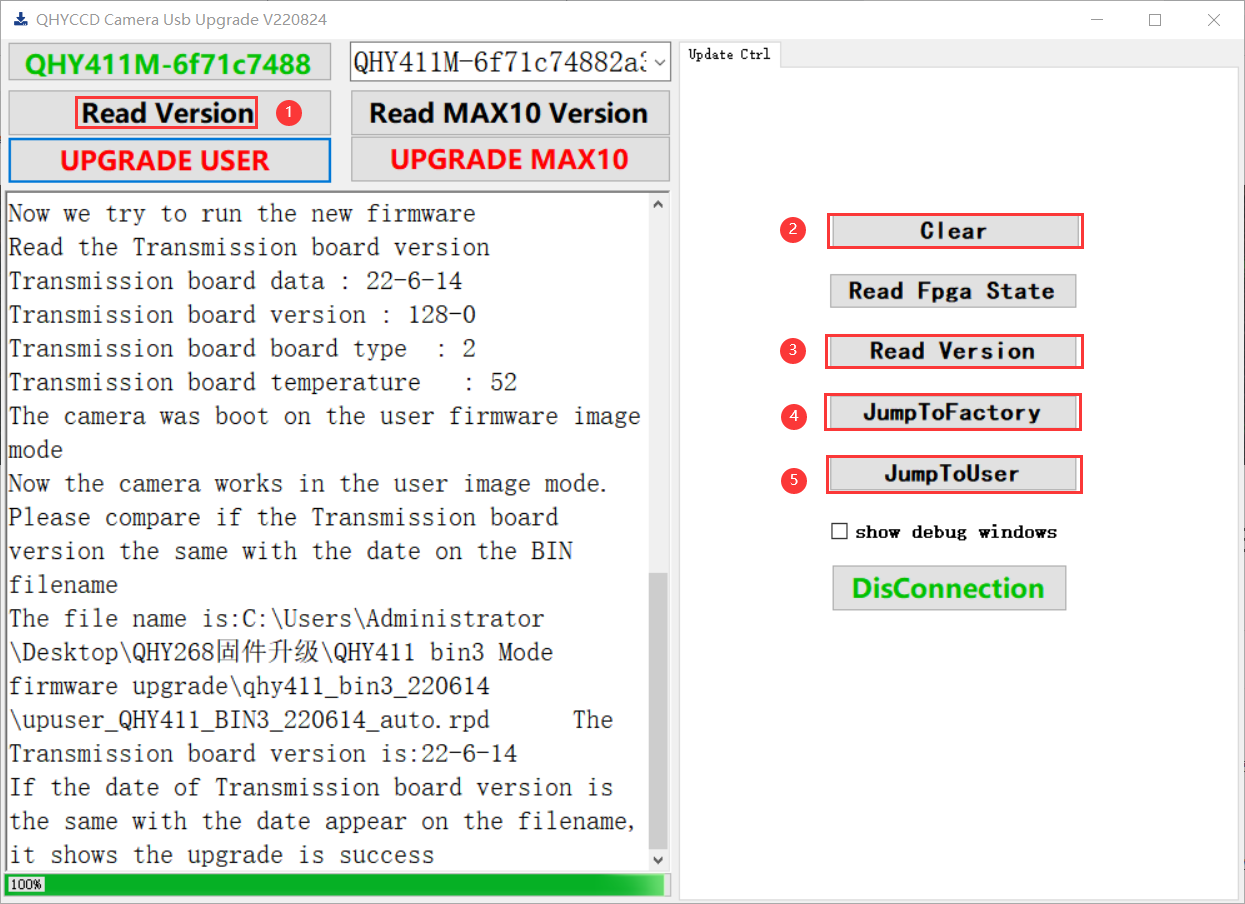
1 Gets the current camera version.
2 Clear the display panel information.
3 Gets the current camera version.
4 Get the factory image version and start the camera from the factory image.
5 Get the use image version and start the camera from the user image.