
QHYCCD: Hi Kevin! We’re very pleased to invite you for this interview. We really like the images you have created with a QHY camera. So, let everyone know more about you. Please give us a brief introduction of yourself.
Kevin: 
I grew up with telescopes and a darkroom in the house, though I did not try taking images with a telescope till 2014. My college degree was in Photojournalism, however I left that behind and spent my career as a CMO in the finance industry. As my career was winding down I decided that Astrophotography was what I would do with my time.
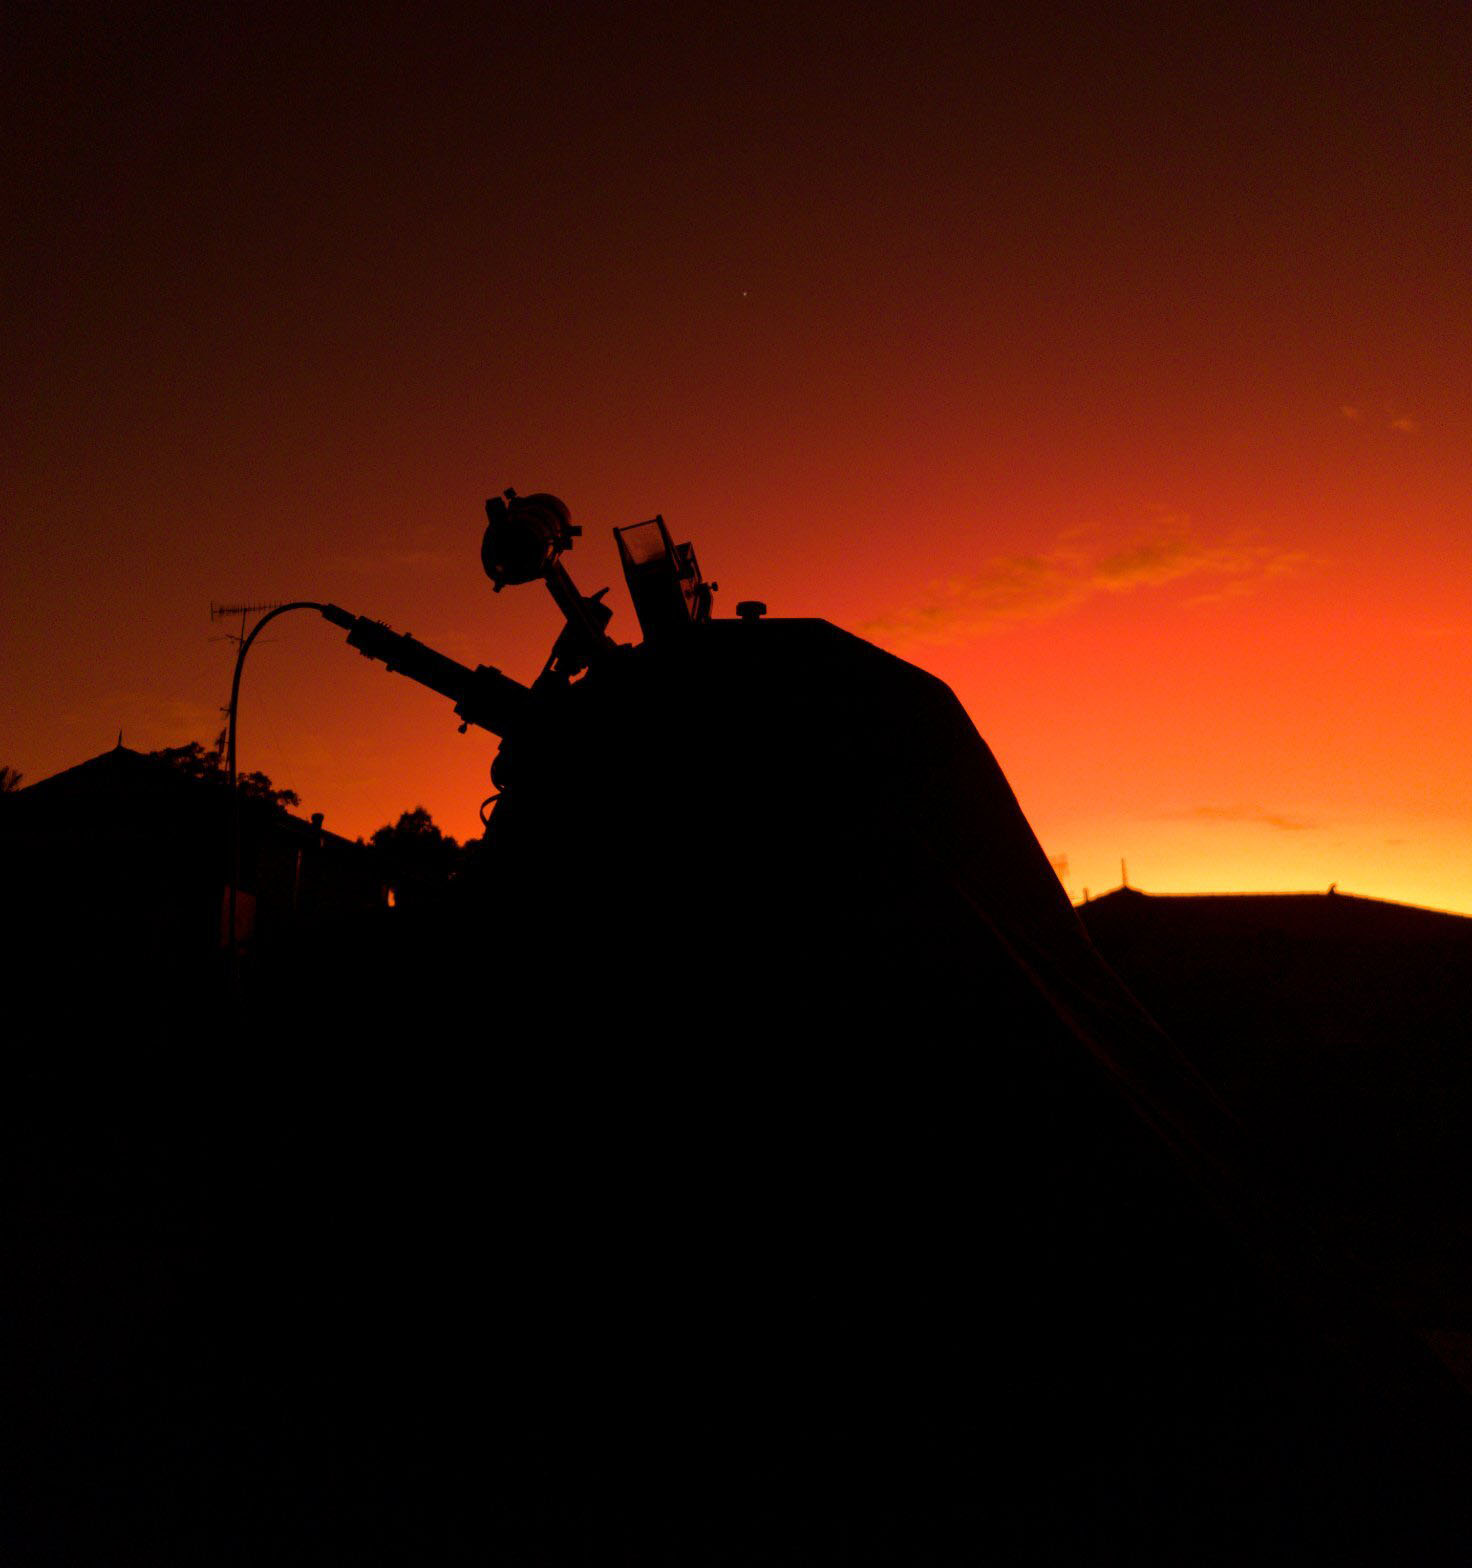
I live in Portland, Oregon and image from my backyard, at nearby dark sites such as Goldendale Sky Village and I keep my Planewave CDK14 at Sierra Remote Observatories in California.
My images can be found on my website, www.KevinMorefield.com,
Astrobin https://www.astrobin.com/users/morefield/, or on Instagram user @Morefield.
QHYCCD: You have shot so many great images, which one is your favorite?
Kevin: Thank you. It’s hard to say which is my favorite but I am particularly proud of this image of the North America-Pelican nebula area. https://www.astrobin.com/f6m8m8/C/ I live in the center of a large city and this was shot in my backyard between neighbors’ lights and obstructing trees. I learned that it is possible to capture high quality images almost anywhere.

QHYCCD: Could you share some experience in image post-processing?
Kevin: I started out using CCDStack, which is an old program now, but is a great way to learn the fundamentals. It has great documentation that explains what the program is doing and why. While I still use CCDStack sometimes, particularly for deconvolution and sharpening, I mostly use Pixinsight now for my linear processing. The Weighted Batch Pre-Processing script has come a long way and is very simple to use. In Pixinsight I typically create the RGB and Luminance masters, color balance, remove gradients and stretch to non-linear. From there I move to Photoshop because I like the instant visual feedback I get. I also find the Photoshop layers to be crucial in applying masks and processing different parts of the image separately.
I have a few pieces of advice for those just getting started with processing:
- Use a mild stretch the first time you go from linear to non-linear. You can always add more stretching and contrast later and this keeps noise in check.
- Don’t clip your backgrounds to black. This is maybe the most common early mistake.
- Leave a little noise in the image after noise reduction. This keeps the image from looking soft and over-processed
- Be careful with your saturation. I tend to push the vibrance first because that affects the color in the dimmer areas and is less likely to cause colors to clip.
QHYCCD: What QHY products do you own? What are the reasons for choosing them?
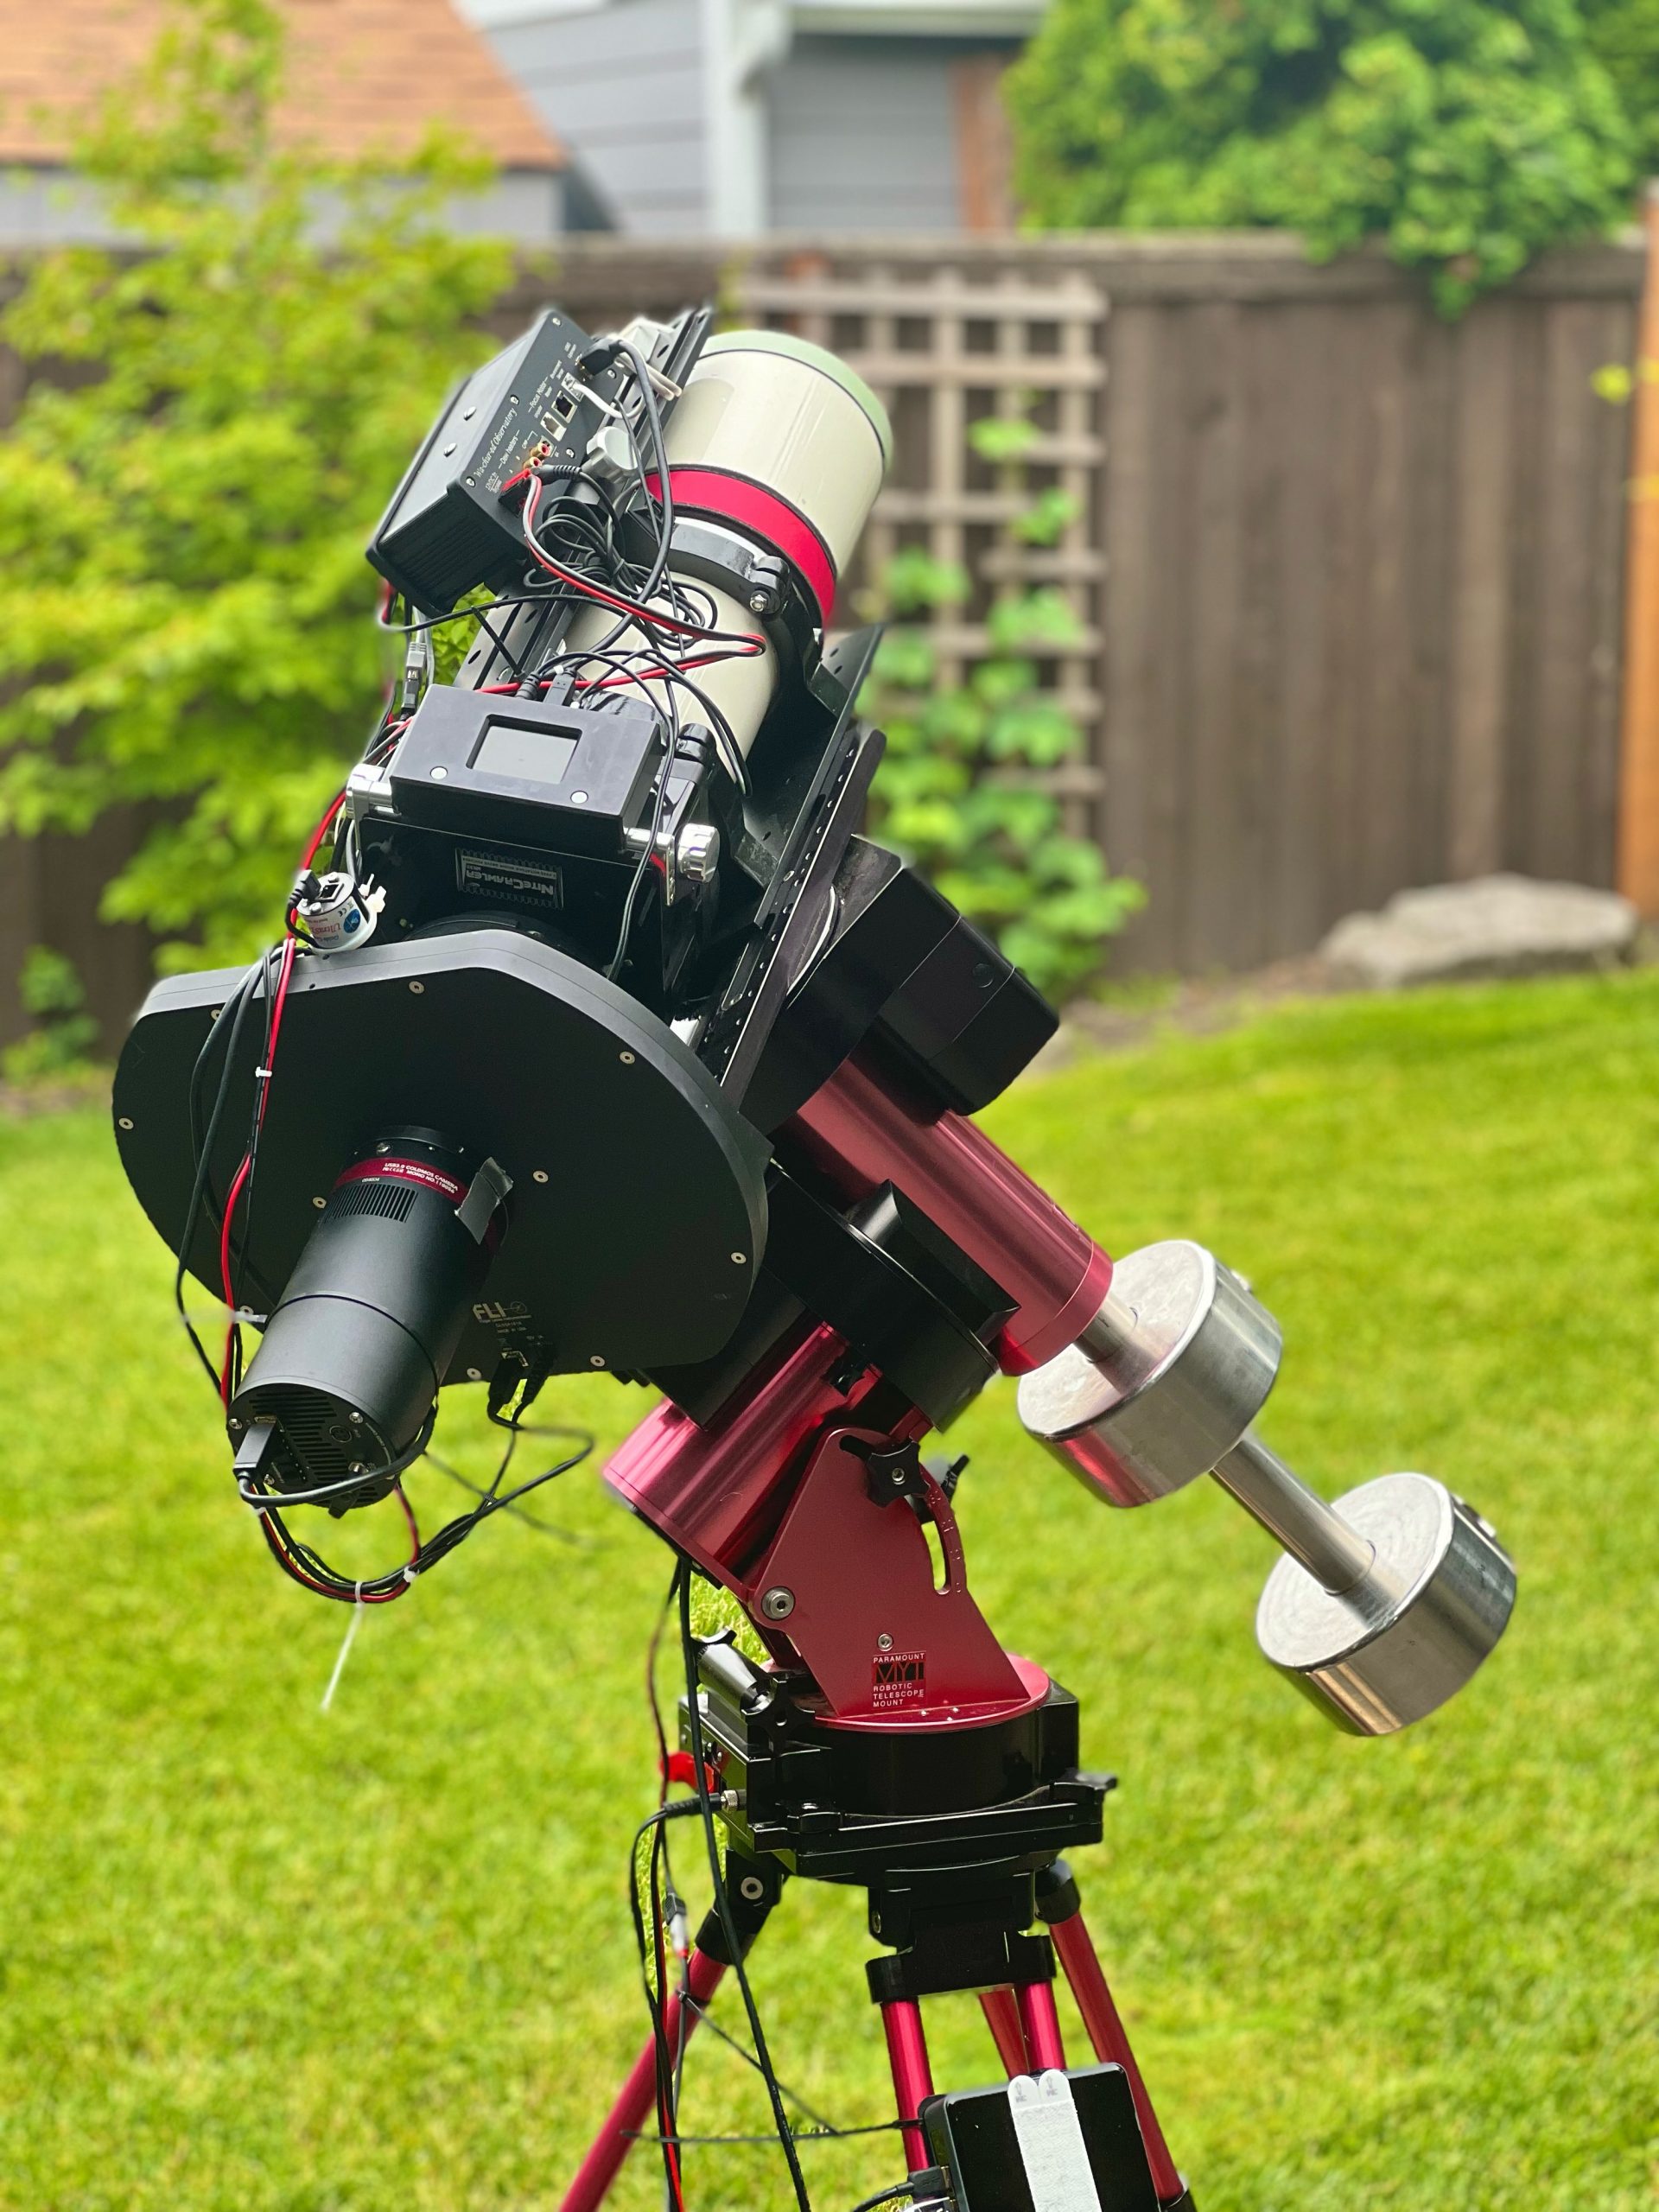
Kevin: I have two QHY600M cameras now, one for my backyard Takahashi FSQ106 and one for the CDK14 at Sierra Remote Observatories. I am assembling a new rig to take to Chile that will have two more QHY600M cameras on Planewave DeltaRho and CDK17 telescopes. I also have a QHY367C that I have used with camera lenses and on the FSQ106.
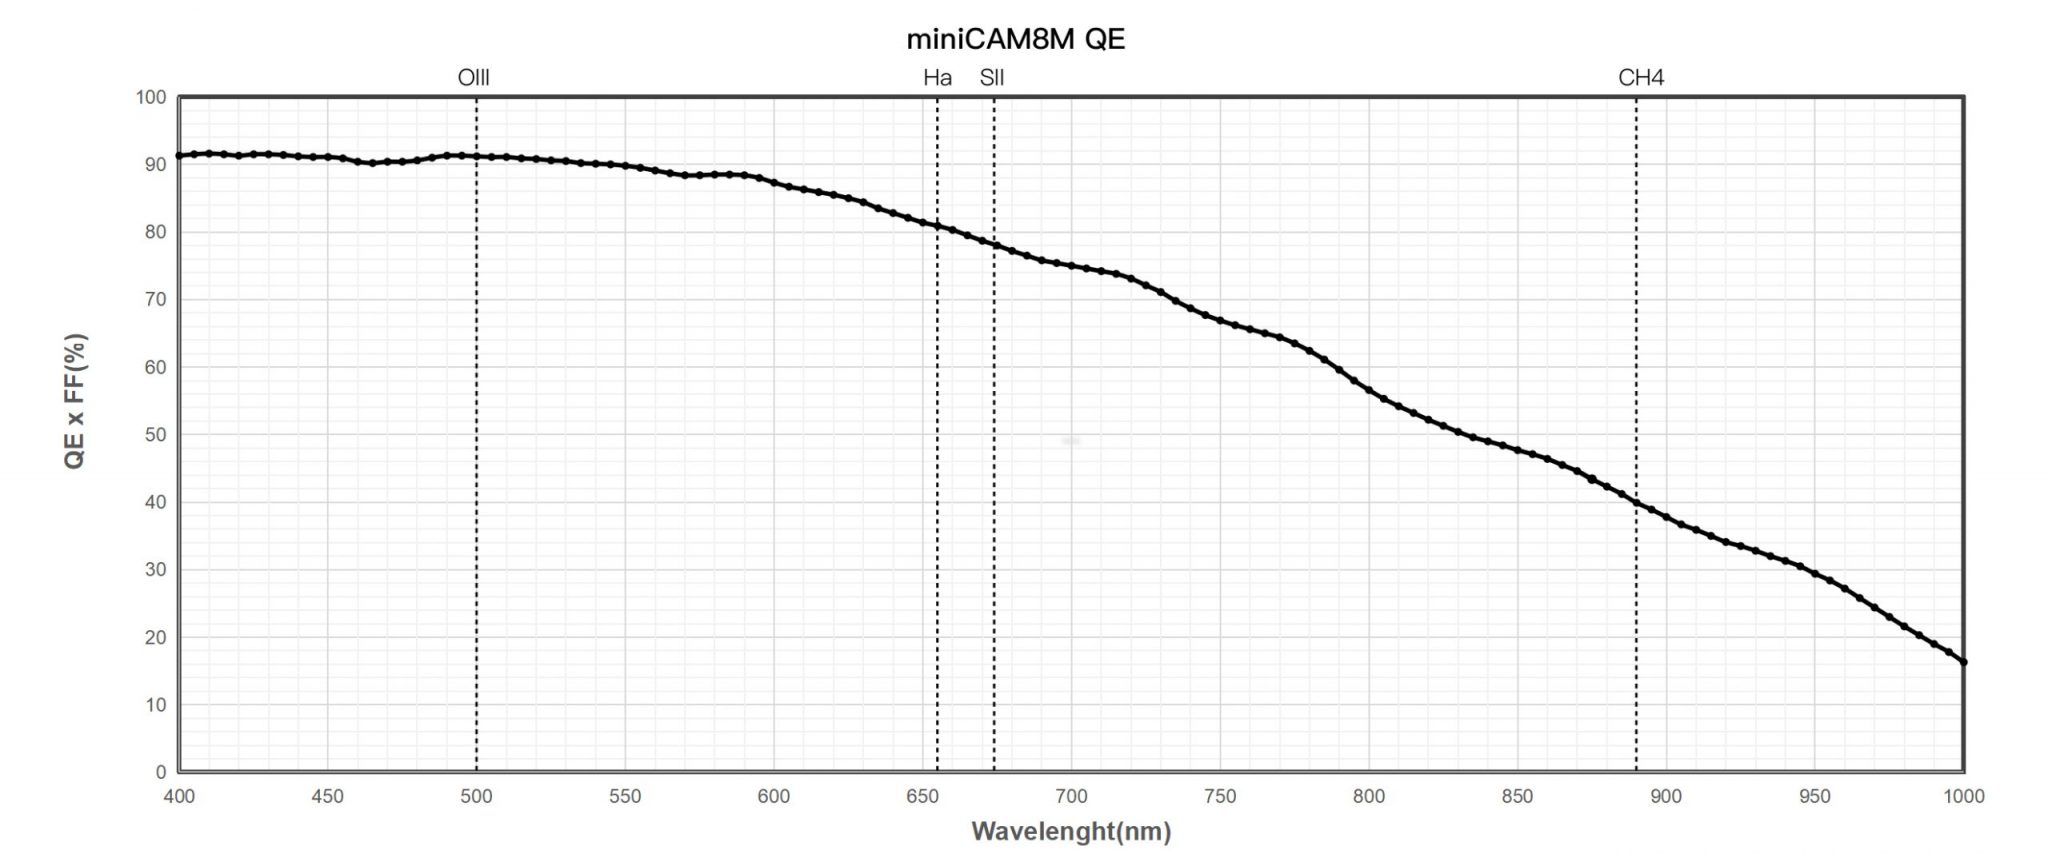
I prefer full frame cameras and the QHY600 is a perfect match for both the FSQ106 and the CDK14. One advantage of the full frame field of view is that it makes your stars seem smaller and therefore sharper! The dark noise, quantum efficiency and the full well depth of the IMX455 sensor in the QHY600 are why I chose that model. The 3.76 micron pixel size pulls the most resolution possible out of the FSQ106 with a 1.47” image scale that is just over the diffraction limit of the aperture. Because the CDK14 is in a location with seeing frequently under 1”, the .30” image scale the QHY600 provides nicely samples the best seeing with about 3 pixels.
Even if my seeing were not so good I would still use this camera with the CDK14. I have not found a larger pixel camera that can out-perform the QHY600 for noise and quantum efficiency.
Finally, I like the QHY dovetail system for attaching the camera. I much prefer this to a screw in system that can come loose. This also allows me to select any rotation rather than just where screw threads become tight.
QHYCCD: How long have you been using QHY cameras?
Kevin: I got my QHY367c in 2019. I ordered the QHY600M EarlyBird version on the day it was announced that same year. I knew this camera was coming and liked the features QHY included such as the different download modes and the chamber window heater.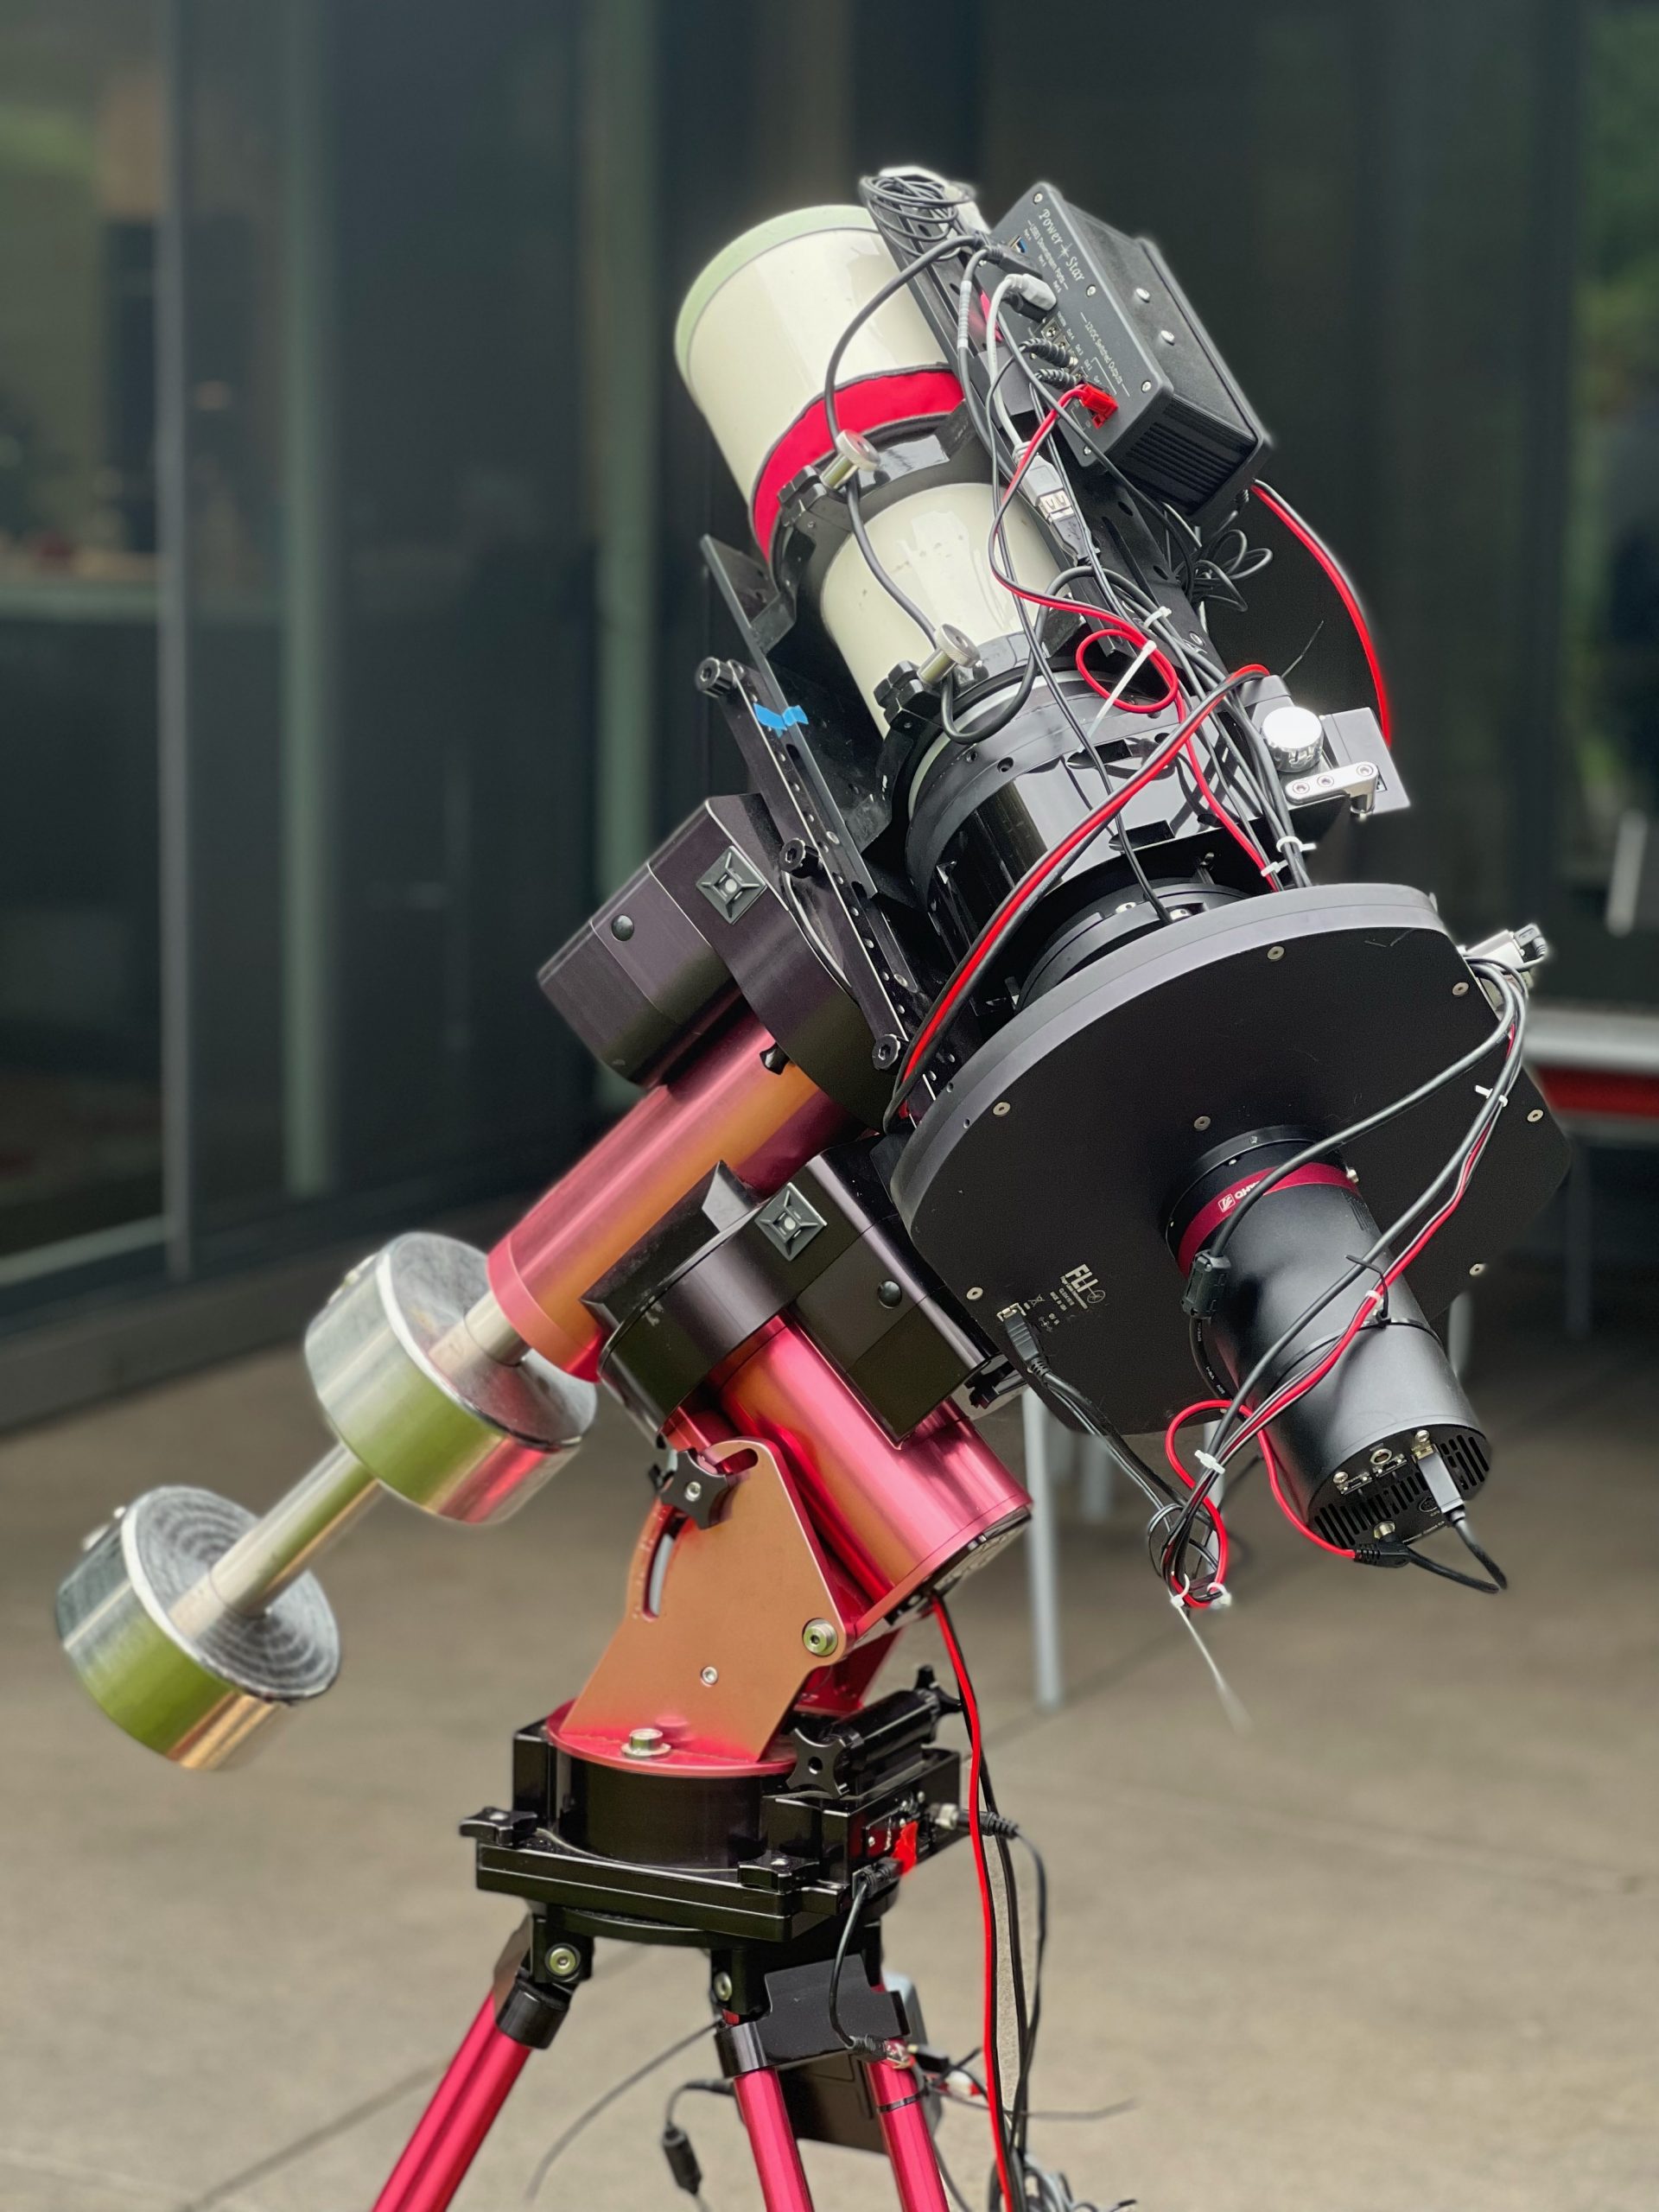
QHYCCD: Astronomy is not easy to do well, do you have any advice for people who are just starting out in astrophotography?
Kevin: The best equipment to get started with in Astrophotography is always the equipment you already own. When you do spend money to upgrade, be sure the equipment matches your goals and environment. Take a look at images on Astrobin and see which ones interest you. Check out the equipment used and see what you might need to make similar images. But also look at where the images were taken.
Be very aware of the seeing in the locations where you will be shooting. If the seeing is just average, say 2-2.5”, you won’t get any more resolution using a 14 inch scope than you would with a 5 inch refractor. My suggestion is to divide your seeing by 2.5 and try to use a scope/camera combination with that number as the image scale. This is where the small pixels of the QHY268 and QHY600 can both save you money and give you a larger field of view. If you expect seeing of 2.5” target and image scale of 2.5/2.5 = 1”. With 3.76 micron pixels you get 1” image scale at a 775mm focal length. That could vary by 100mm +/- and still be about right. With the larger (and less sensitive) pixels of the past you needed a much longer focal length to get to the right image scale.
By using a smaller and faster refractor instead of a larger RC or SCT scope, you can use a smaller more portable mount too. So in essence, I’m saying pick the camera first and then match the scope to the camera when possible.
You can save a lot of money by using a one shot color (OSC) camera but be aware that you’ll have to capture more data to reach the same signal to noise ratio as with a mono camera. Shooting in the city with narrowband filters is another advantage for the mono camera. Two, three and four-band filters do work with OSC cameras but the data not separated as well. For example, the SII and Ha data is all combined in the red pixel in OSC. Still, filters and filter wheels are expensive and not for everyone.
Lastly the mount is always the most important decision you will make. Always buy the best mount you can afford and check out the manufacturers periodic error tolerance. The lowest periodic error is one of the main goals of selecting a mount.
QHYCCD: I heard that you have been shooting with the QHY600 all the time since your last CCD camera. What differences and similarities have you found between your previous CCD camera and the QHY600?
Kevin: I was using a camera with a 16803 CCD sensor prior to the QHY600M. This sensor had 9 micron pixels and a 100,000e full well capacity (FWC). At 0.73” image scale that was a bit too large for my seeing and I was losing resolution. At first I thought the 100,000 FWC of the 16803 was better than the standard 50,000 of the QHY600, but then I realized that about 5.5 of the QHY’s pixels would fit within one pixel of the CCD. So in reality, over the same 9 square micron area, the QHY could receive about 50,000 x 5.5 = 275,000e before saturating!
With the QHY600’s back illuminated sensor architecture, it has a large advantage in quantum efficiency. And the dark noise is much lower than the CCD.
I was concerned about the sensor of the QHY600 being smaller than the 16803 CCD. The CCD is the same width as the QHY600 but being square is taller. In practice I have not found this to be a limiting factor. I find that I like most compositions to be rectangular rather than square so I had been cropping the images from the CCD in most cases.
QHYCCD: I noticed that you also like landscape photography, what differences do you think are there between astrophotography and deep sky photography?
Kevin: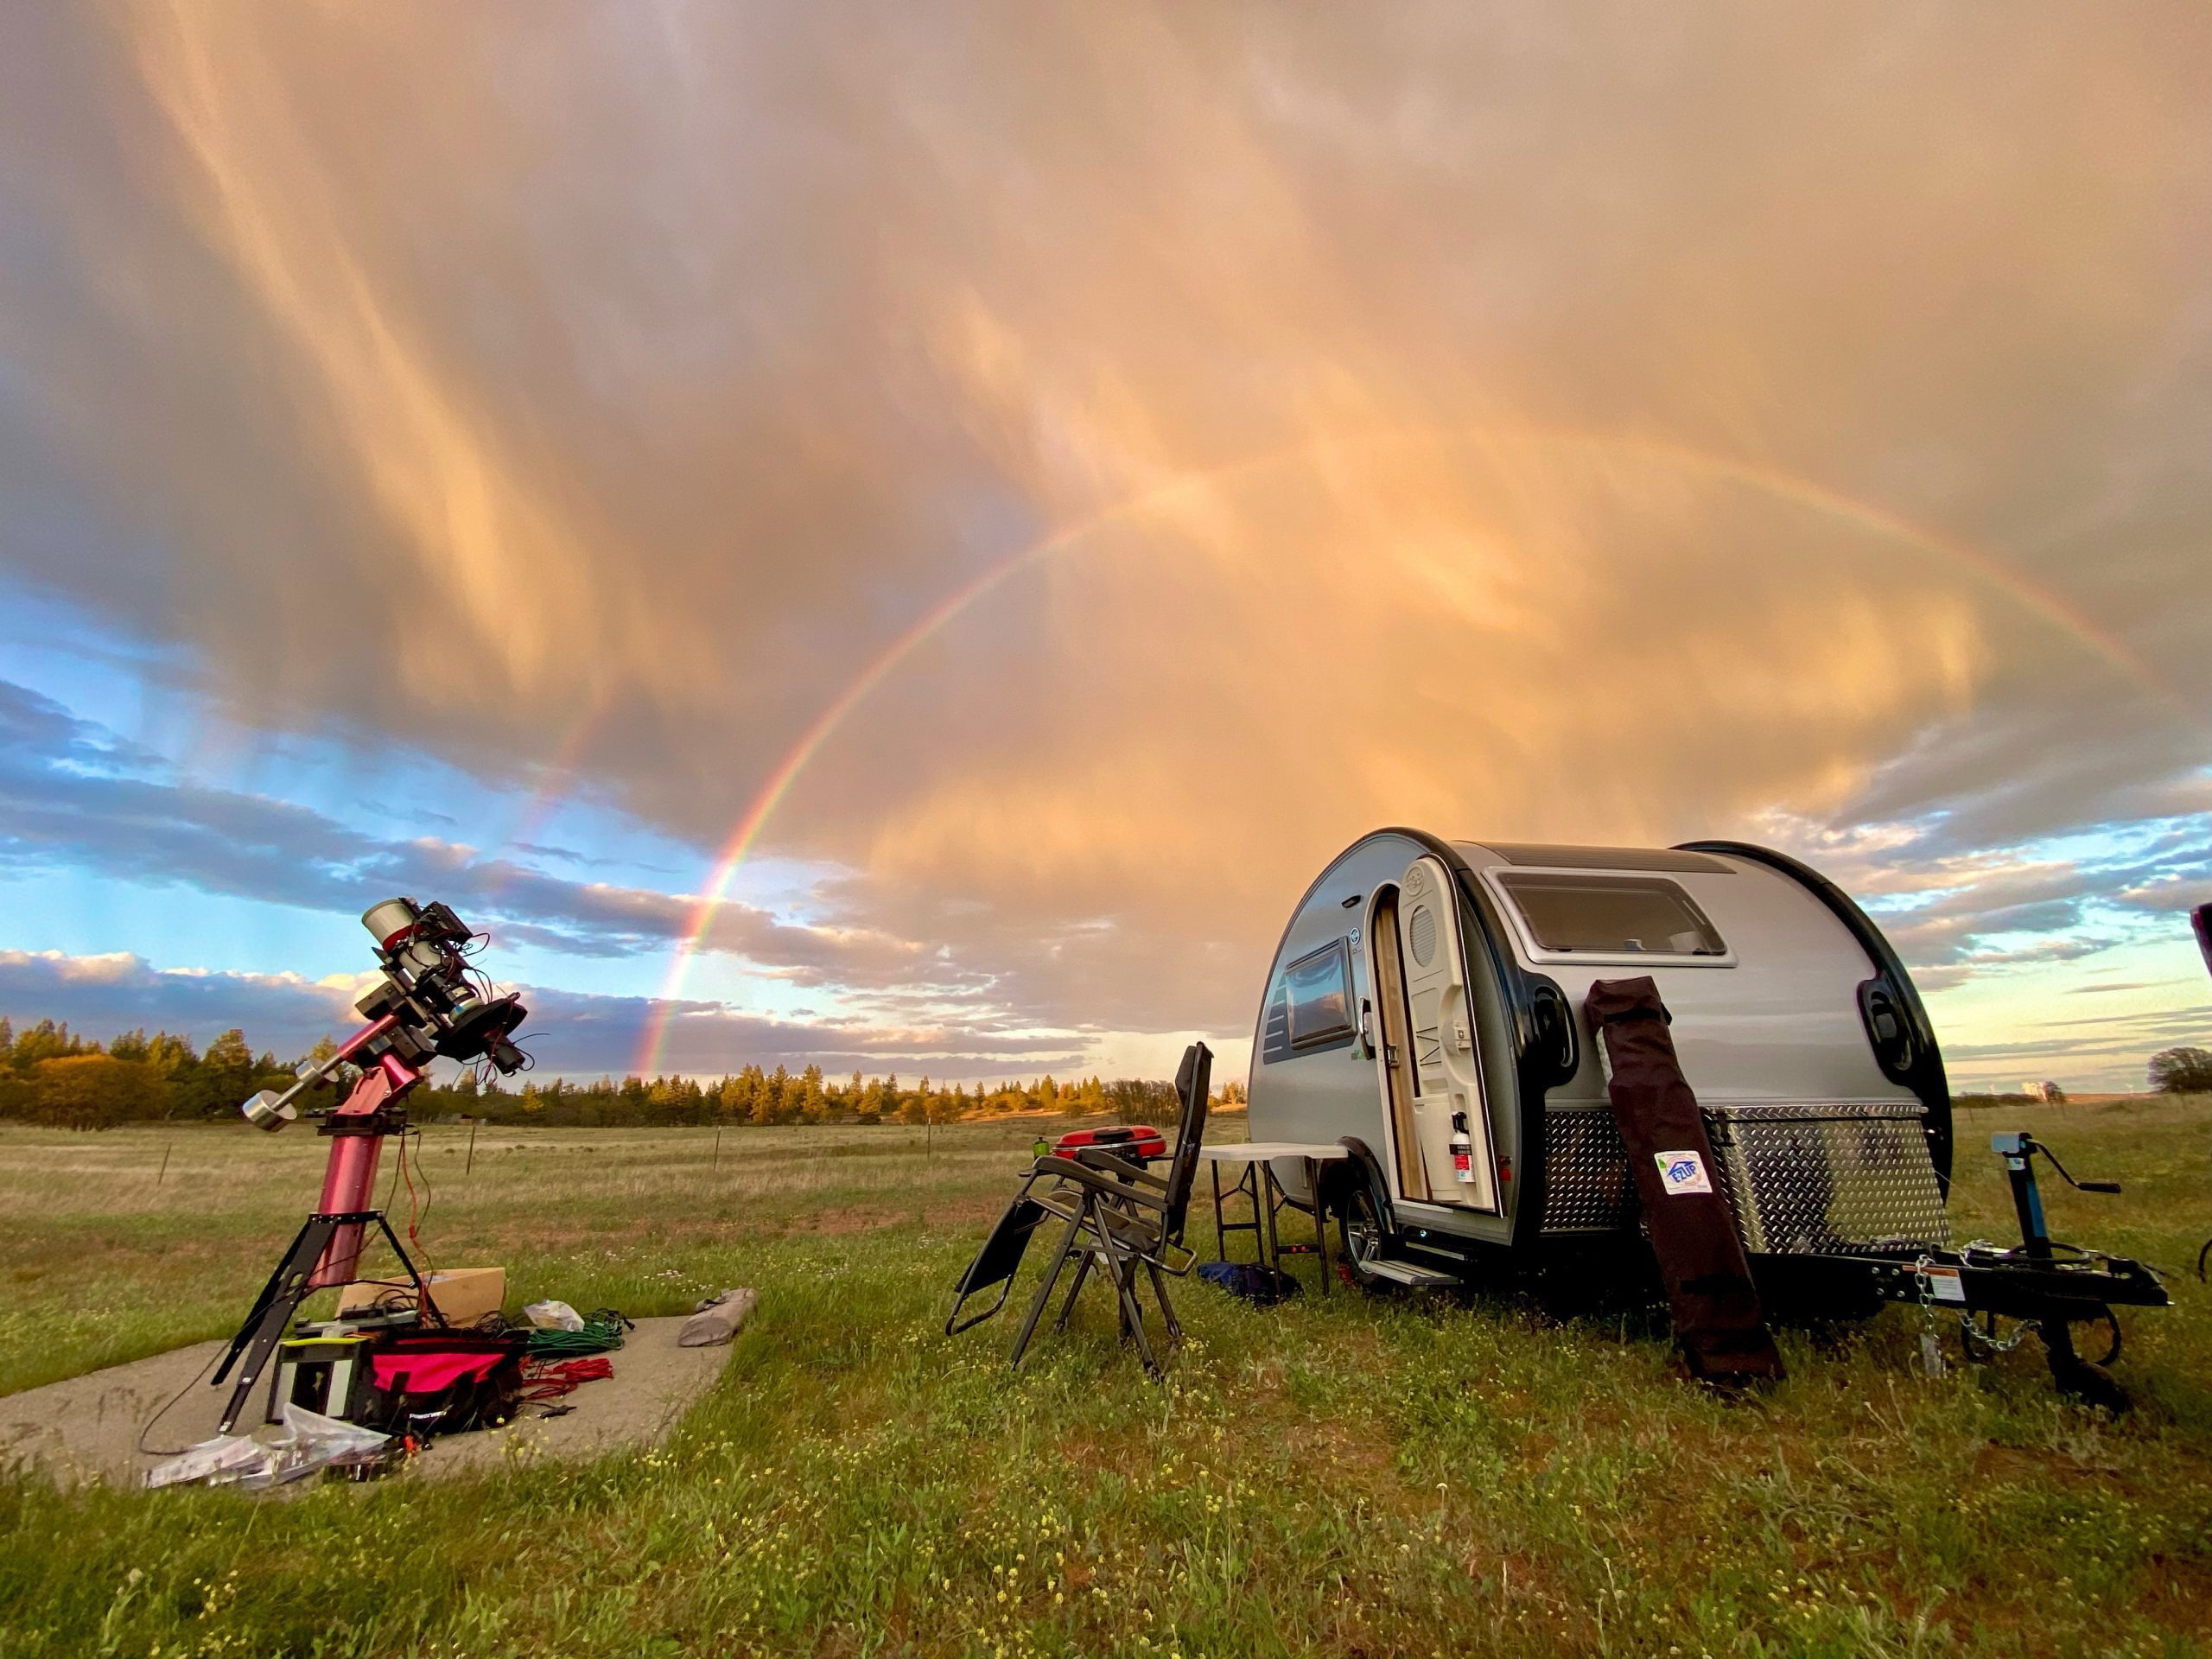
The two are closer to each other than one might think. The best astrophotos are not just sharp, colorful, representations of a celestial object. They are also artistic compositions that take into account the rule of thirds, eye flow, and balance to name a few. Your eye quickly gets bored with an object placed alone at the center of an image.
In landscape photography, we usually see the horizon on an imaginary line around one third or two thirds of the frame horizontally. The peak of a mountain might be at the upper left or right intersection of thirds. Maybe from there our eye follows a river flowing down the mountain and across the foreground.
We can do the same thing with astrophotography. I often find that bright stars in the image need to be placed to balance the visual weight of the galaxy or nebula. A nebula will often be composed like the mountain in my landscape example. We also can create tension in the image by placing the object at a precarious angle – just be careful to balance things such as the surrounding stars. A good example of using tension in a composition is my image of NGC 5566 https://www.astrobin.com/ip3a3b/E/
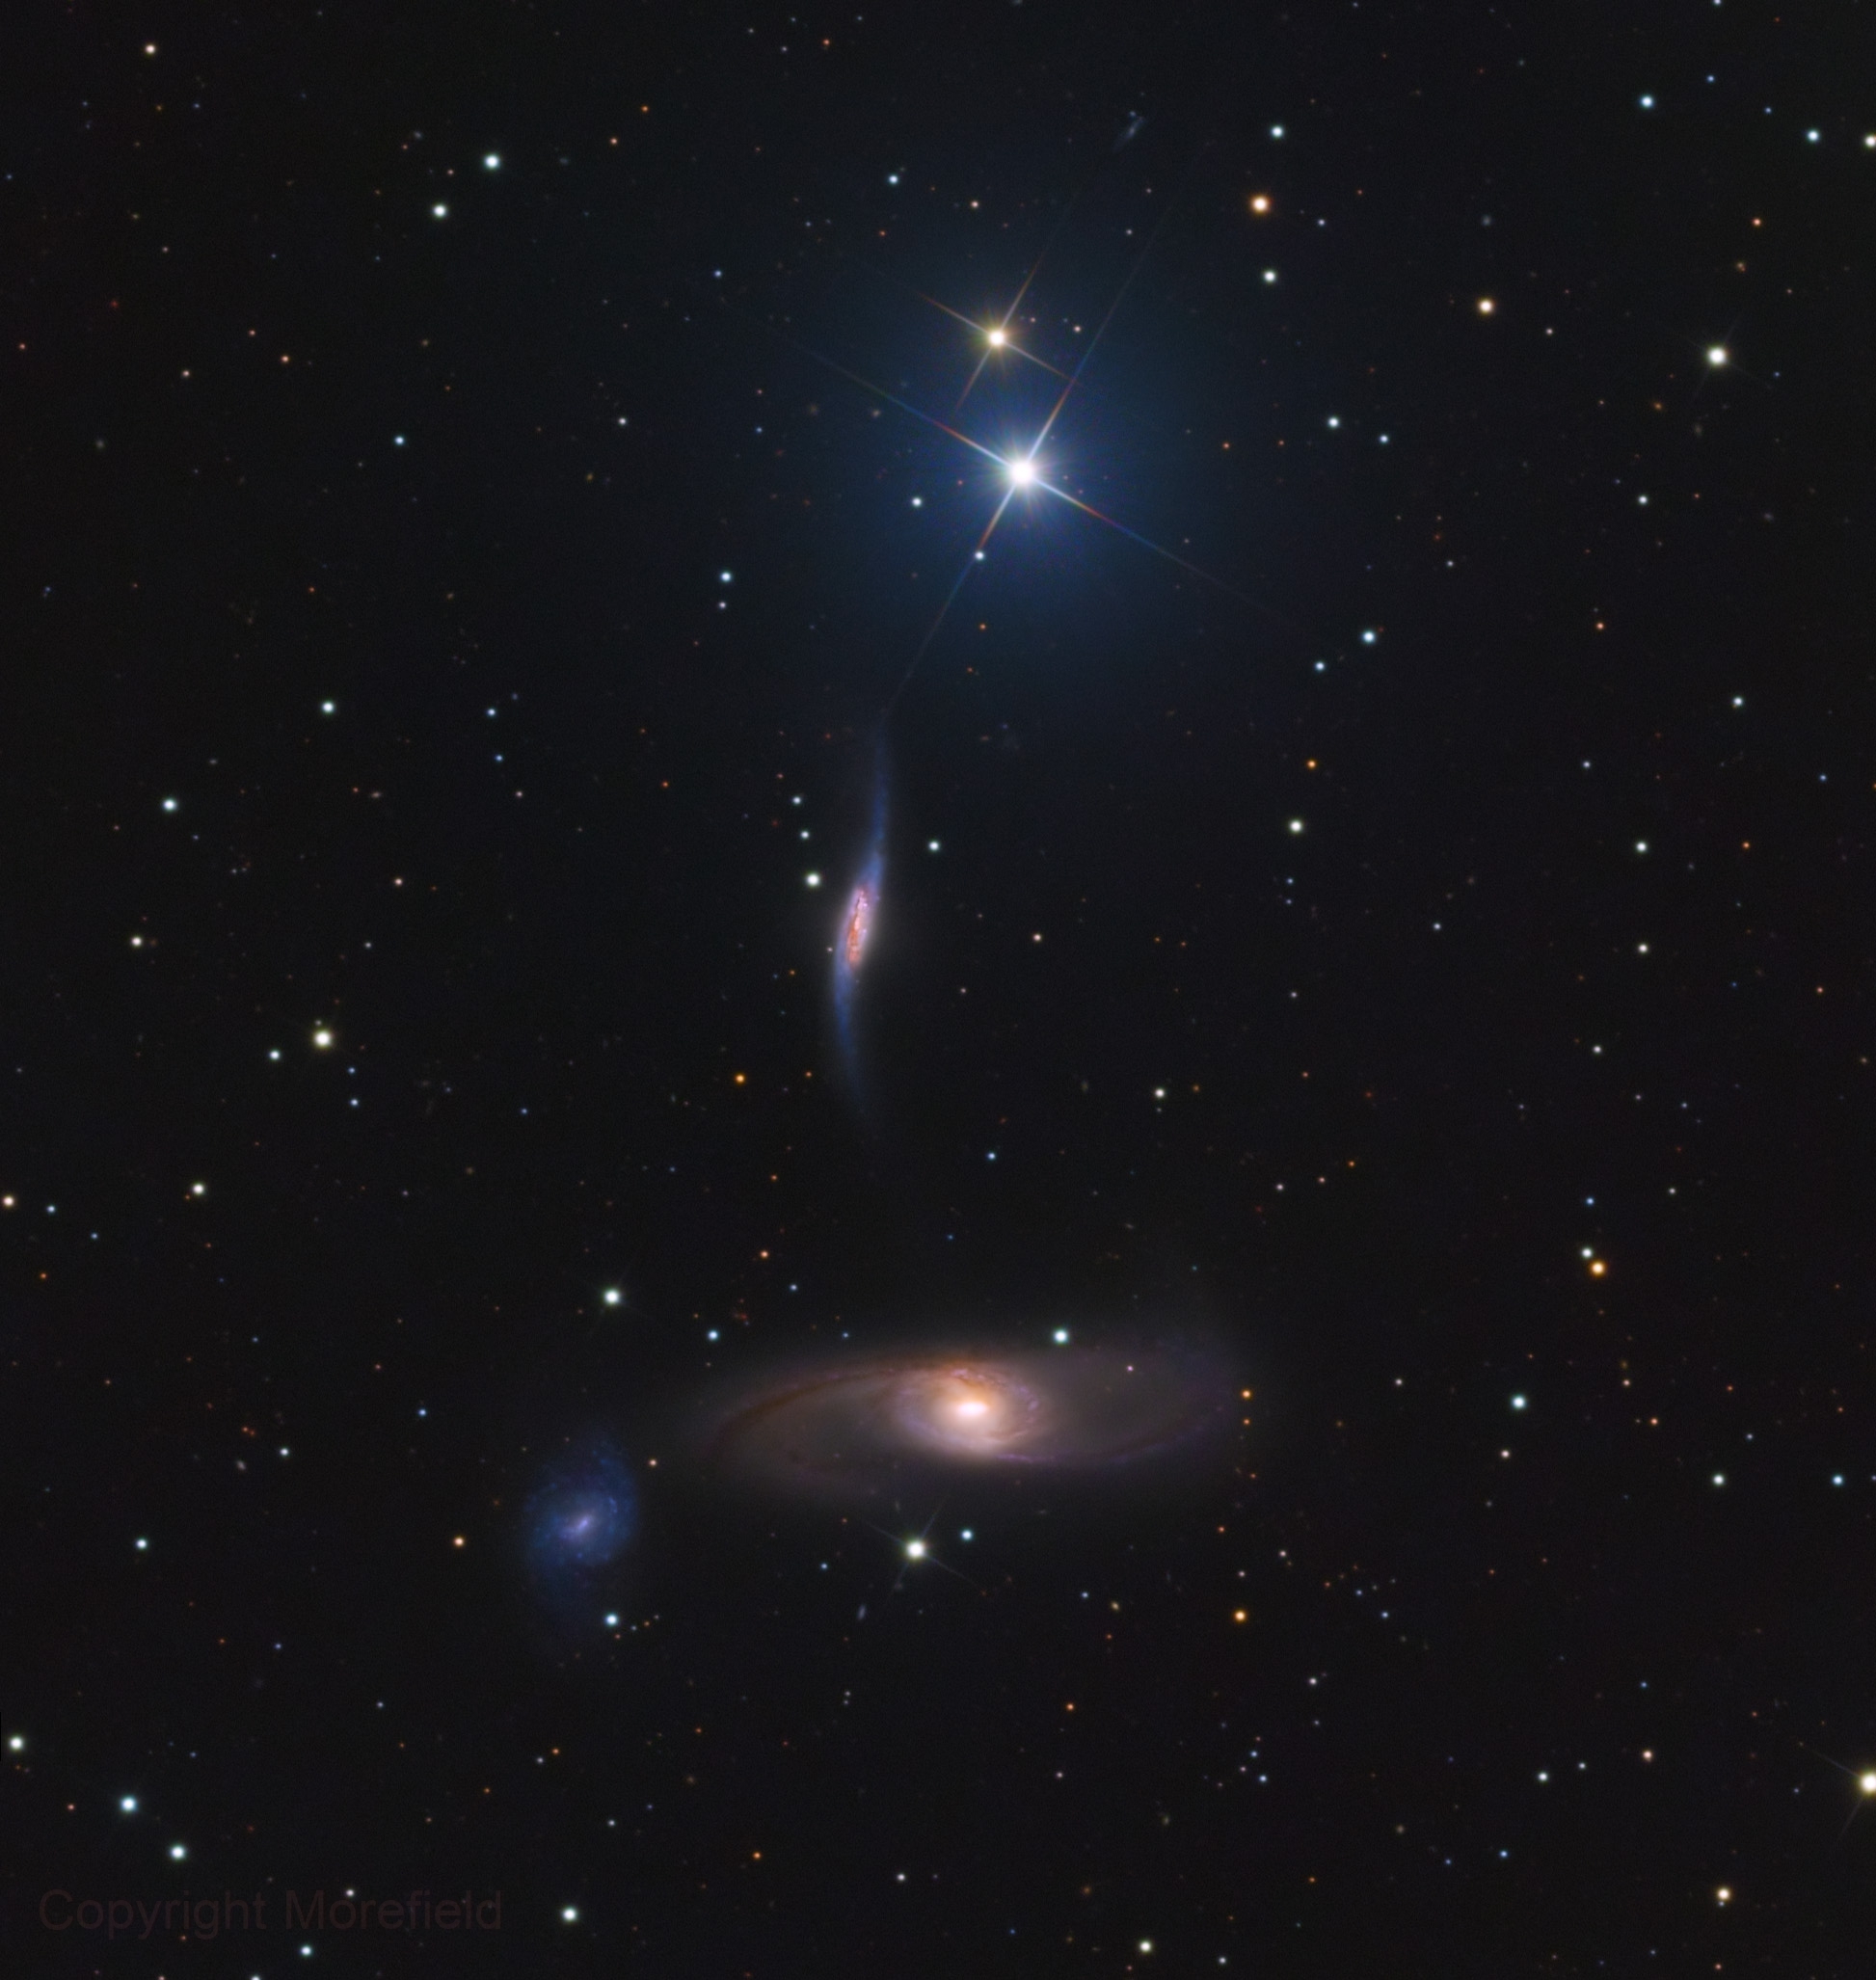
The vertical galaxy and the pair of stars seem to balance on the horizontal galaxy below.
Upon seeing an image, our minds search for familiarity. Have we seen something like this before? Some astronomical objects connotate objects or scenes from the Earthbound world. I like to emphasize that familiarity whenever possible. For example, this image of NGC 225 resembled exploding fireworks in the sky with the smoke from them drifting away. We feel like the stars have just exploded into the sky. https://www.astrobin.com/n1fdoc/
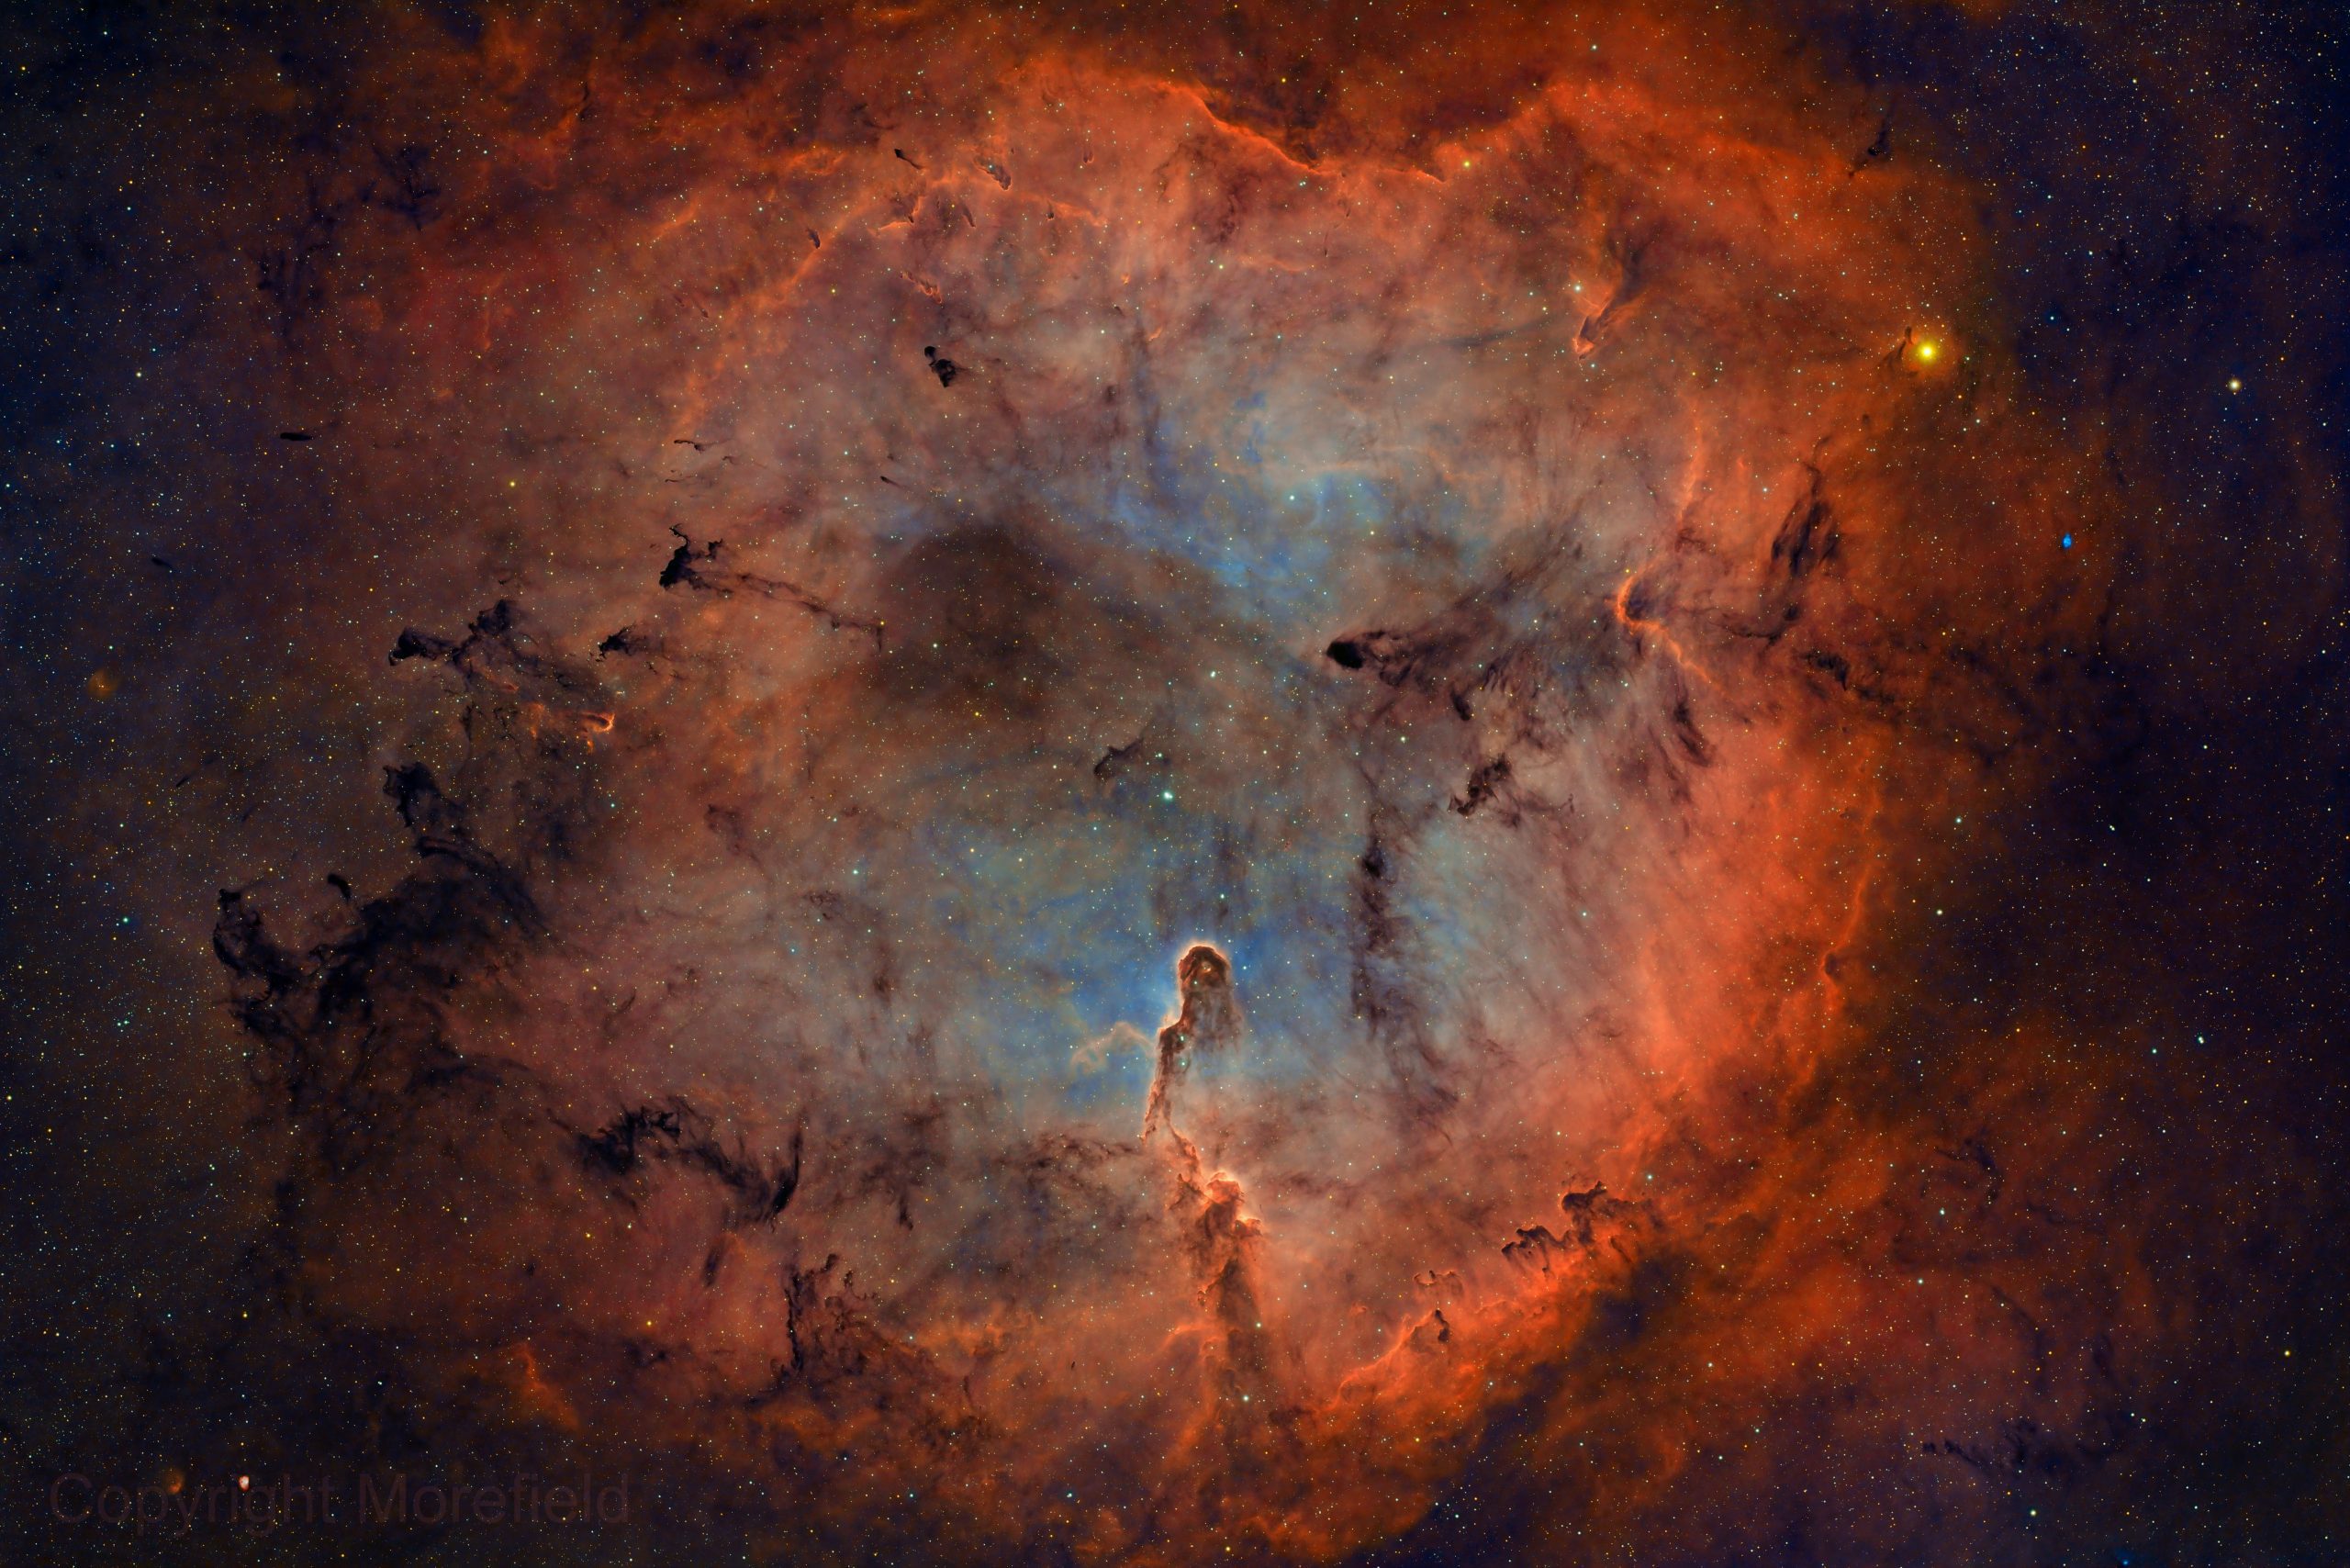
All of this is not to say that you never center an object! Sometimes that’s the right approach. For example, this image of the complete Elephant’s Trunk nebula is centered because the object is so complex and symmetrical that your eye is drawn around the nebula and up the trunk to the center. https://www.astrobin.com/e944ay/B/.
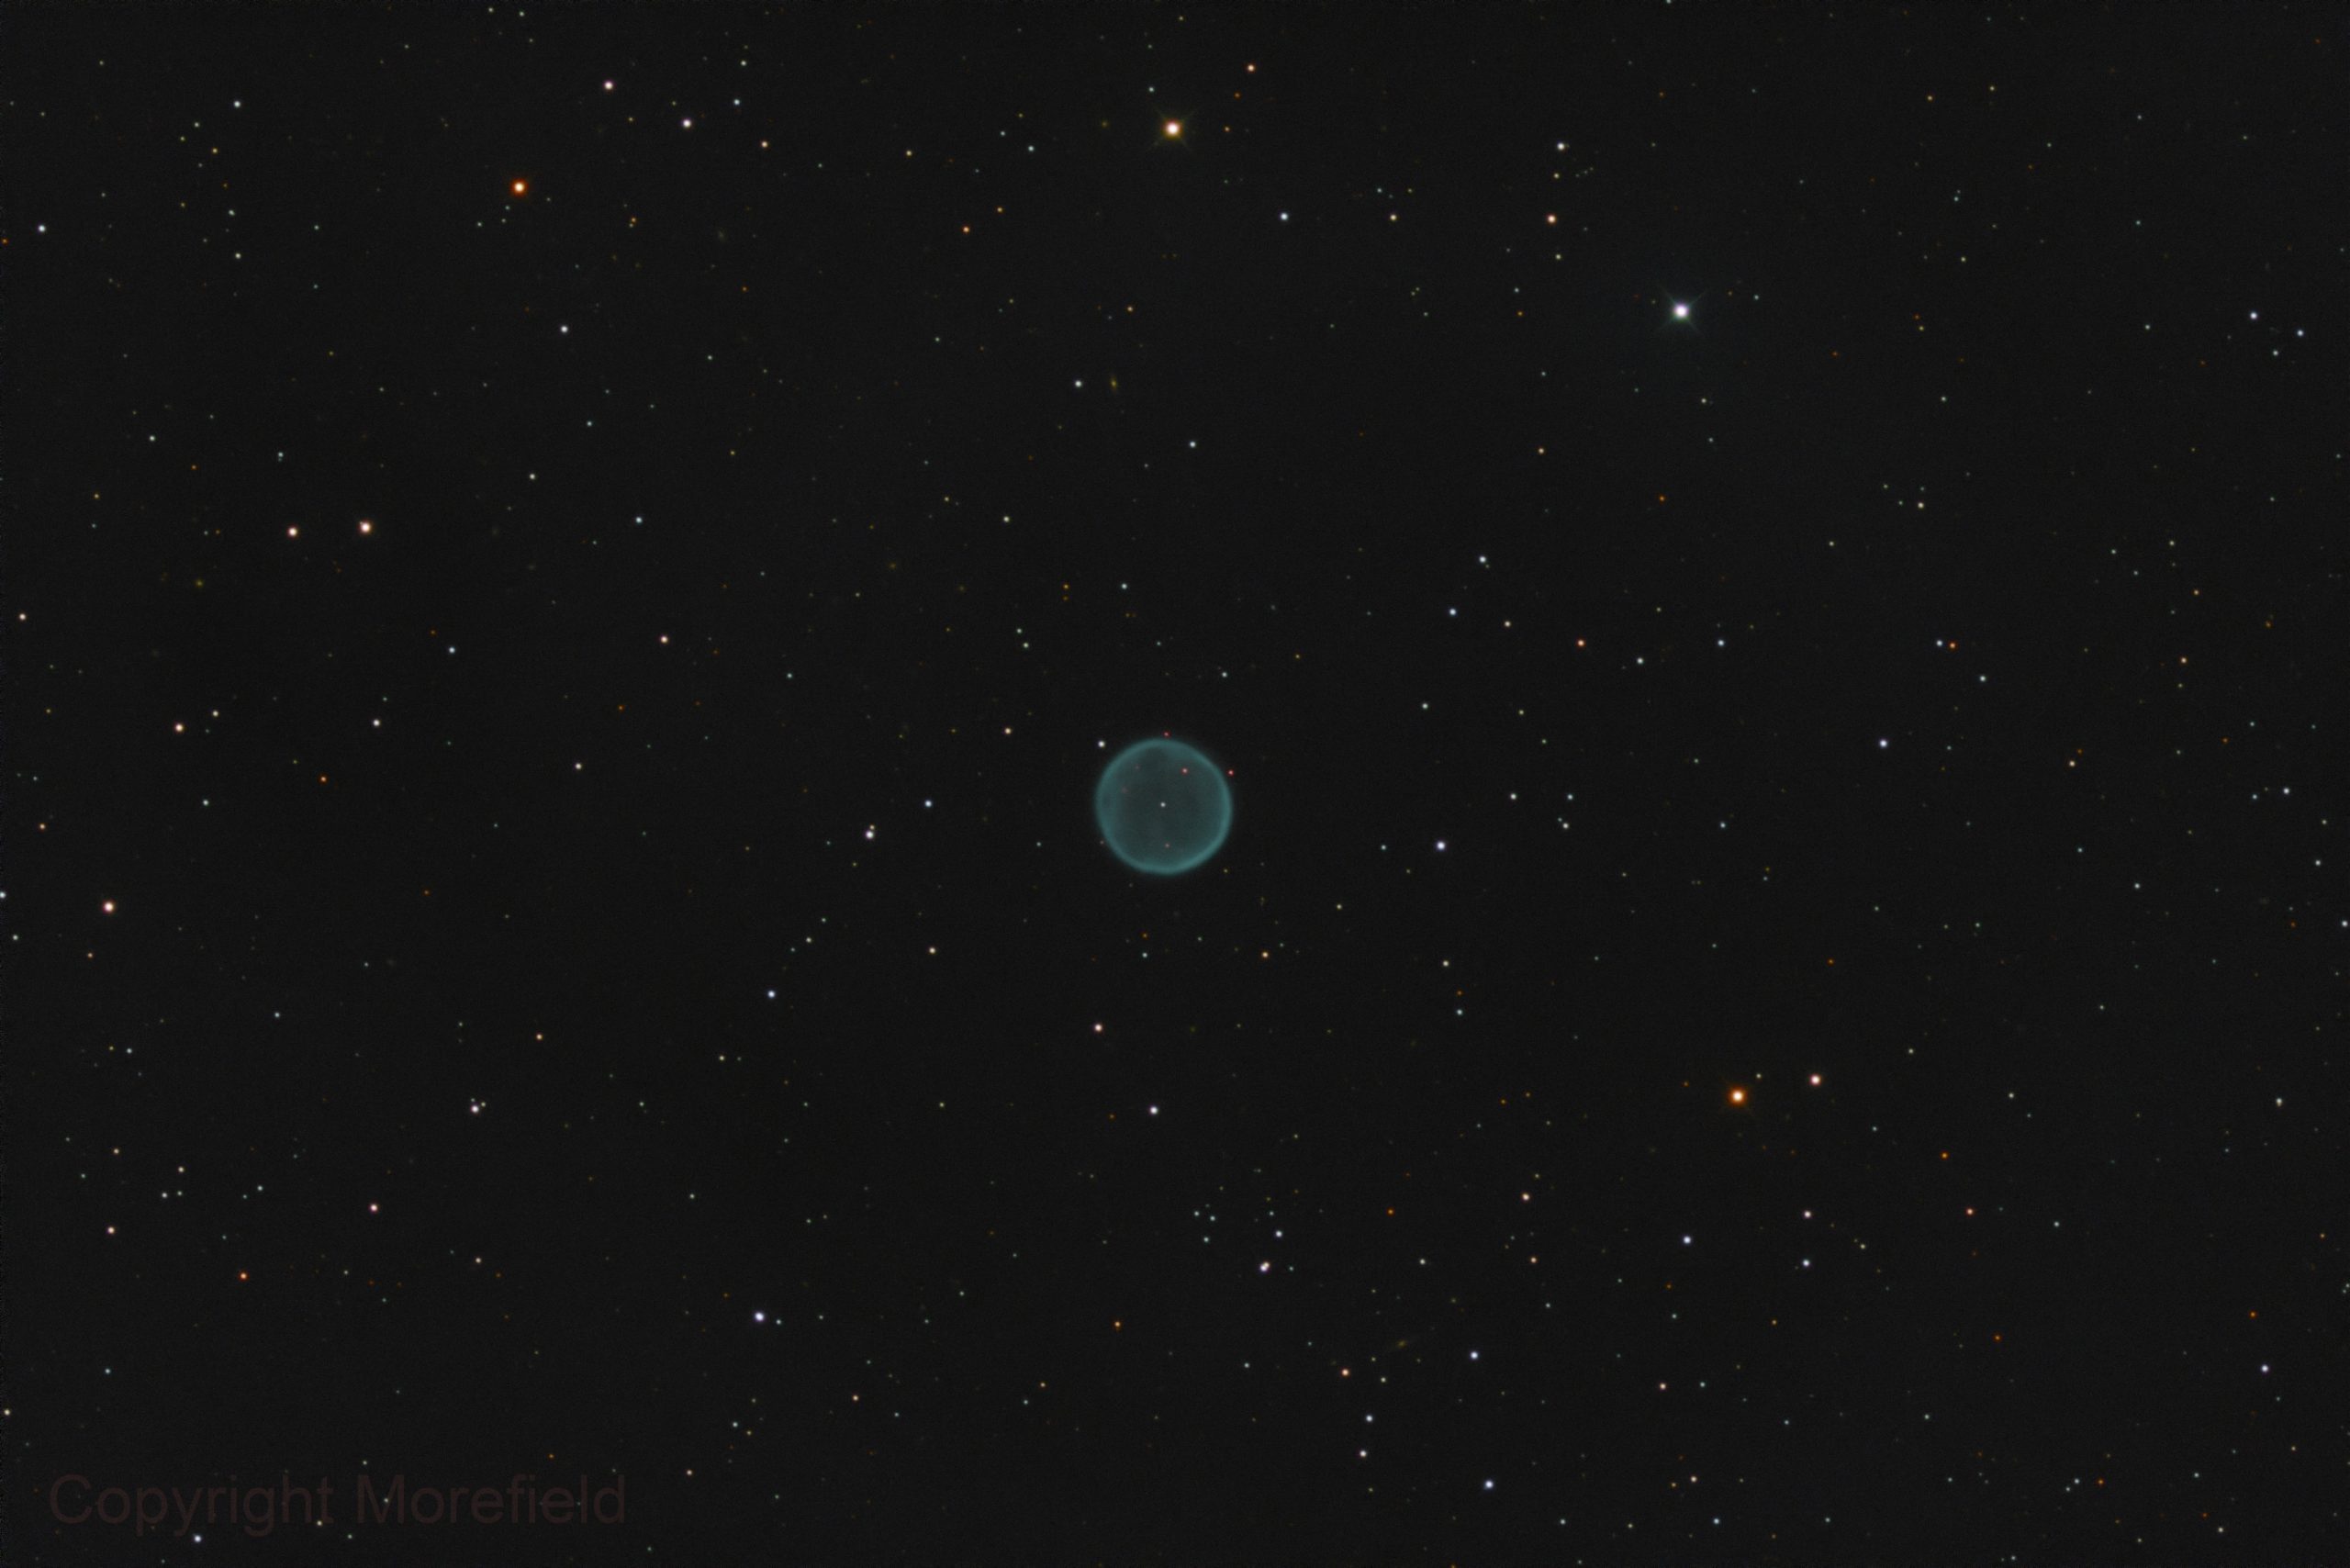
 Another example is this image of the perfectly round and nearly featureless Abell 31 planetary nebula placed dead center to highlight its isolation in a field of similarly bright stars. https://www.astrobin.com/ucuy46/0/
The largest difference between landscape and astrophotography are the technical limitations and the patience required. With landscape we can easily capture 30,000 16-bit ADUs in a fraction of a second rendering all noise moot. With astrophotography we labor for weeks capturing an object that may only register a few tens or hundreds of ADUs over the noise floor. Subtly stretching that small slice of photons we captured into a viewable image is the most important phase of creating a successful astrophoto.