
Introduction
Unlike external guiding arrangements, when using an OAG, the guiding camera and the imaging camera share the field of view of main optical system. If a user’s OTA has a long focal length, and the environment is not ideal, there will often be fewer stars suitable for guiding to be found in the FOV. One way to improve the chance of finding a good guide star is to use a guide camera with a larger sensor. For example, guide cameras like the QHY5III174M or the QHY5III585C have a FOV that is 2-4 times larger than that of smaller cameras typically sold as guiders. This larger FOV naturally allows you to capture more stars, essentially solving the issue of no or few stars available to guide the image.
In order for a large-sensor guide camera to fully perform to its potential in an OAG, a prism large enough to allow illumination of the larger sensor is needed to avoid severe vignetting. The new OAGM/L Pro uses a new wider prism to better accommodate larger sensor guide cameras. The prism size of the standard QHYOAG series is about 8 x 8mm, while QHYOAGM/L Pro is 10 x 14mm.
When the QHY5III174M is connected to the older version of QHYOAG, there is severe vignetting (Image 1, below). In contrast, connected to the OAG Pro in the same optical system, there’s only a small amount of darkening occurs at the edges, which won’t affect guiding at night (Image 2, below).
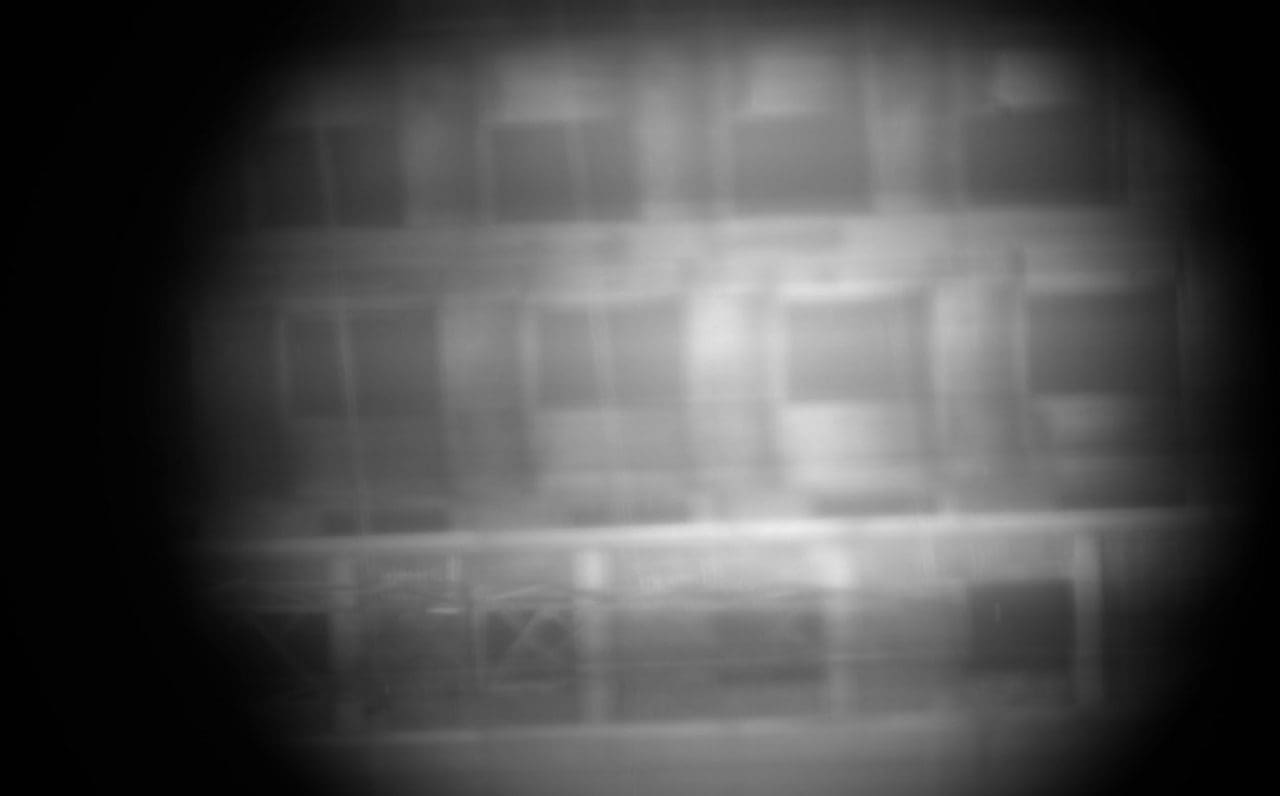 (Image 1)
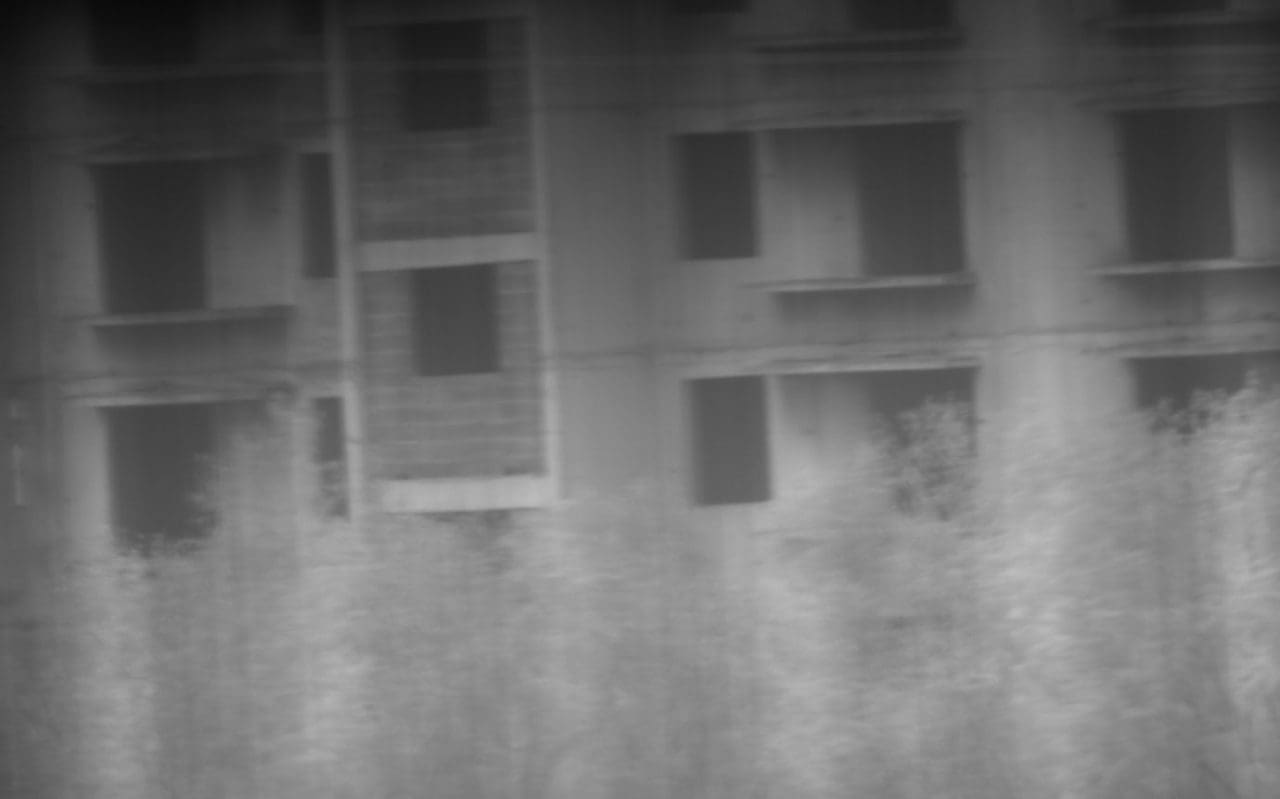 (Image 2)
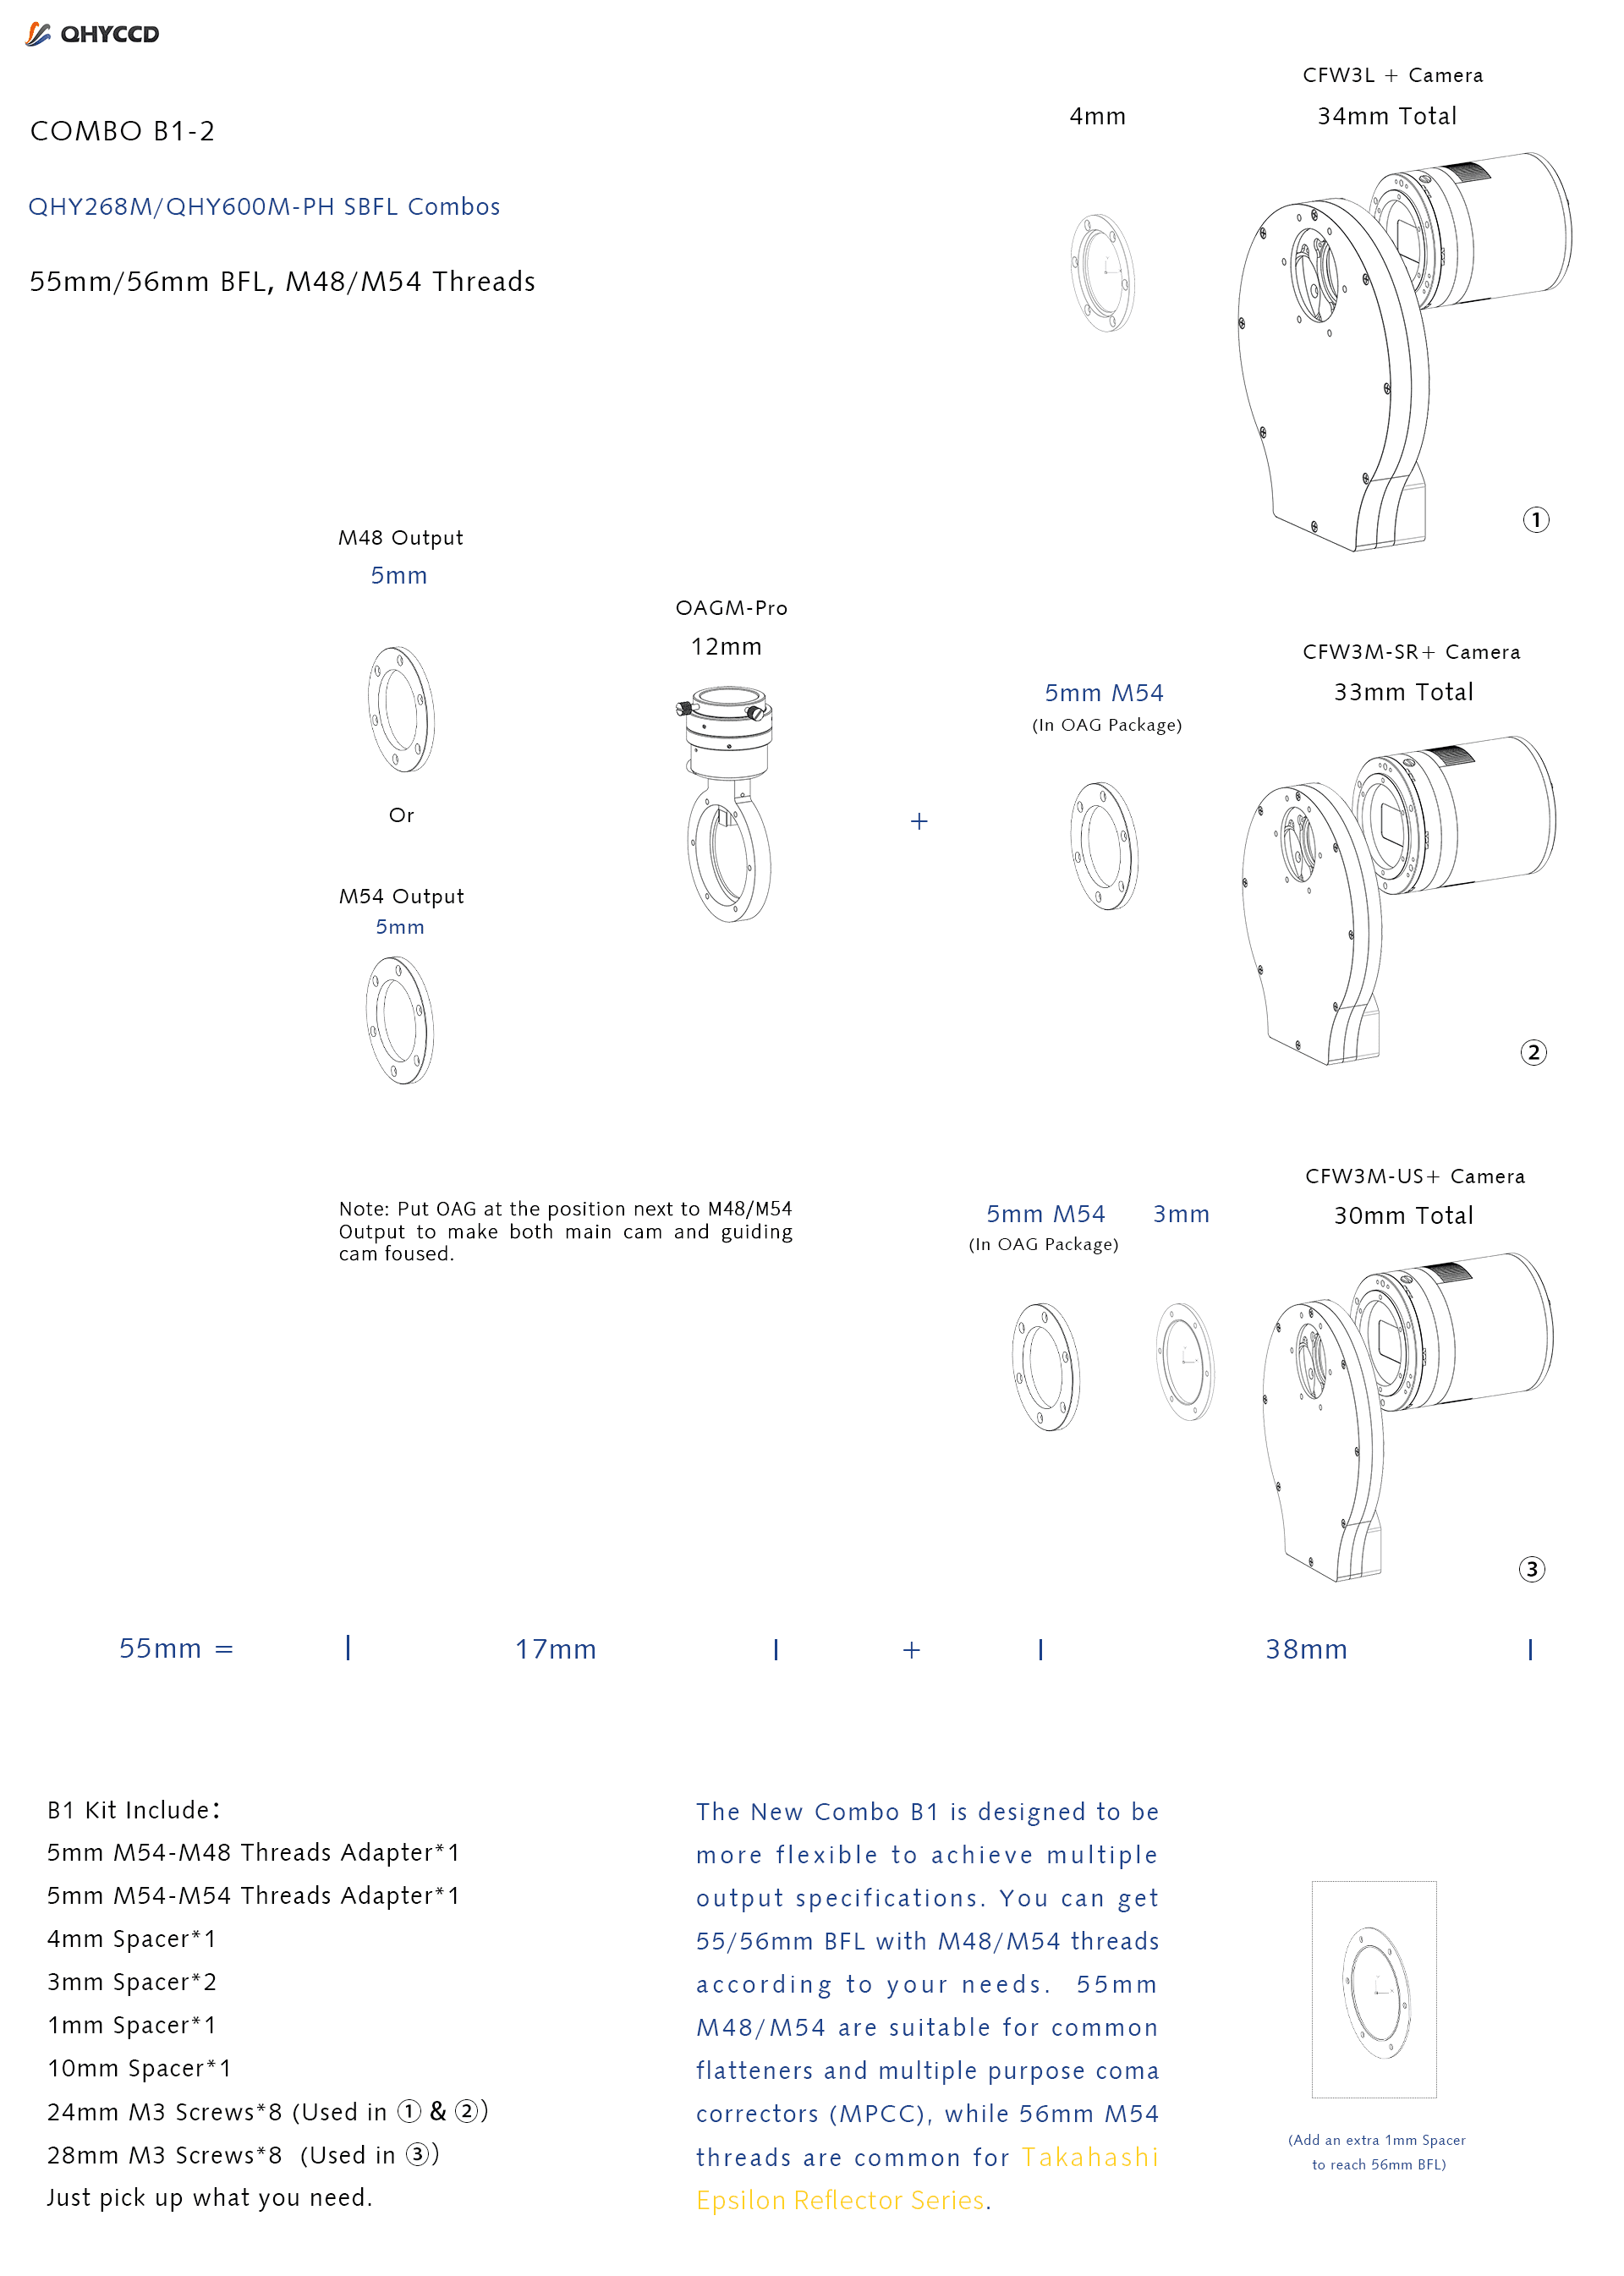
Combos and Connection (Combined with Kit B1)
The QHYOAG Series directly attaches to the camera or filter wheel with six screws, ensuring a solid, parallel and reliable mechanical connection. At the same time, various standard and optional QHY accessories can be used to realize a variety of structural combinations.
Below are some typical connection examples. Now Adapter B1 Kit is included in each package of QHY268M and QHY600M-PH SBFL. Adapter G1 Kit is included in each package of QHY268C and QHY600C-PH SBFL.
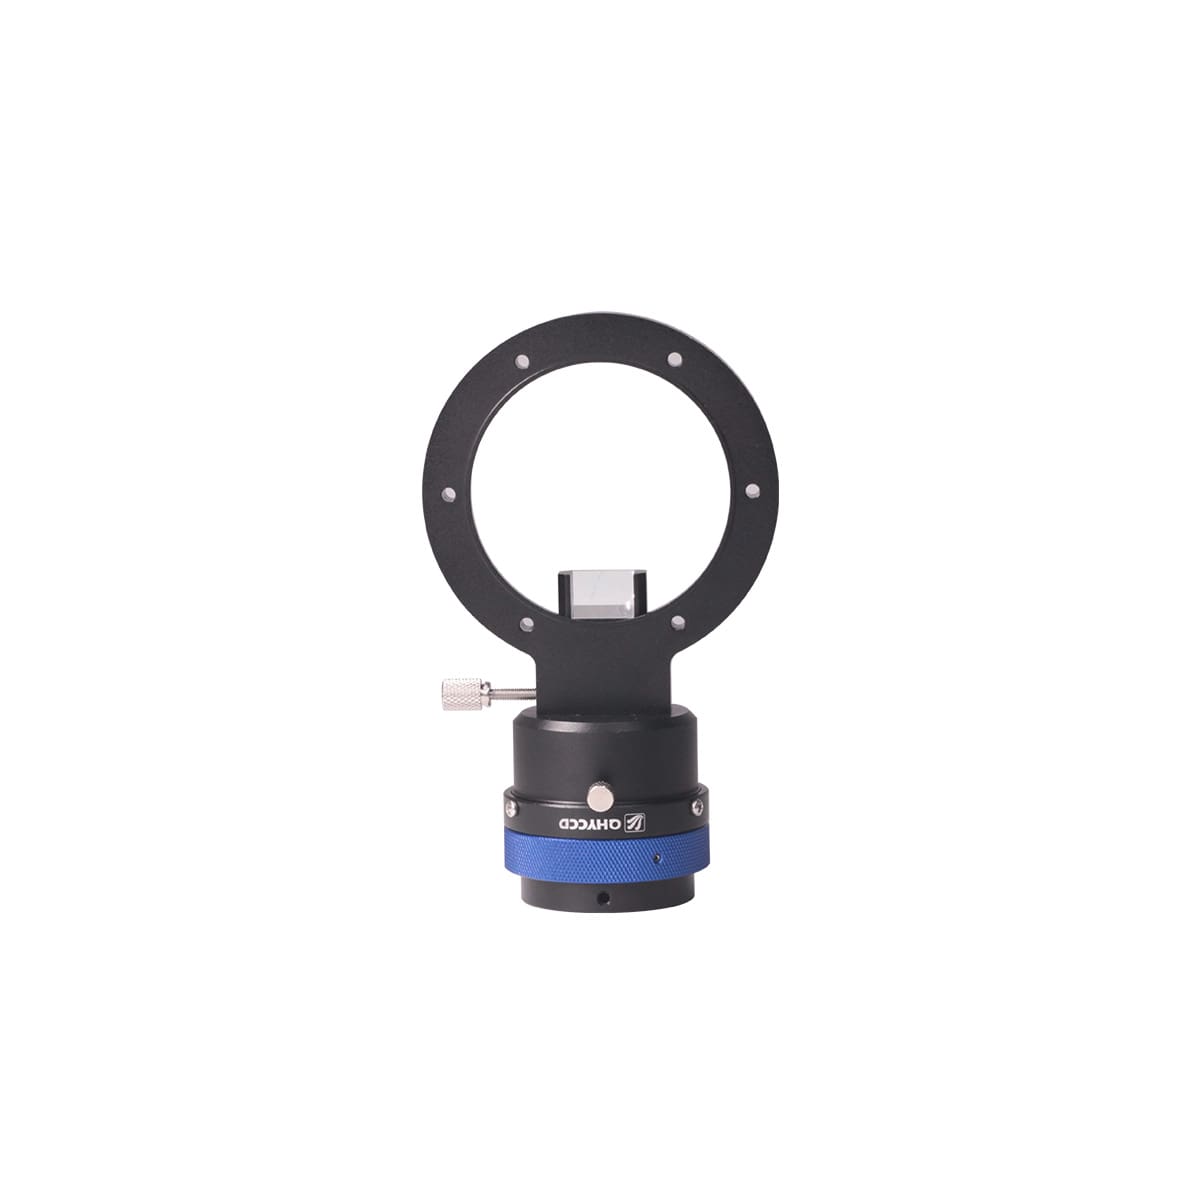
QHYOAGM-Pro
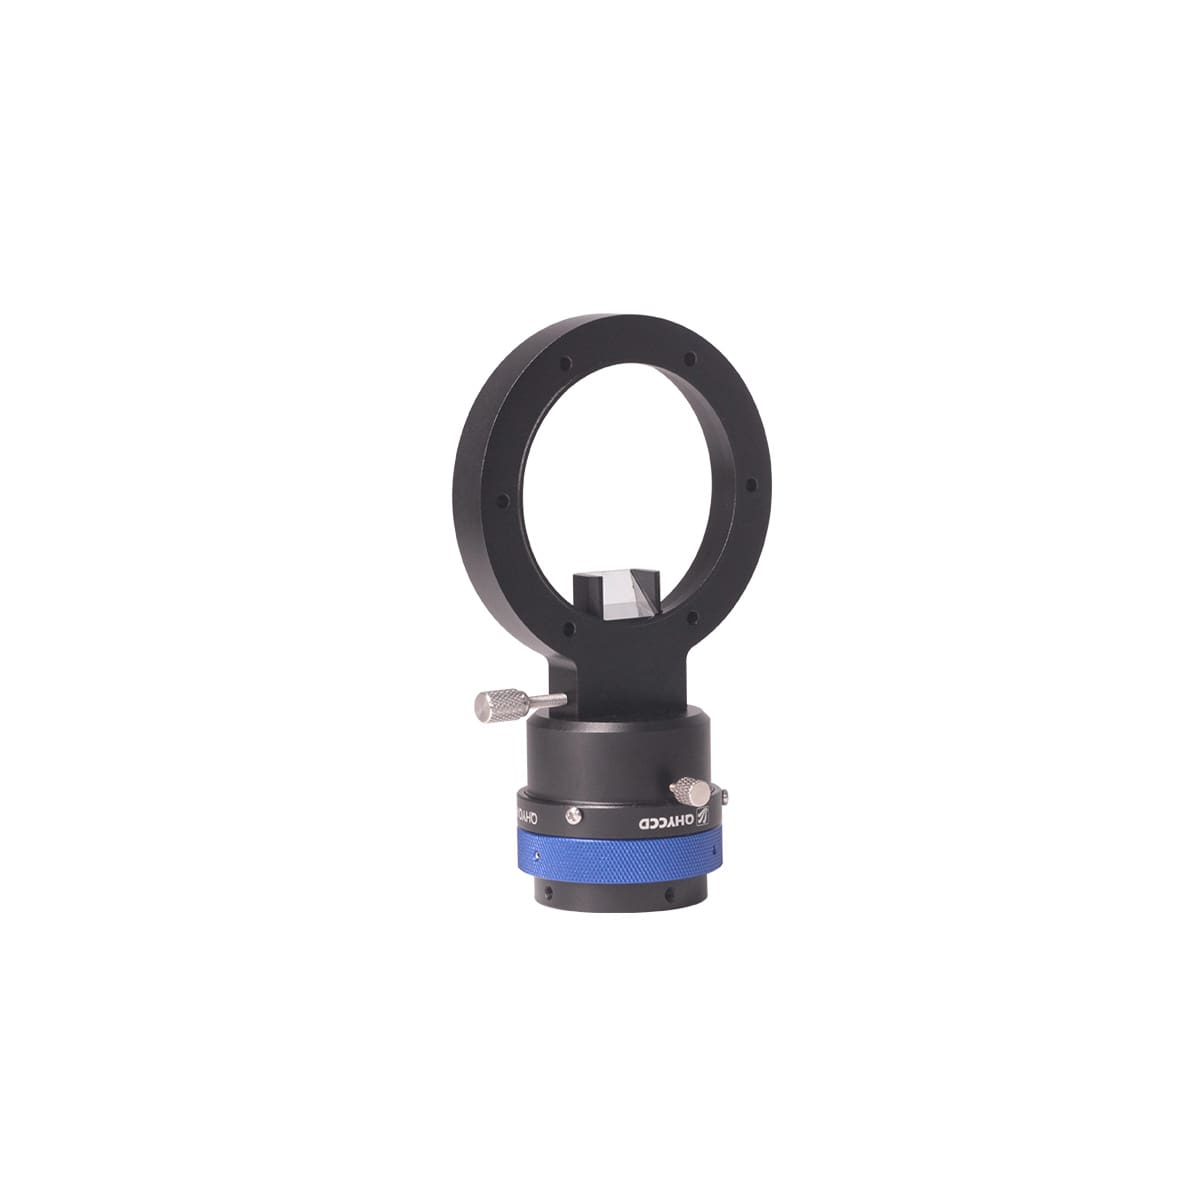
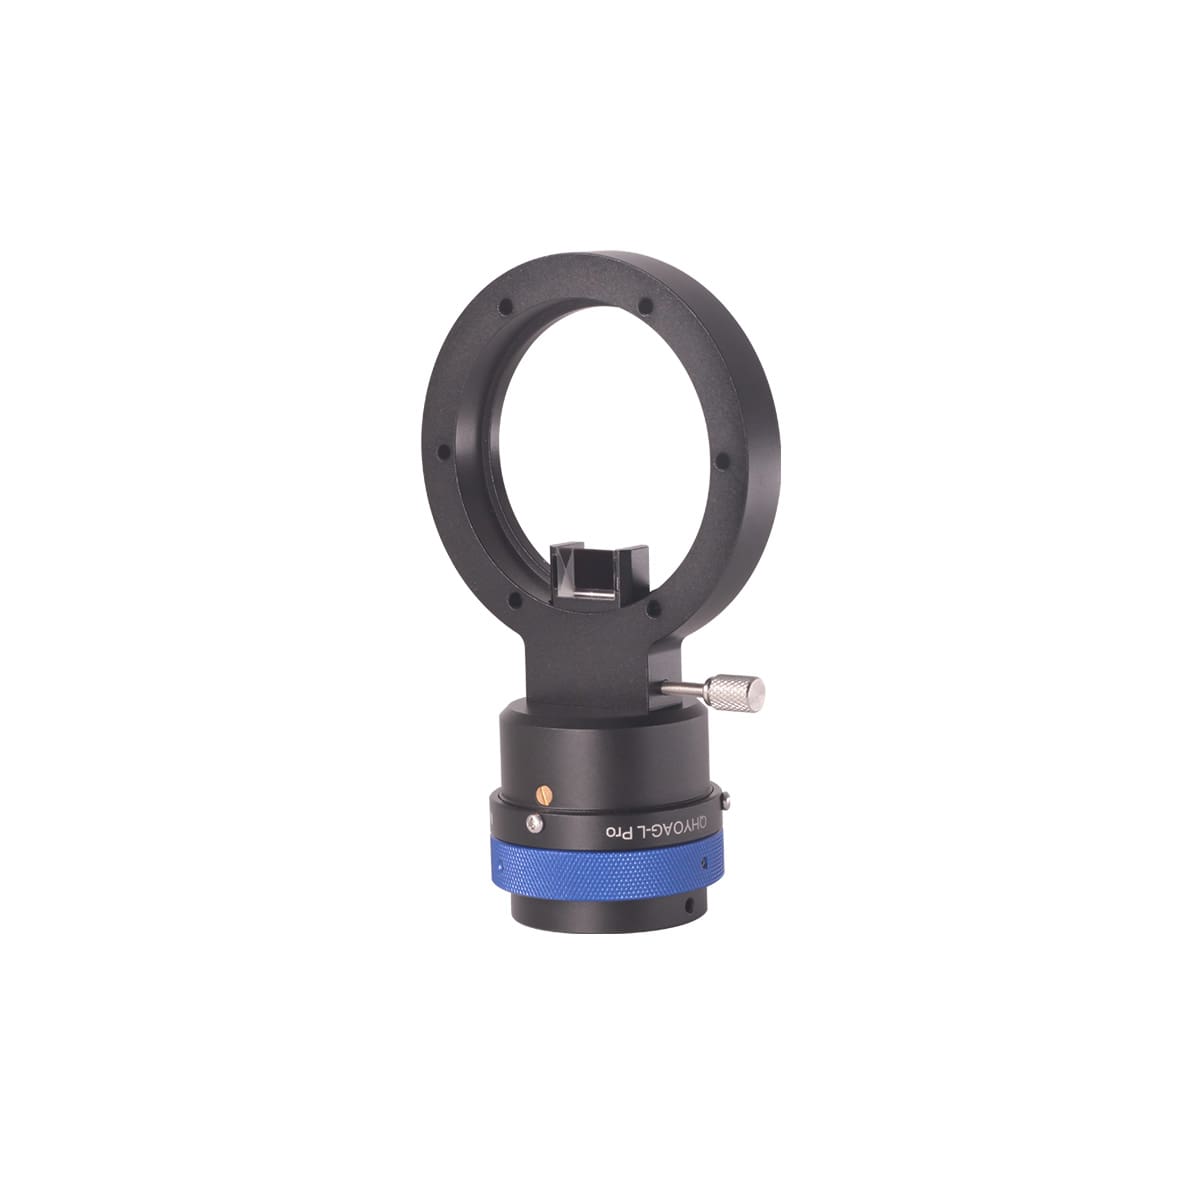
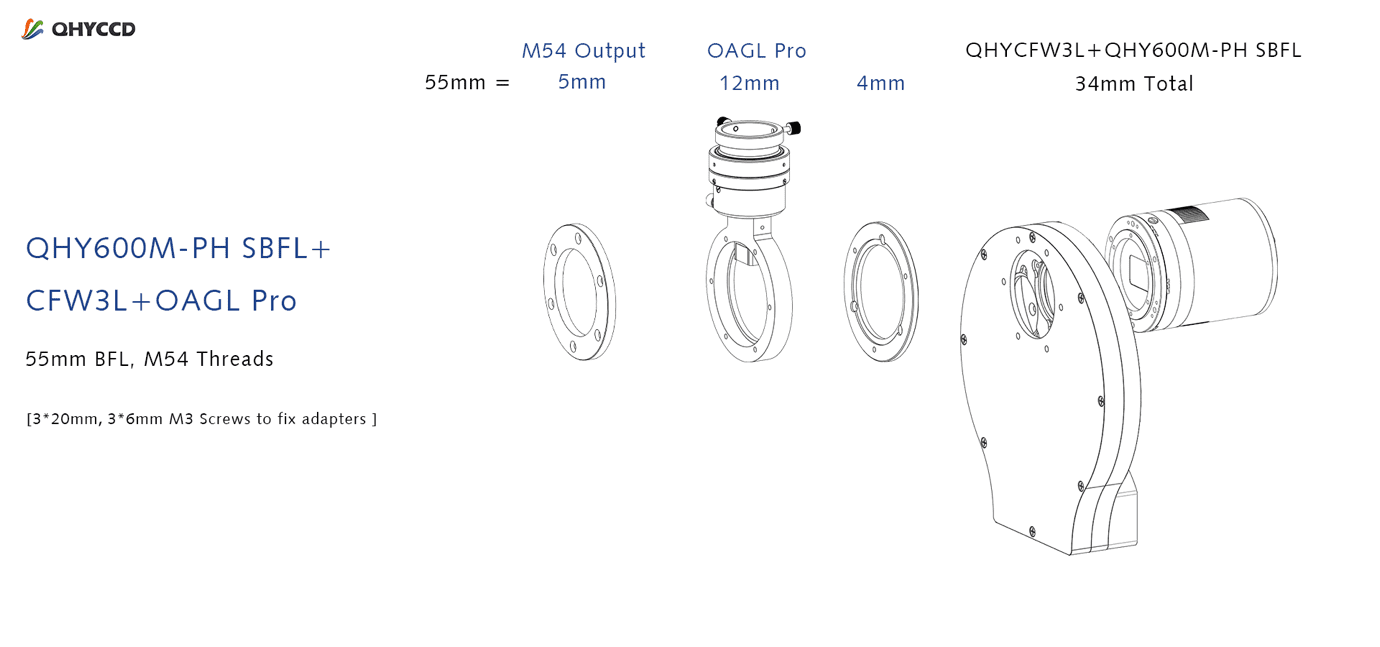
QHYOAGL Pro
The QHYOAGL Pro and the QHYCFW3XL (62mm) can be directly mated.

QHY also provides compatible adapters for QHYCFW3L and QHYCFW3M as standard accessories, making the OAG-L Pro compatible with more filter wheels. At the same time, solutions to achieve a back focal length of 55mm are also provided, see below:
The QHYOAGL Pro is designed to support cameras with larger sensors like the QHY461PH, QHY600, and their corresponding large optical systems. Therefore, it only provides M62 and M54 thread outputs.
Specifications
| Model | QHYOAGM Pro | QHYOAGL Pro |
| Telescope Interface | M54/0.75(combined with certain adapters) | M62/0.75 or M54/0.75 (combined with certain adapters) |
| Focal Length | 12mm (excluding adapter) | |
| Suitable for CCD/CMOS Size | Full Frame and APS-C CMOS | Full Frame and Medium Frame CMOS |
| Compatible Filter Wheel
|
QHYCFW3L and QHYCFW3M (combined with certain adapters) | QHYCFW3XL, QHYCFW3L and QHYCFW3M (combined with certain adapters) |
| Compatible Guide Camera | Large-sensor guiding camera like QHY5III174M is recommended. Also be compatible with smaller cameras | |
| Guide Camera Interface | 1.25 inch | |
| Weight | About 155g | About 165g |
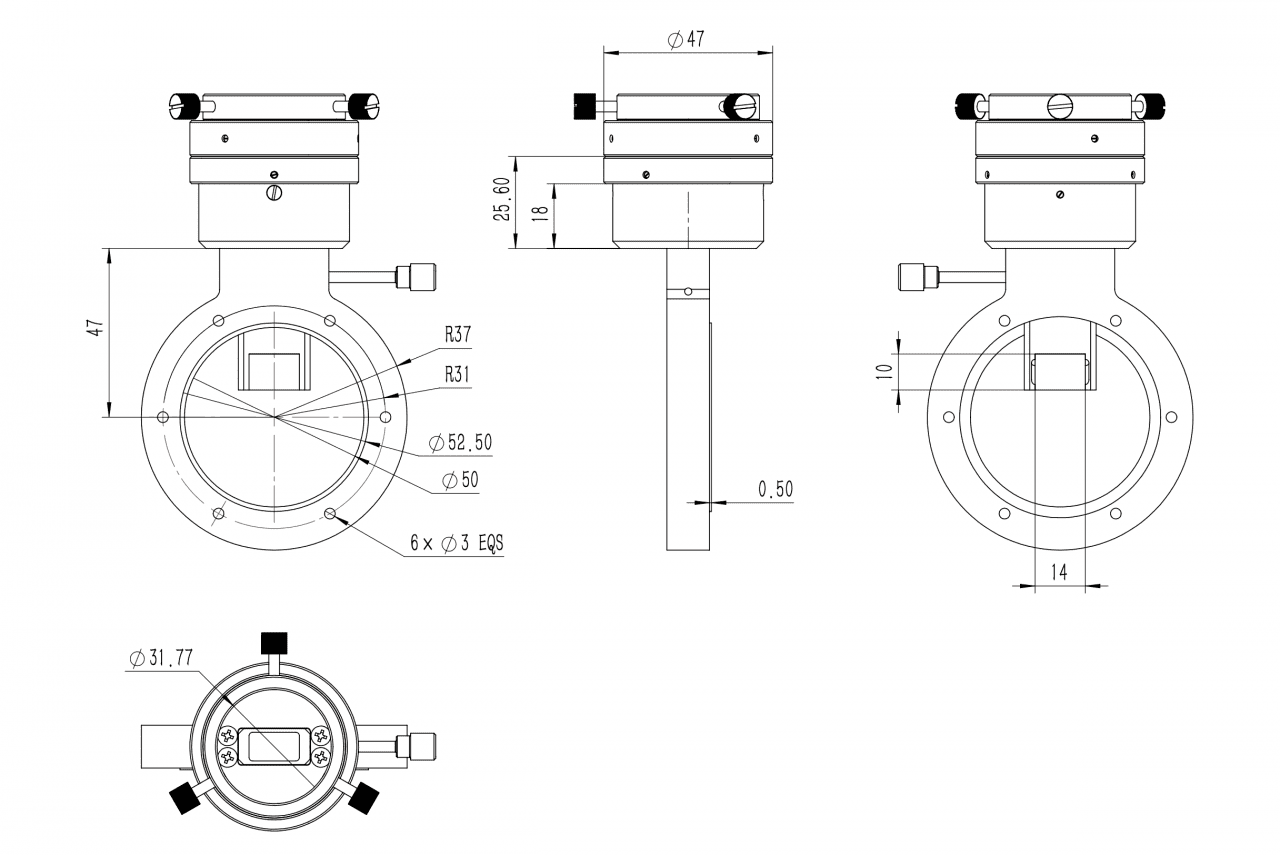
Mechanical Dimensions
QHYOAGM-Pro
QHYOAGL-Pro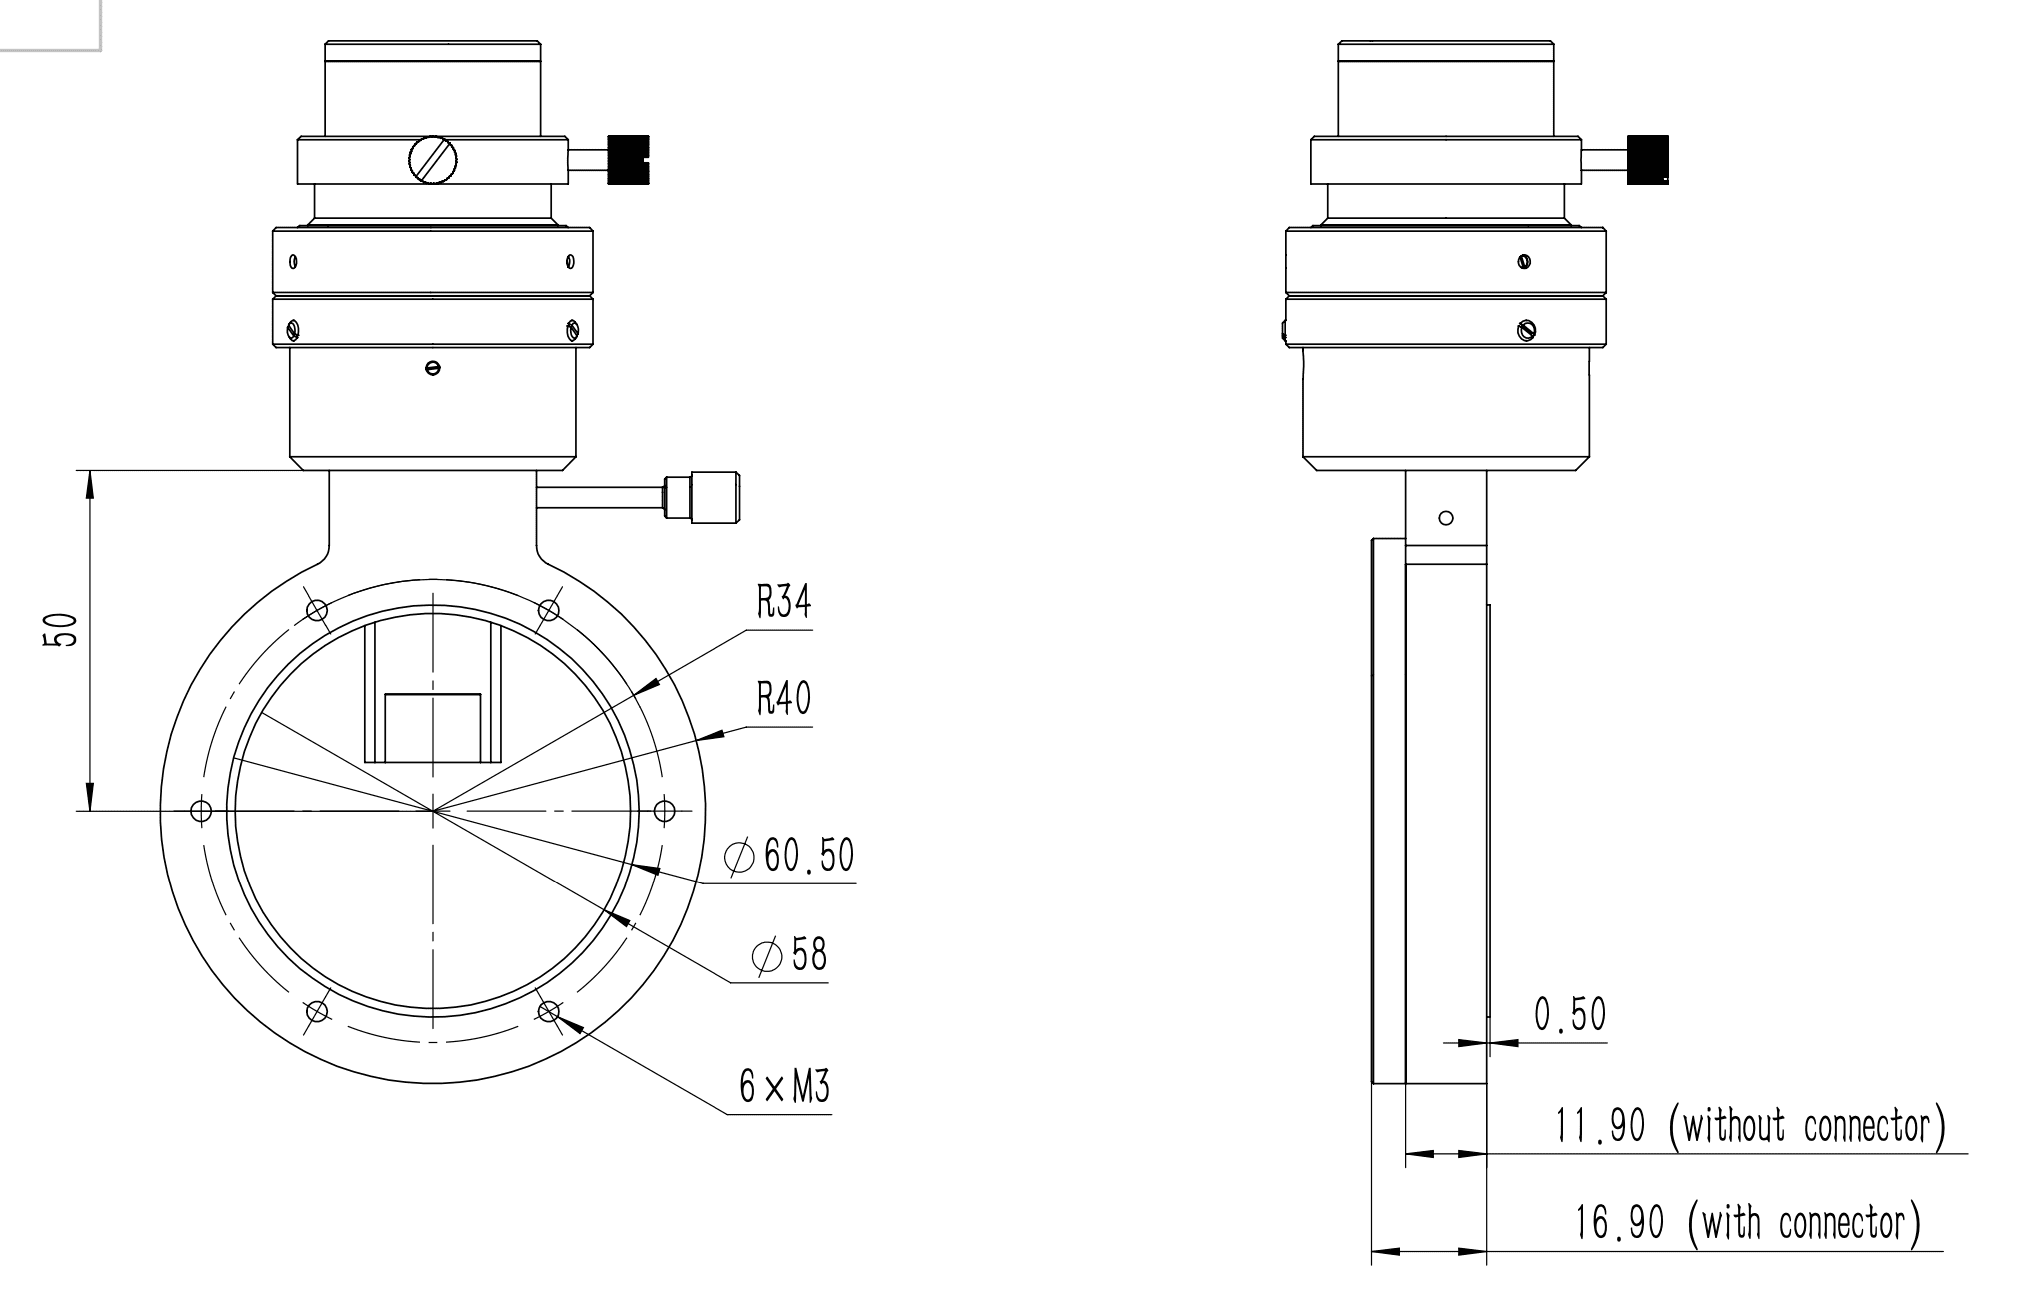
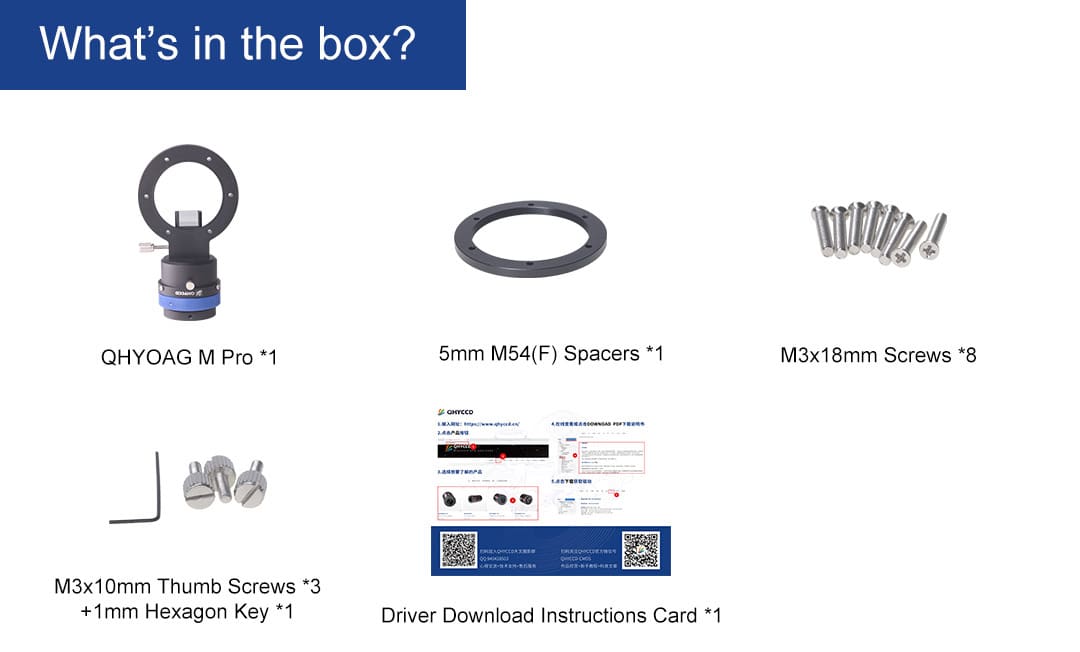
What's in the box?
QHYOAGM-Pro
QHYOAGL-Pro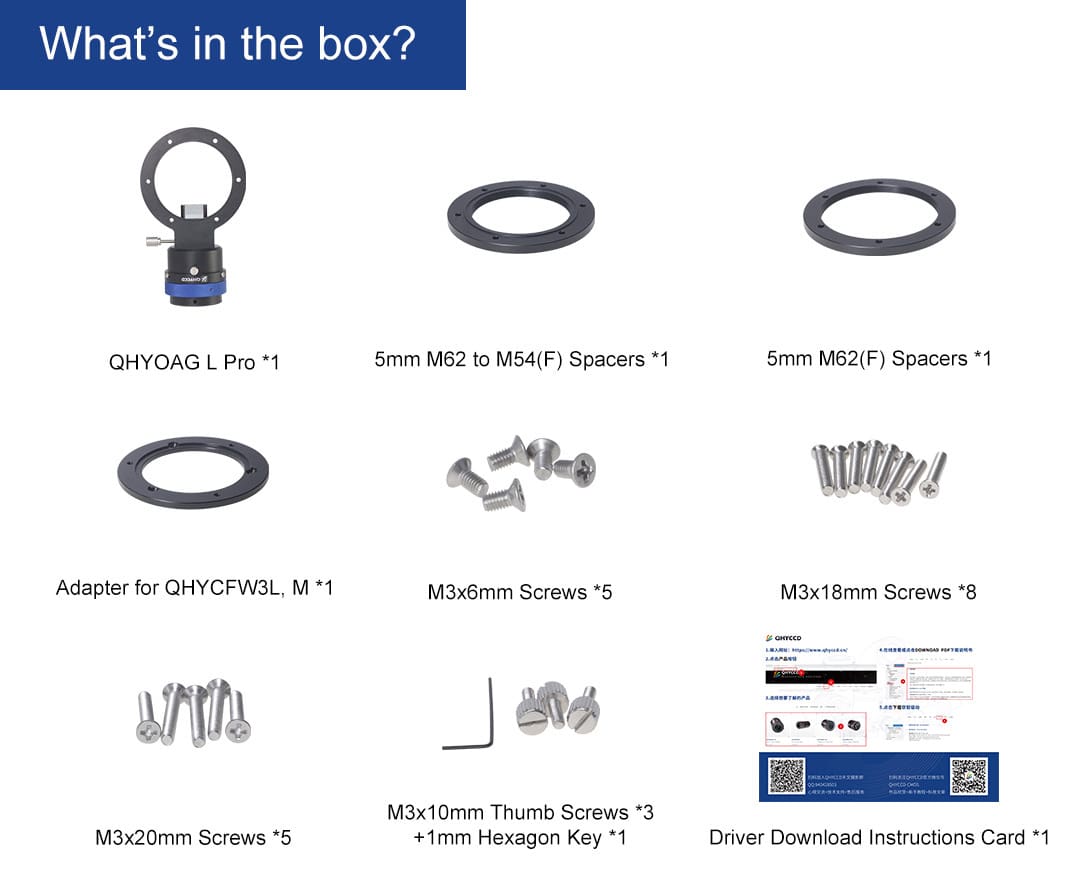
Brief User Guide
Before using, please remove the protective film attached to the prism.
The OAG body has six holes with a diameter of 3mm, used for connecting with various adapter rings or the QHYCFW3 filter wheel.
The OAG includes a prism position adjustment locking knob located on the side of the body. When this knob is loosened, the position of the prism can be adjusted. Adjust the prism’s position carefully to ensure it doesn’t obstruct the chip. If you find any obstruction in the corresponding position of the captured image, move the prism further away from the chip.
The OAG features a helical focusing seat, allowing for fine adjustments to the camera’s focal plane. On the focusing seat, there’s a focal plane position locking knob. When adjusting the focus, please release this knob. Once the focal length is adjusted, lock this knob. Do not forcibly rotate the focusing ring when it’s locked, to prevent damage to the internal structure. Once locked, you’ll notice that the focusing ring can still move slightly left or right. This is normal, and at this point, the camera is locked, and the focus won’t change.
The OAG can be used in conjunction with a guiding camera. It’s important to ensure that the distance from the prism’s surface to the guiding camera is equal to the distance between the prism’s surface and the imaging CCD. If the guiding camera is still not in focus at its limit distance, you can remove the front end of the guiding camera to further shorten the distance.”