
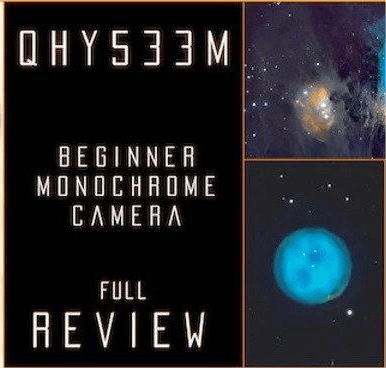
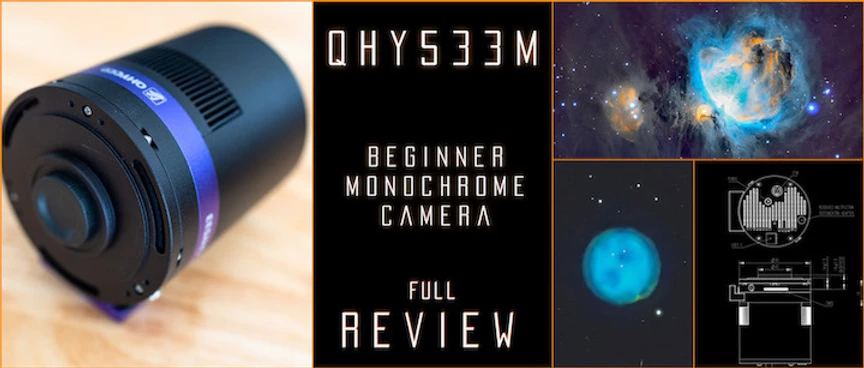
Astrophotography QHY533M Review by Author: Galactic Hunter
Long-awaited by amateur astrophotographers, a monochrome camera using the IMX533 sensor is now finally available.This should be the best BEGINNER mono camera for astrophotography!
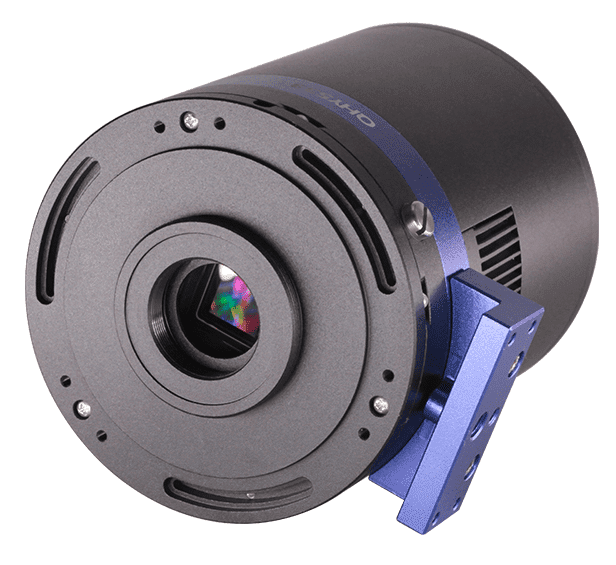
The QHY533M is a 14-bit astronomy-dedicated cooled camera with 9 MegaPixels and a pixel size of 3.76 microns. This camera has low readout noise and does not have any amp glow!
In this post, we’ll put this affordable astro-dedicated camera to the test from our Bortle 9 backyard. We’ll use our basic beginner 7nm narrowband filters and see how the camera performs when imaging a couple of different deep-sky objects. Be sure to watch our review video and download our raw data and example files later in this post!
 Watch our full video on YouTube
The QHY533M camera was designed because of how well the IMX533 sensor was received. It has high sensitivity, low readout noise, no amp glow, and most importantly, a fair price.
We’ve seen a ton of people on social media wondering if a monochrome version would ever come out, so it’s nice to see that astronomy companies listen to the community and… give birth to this!
Tables of Contents
-
Introduction
-
What’s in the Box?
-
Tips for using the QHY filter wheel
-
Imaging the Orion Nebula with the QHY533M
-
Specs | Resolution | Square Sensor | Pricing
-
Imaging the Owl Nebula with the QHY533M
-
Download our Raw Data from the QHY533M
-
Final Thoughts
QHY533M – What’s in the Box?
We received the camera along with a filter wheel. The filter wheel is the QHYCFW3S-SR which is small and light, perfect for this camera. It can hold a total of seven 1.25″ filters. This filter wheel is great for small to medium size cameras that use a cropped sensor. If you plan on upgrading to a full-frame camera in the future, you’ll need a larger filter wheel that is capable of holding 2″ filters.
As you can see in the picture below, the size of this small filter wheel is definitely night and day when compared to our QHY600 filter wheel which is the Extra Large version.
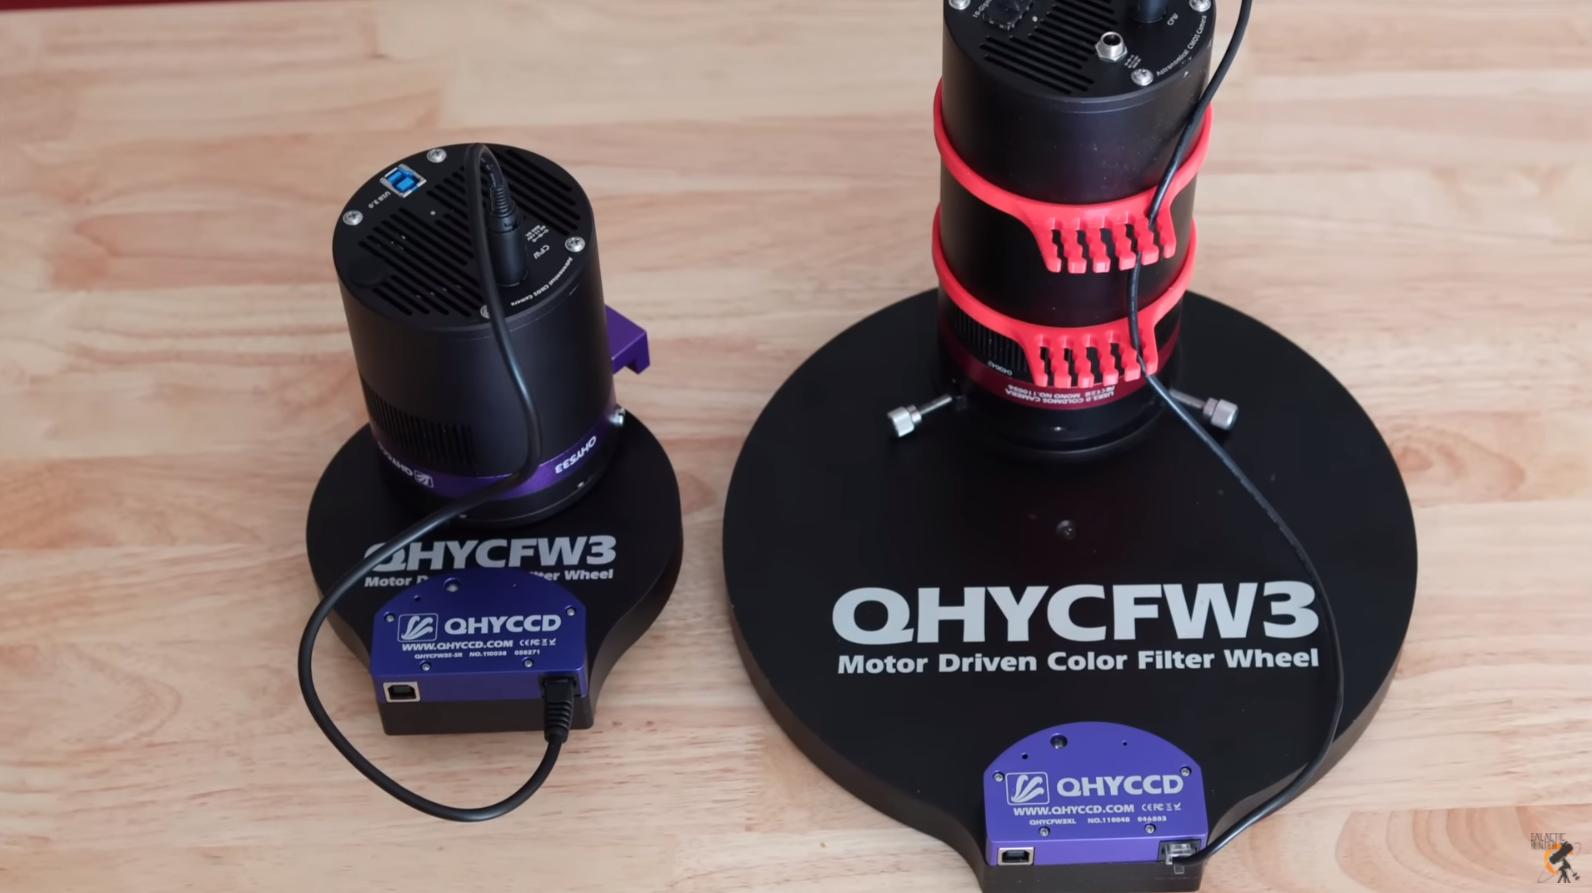 QHY small CFW vs Extra large CFW
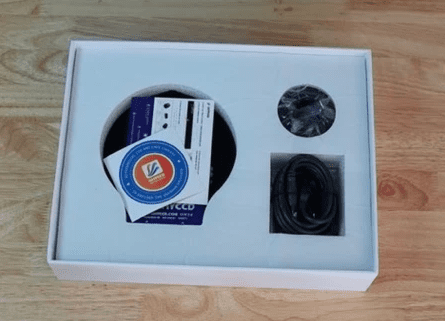
We made a full unboxing video for both the filter wheel and the camera, so be sure to go watch it. But let’s quickly summarize what comes in each box.
In the camera box, you will find:
-
The QHY533M camera
-
A power cable with a power brick
-
A power cable extension cord
-
A USB 3 cable
-
A desiccant
-
Some adapter rings with screws
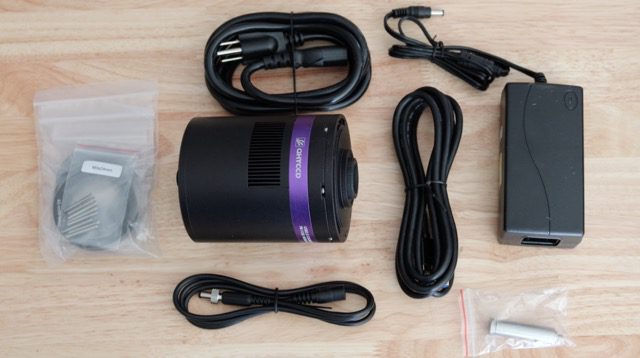
And if you also purchased the small QHY filter wheel, you’ll get:
-
A nose adapter
-
A USB 2 cable
-
A 4PIN cable
-
Some filter washers and screws
Tips for Using the QHY Filter Wheel
If you have never used a QHY filter wheel before, you might be wondering about the included cables. Should you use the USB cable to connect the filter wheel to your computer? Should you use the 4PIN cable to connect the filter wheel to the camera? Should you use both?
To save you some time and frustration, here is what we recommend:
-
Ignore the USB2 cable. Leave it in the box and never use it. Using the USB cable means you will need to connect the other end of the cable either straight to your laptop or to a USB hub. That is one extra cable dangling around we don’t need. Also, if using a large filter wheel, the USB cable might not be enough to power the wheel.
-
Connect the 4PIN cable from your filter wheel to your camera. That cable is short and won’t get stuck anywhere.
-
Grab a tiny pin or another very thin object. There is a small button near the bottom of the filter wheel that needs to be pressed in order to switch the filter wheel mode from USB to 4PIN. Using your thin object, click the button until the light turns green. Green means 4PIN mode, Red means USB mode.
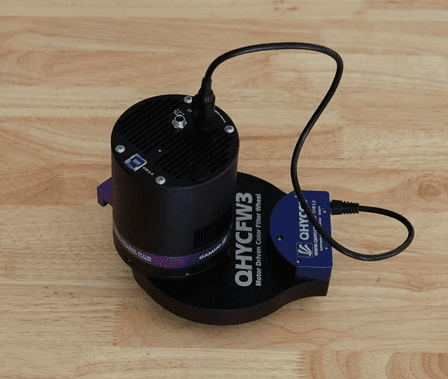 the camera and filter wheel connected by the 4pin cable
You should now be able to use the filter wheel normally. Don’t worry, you will not have to mess with that tiny button anymore after that first time unless you decide to switch to the USB cable in the future.
Unboxing the QHY533M and QHYCFW3S-SR
I made a quick video unboxing both the QHY533M camera and the small QHY filter wheel. You can watch the video below!
https://www.youtube.com/watch?v=cxGpYN4c0o8
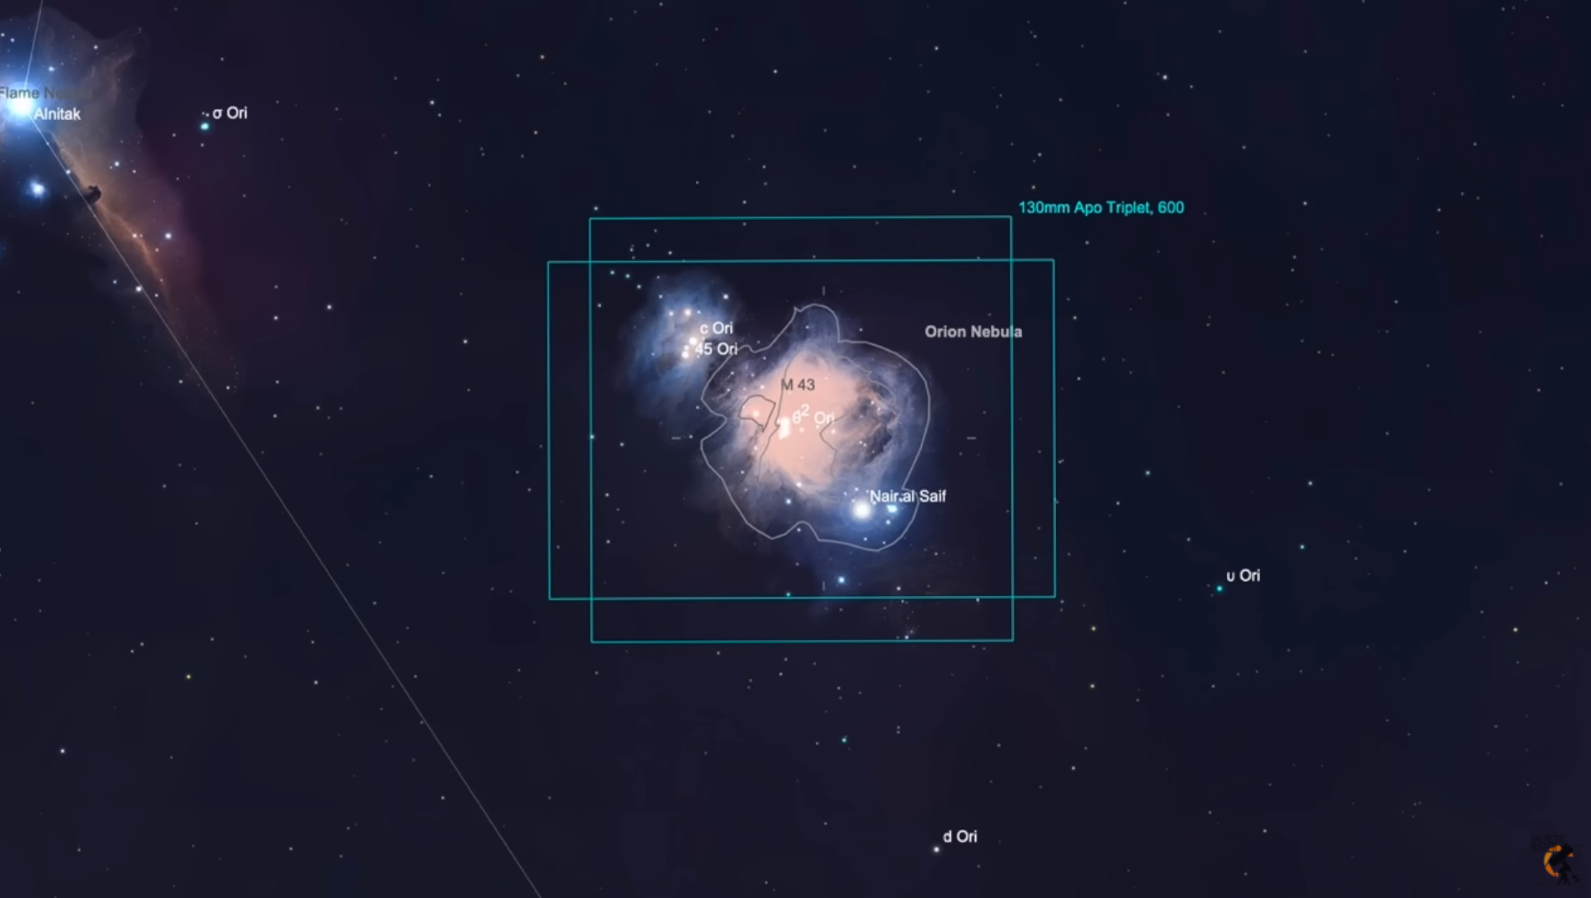
Imaging the Orion Nebula with the QHY533M
Before we go into the specifications and performance of the camera, let’s quickly show you one of the two nebulae we photographed using the QHY533M so far: the famous Orion Nebula (Messier 42).
This shot was taken from the city, using 7nm beginner filters (instead of the much better 3nm ones we usually use).
The telescope used, which you can see on the side, was also a beginner-grade telescope, a small 70mm refractor from Meade now discontinued.
Looking at the picture below, you can see that the camera did a really good job at capturing the intricate details, colorful gas, and low-noise background even from our Bortle 9 backyard! The nebula appears blue and golden because of the color palette used, the “Hubble Palette” using narrowband filters.
With just 2 hours and a half of total exposure time, we are impressed with the results!
M42 in narrowband using the QHY533M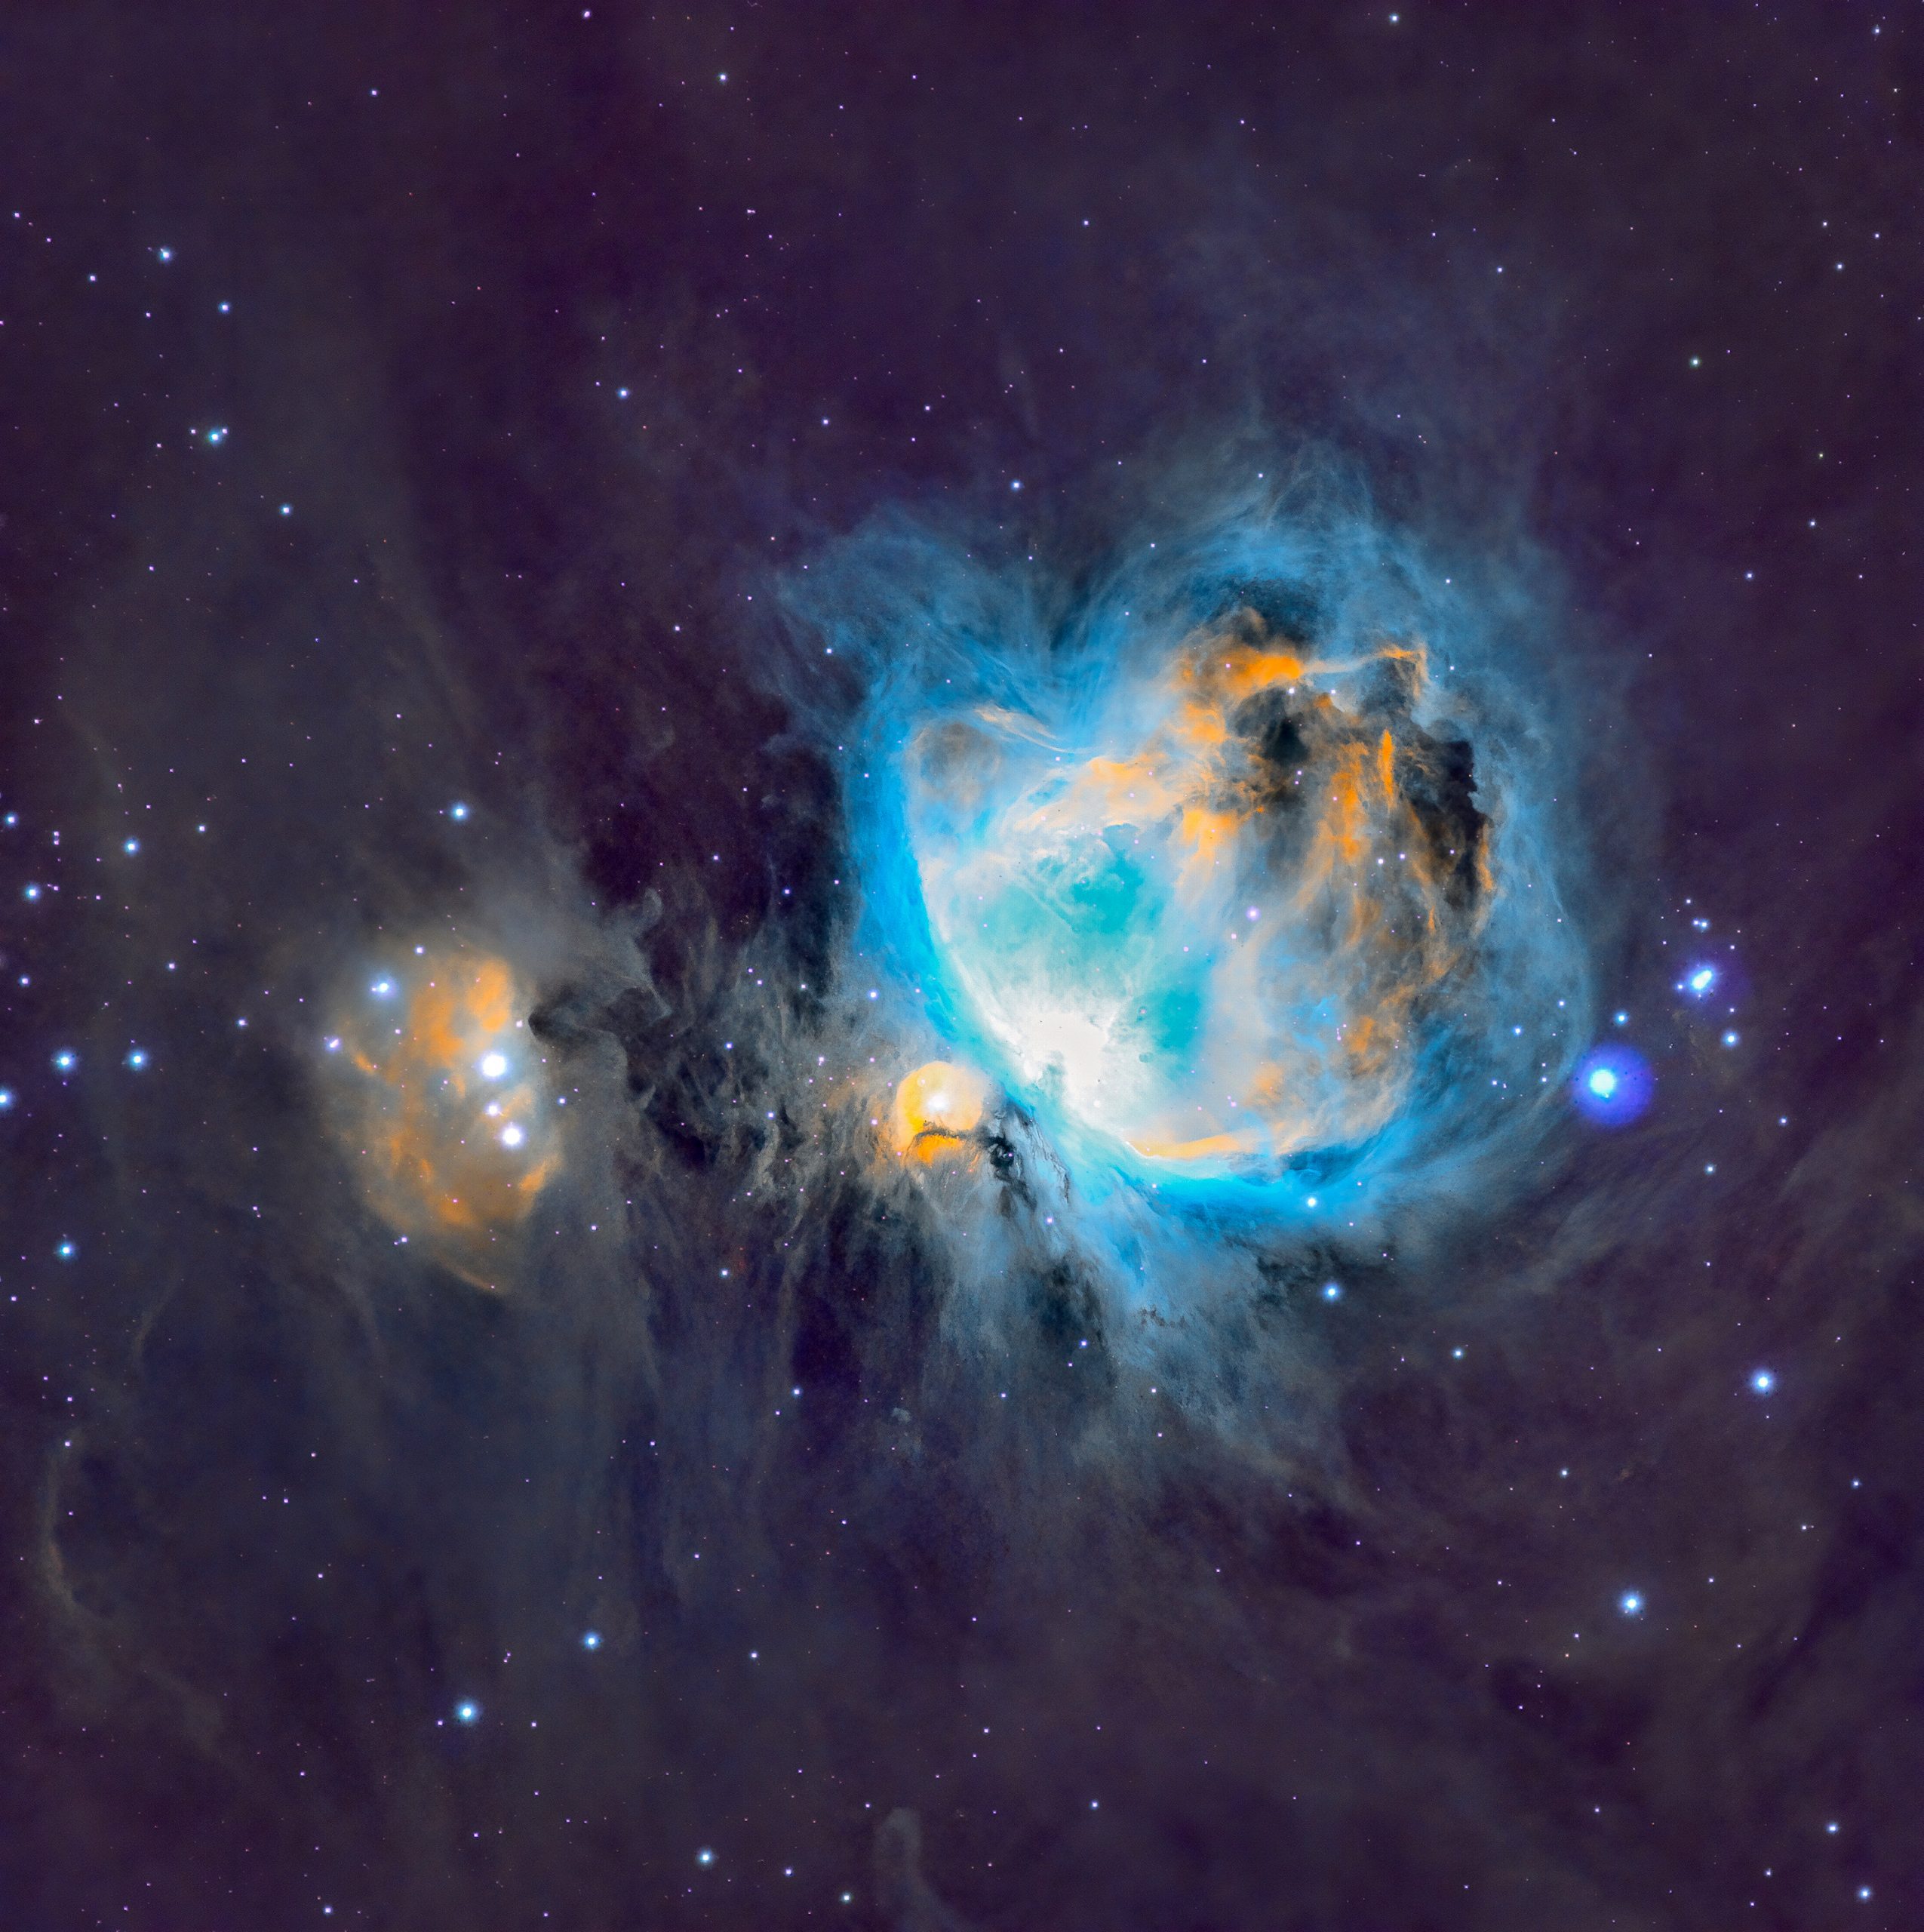 Want to process your images following our own workflow? Download our guide HERE!
GEAR USED:
Camera: QHY533M
Telescope: Meade 70mm APO
Mount: 10Micron GM1000 HPS
Accessories: Pegasus Astro Ultimate Powerbox
Processing: Pixinsight
Total Exposure Time: 2.5 hours
Gain: 76
QHY533M Specs & Price
We’re not going to go too in-depth about the specs of the camera, because we don’t want to pretend that we know what all of these numbers and graphs mean. Still, let’s talk about what matters most for a beginner astrophotographer. If you like confusing numbers and want the full specifications of the camera, we’ll attach the Specs list and performance graphs as well!
General Specs
-
Sensor: SONY IMX533M
-
Pixel Size: 3.76um x 3.76um
-
Mega Pixels: 9 MegaPixels
-
Pixel Array: 3008 x 3028
-
Full Well: 58ke
-
ADC: 14-bit
-
Read Noise: 1.3e to 3.4e
-
Anti-Dew Heater: Yes
-
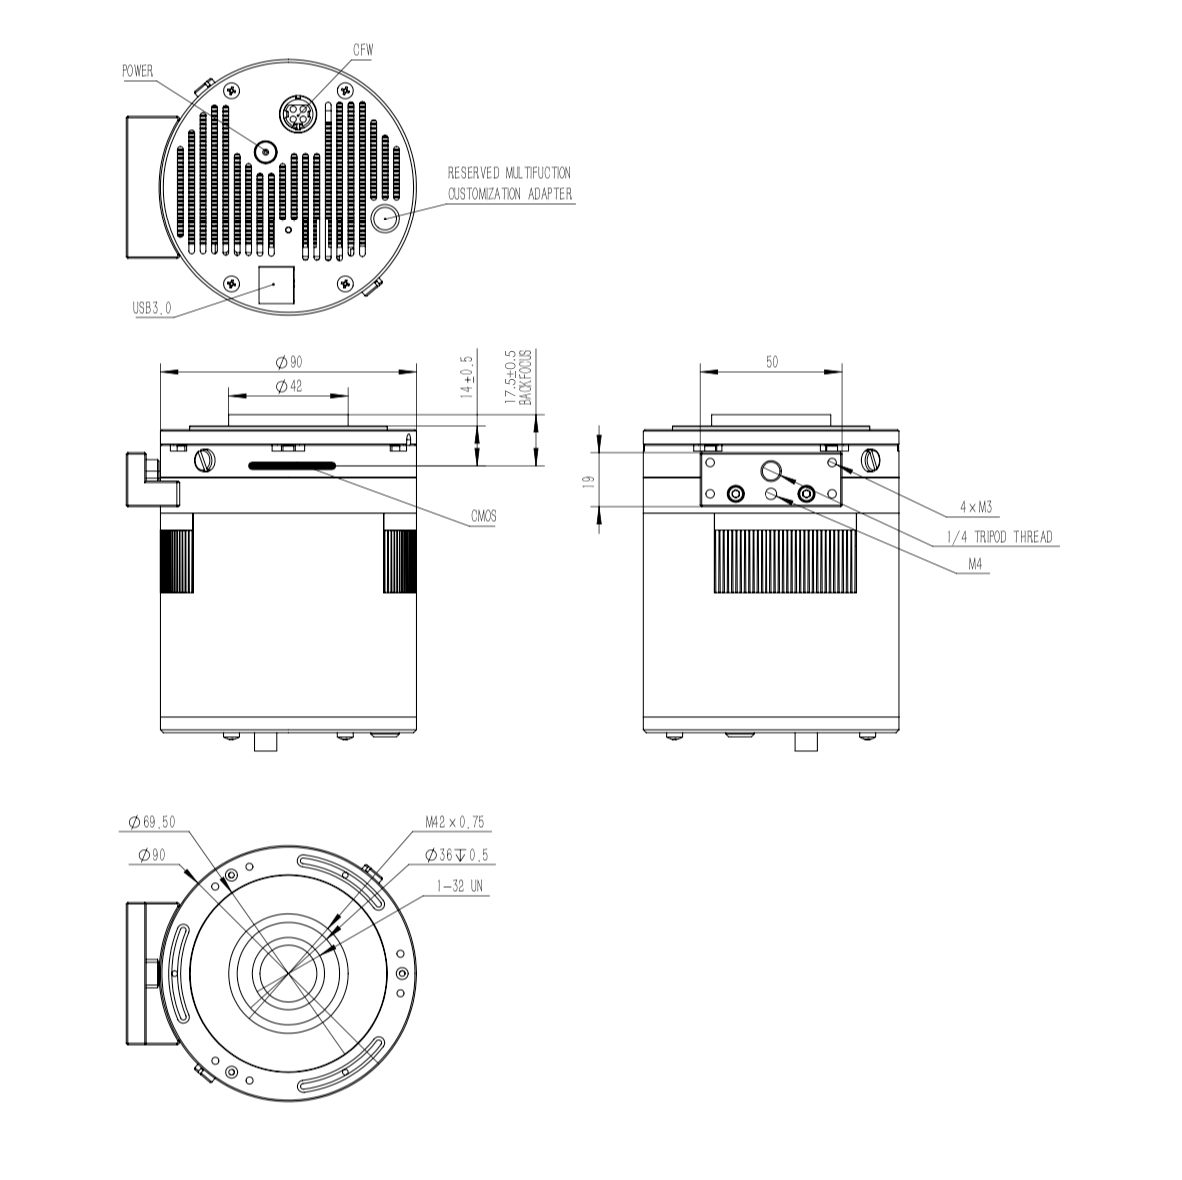
Telescope Connection: M54
-
Back Focal Length: 14mm for the monochrome version with the filter wheel attached, 17mm for the color version
-
Weight: 845g (1.9 lbs)
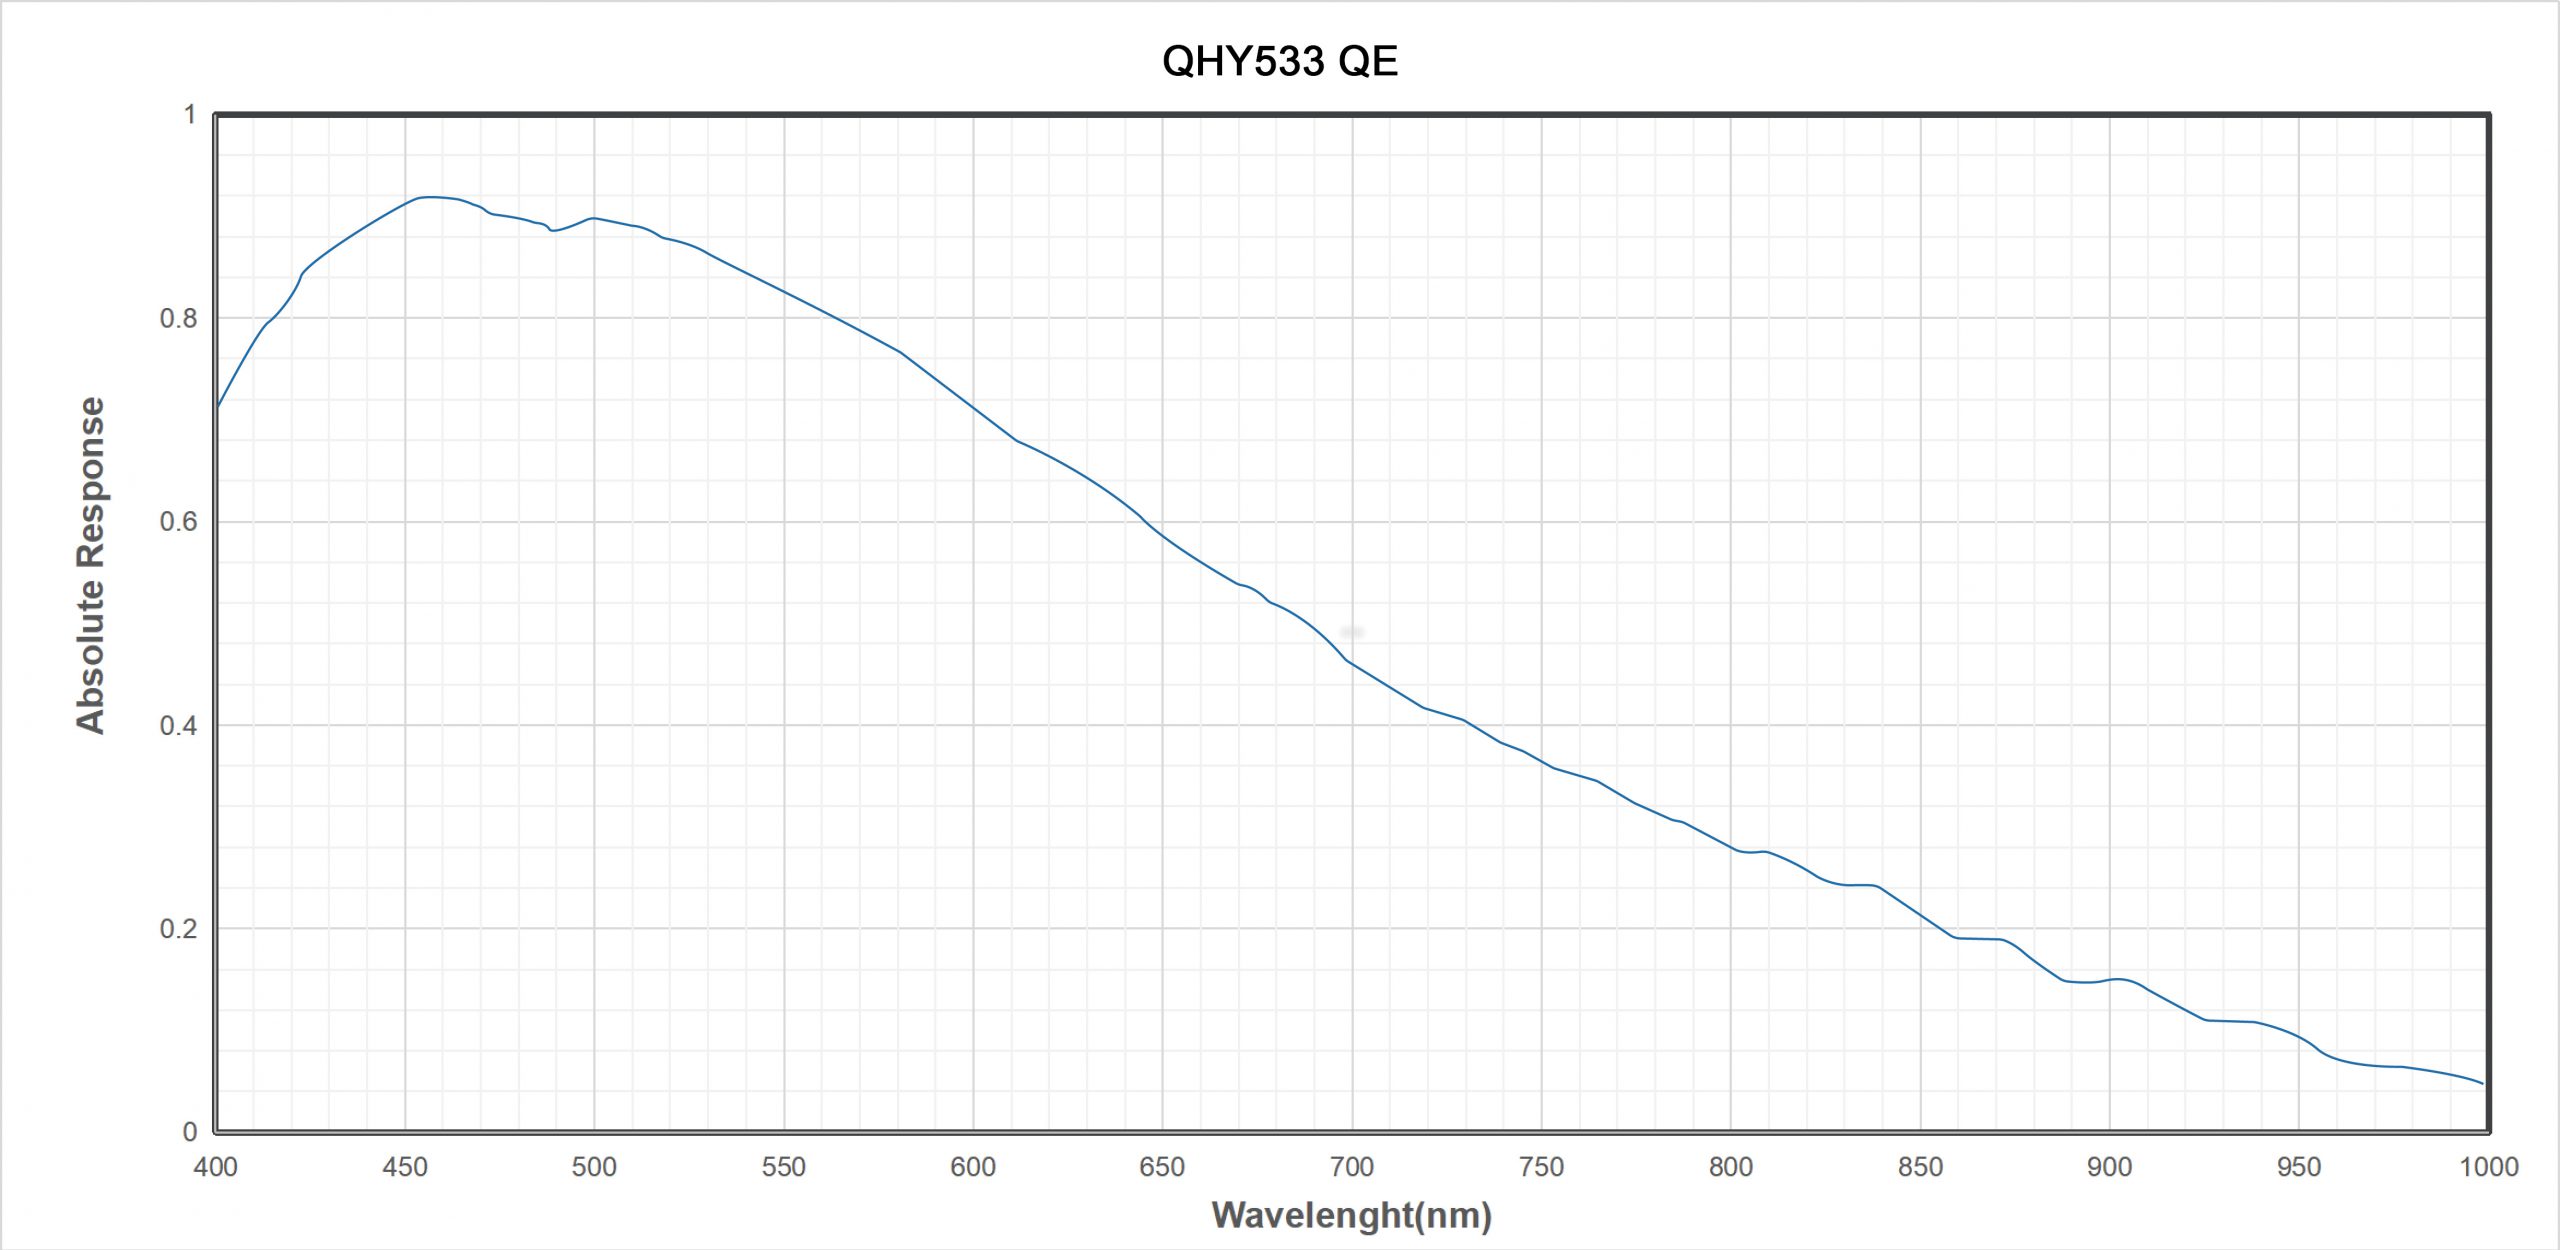
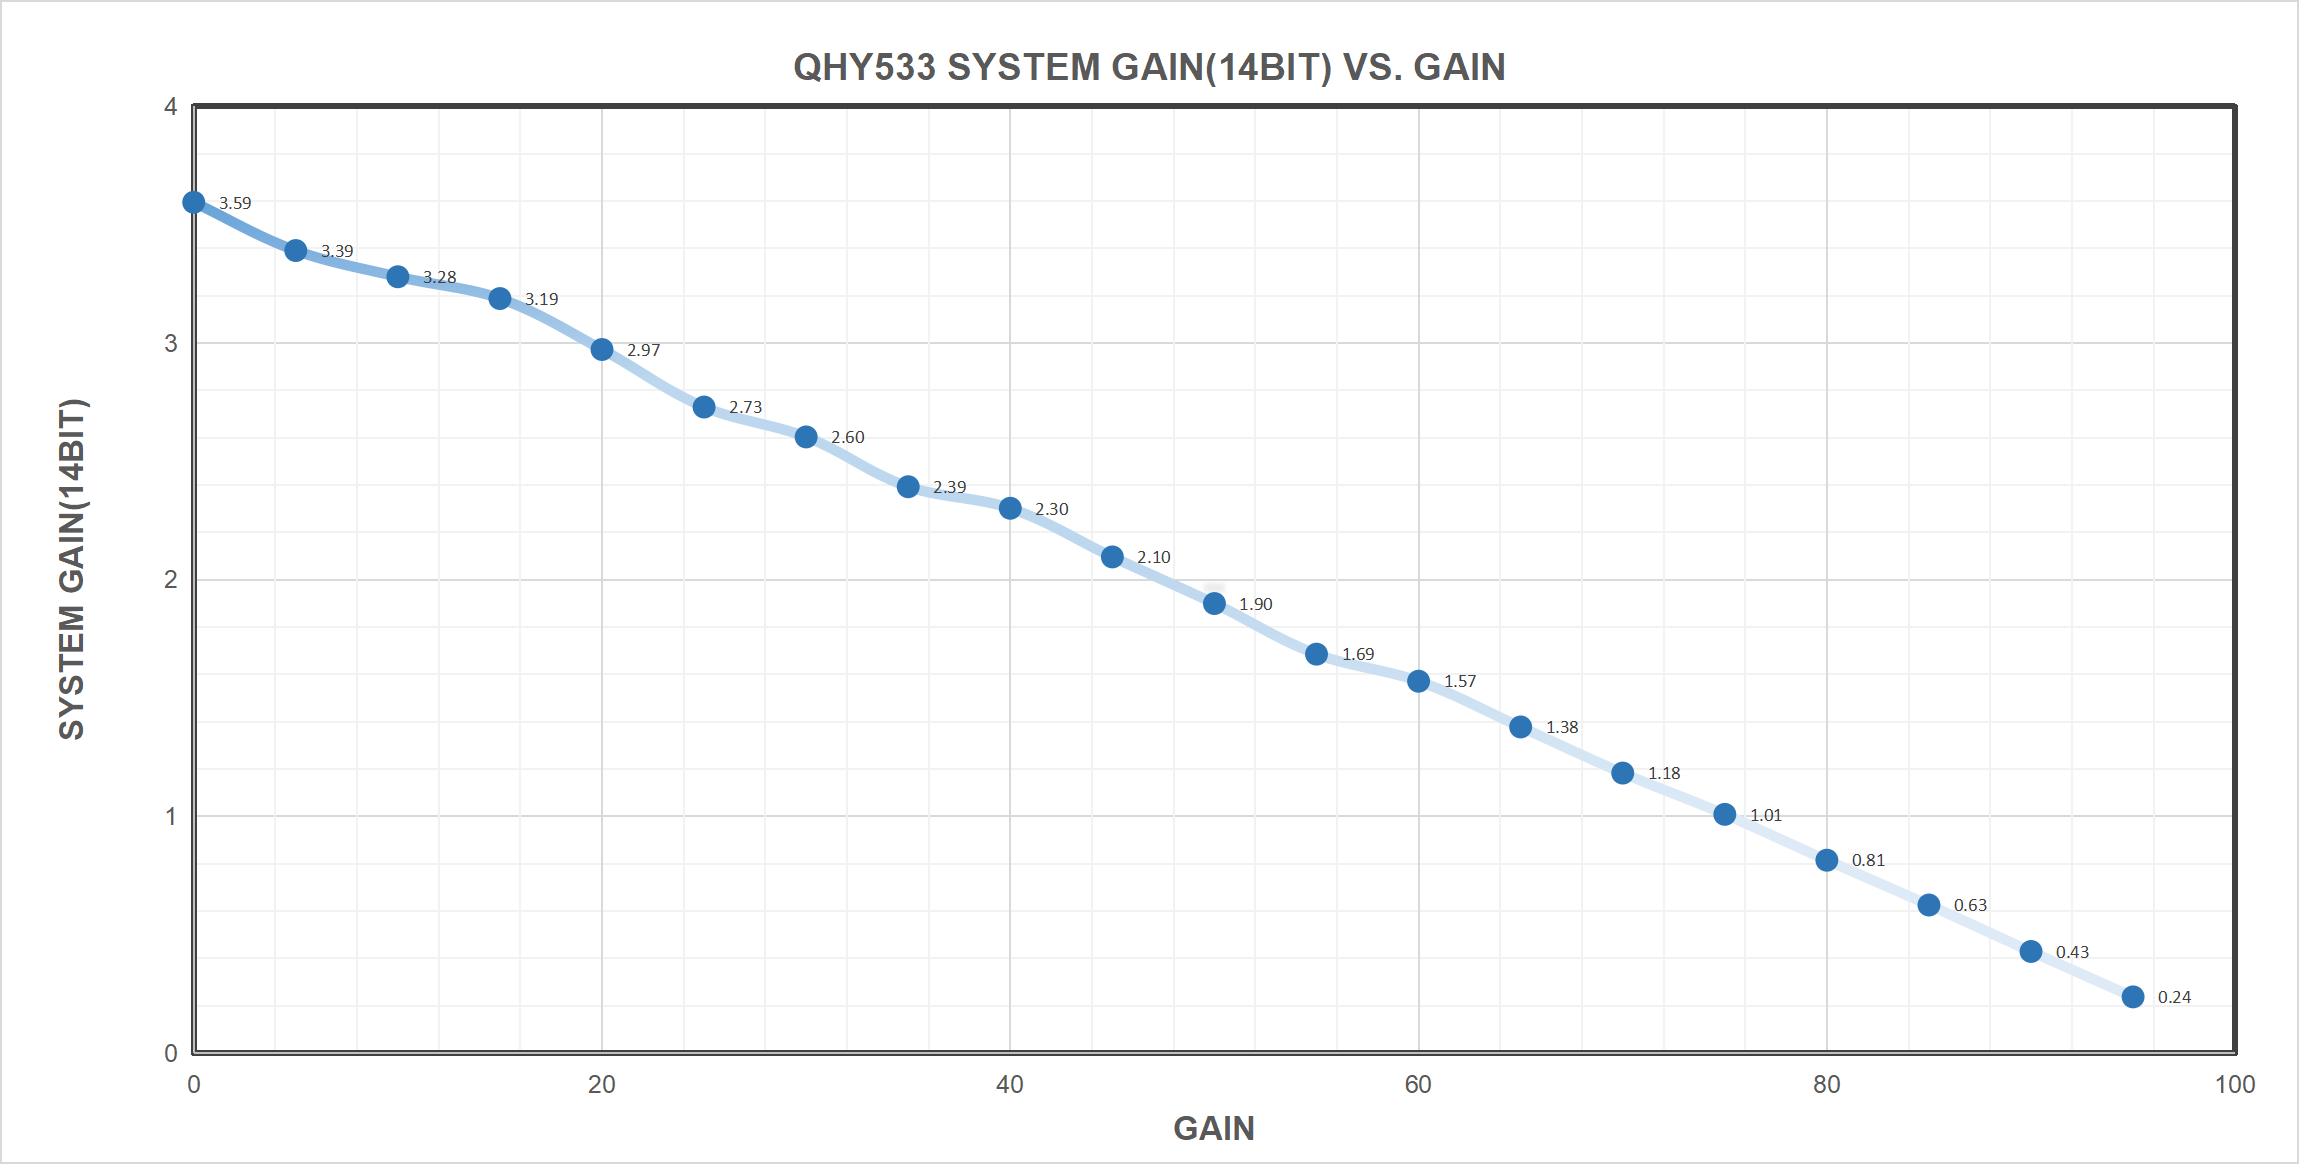
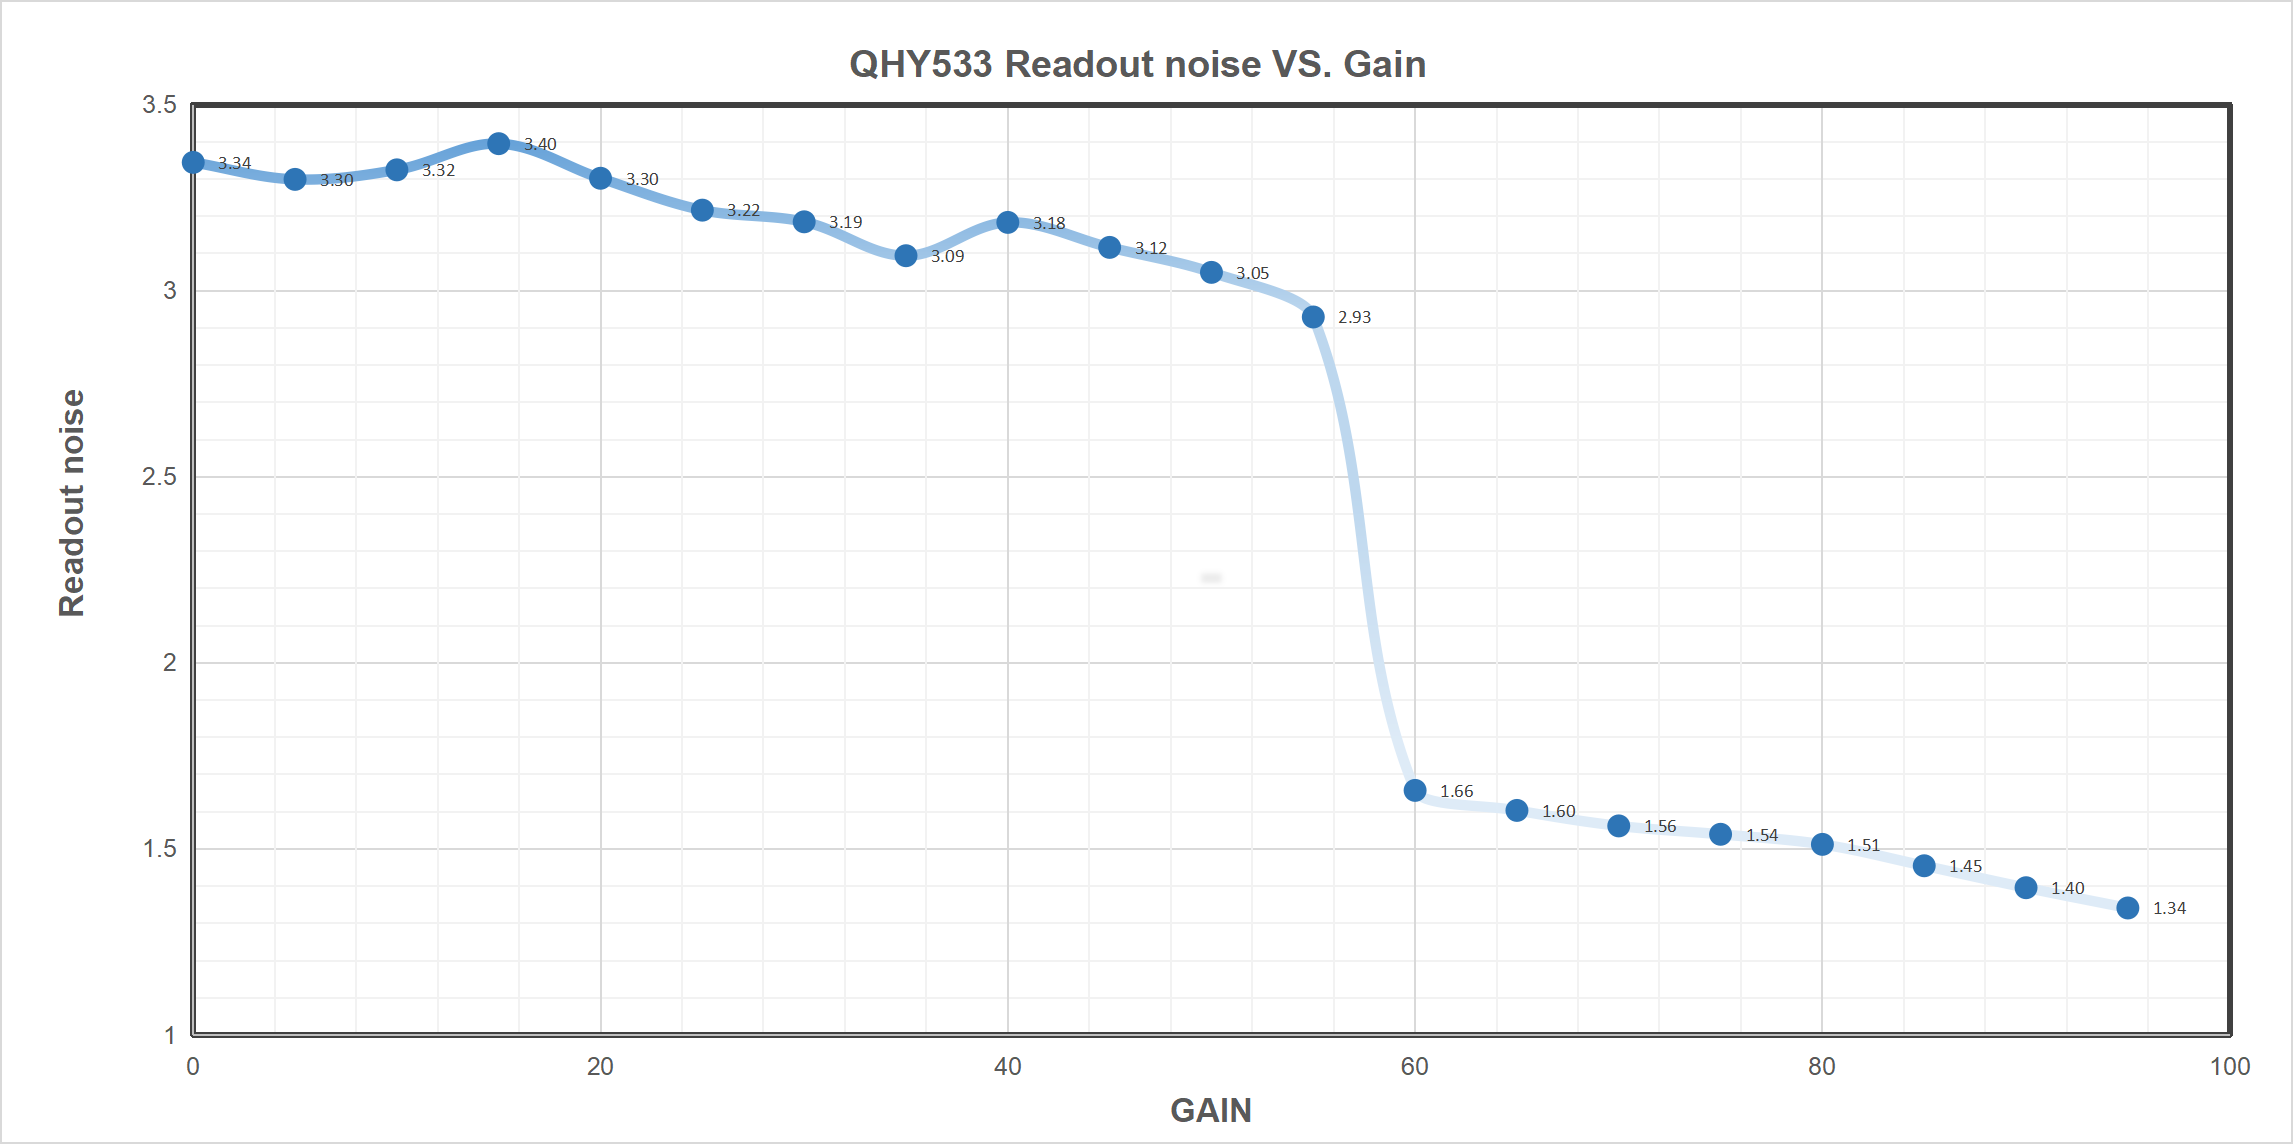
And below are the full specifications taken from QHY’s PDF files. It includes a list of all specs, and performance curves for the following:
-
QE
-
Gain
-
Readout Noise vs Gain
-
Dynamic Range vs Gain
-
Fullwell vs Gain
You can click on each image to see it full screen. You may also download these graphs if you find them useful!
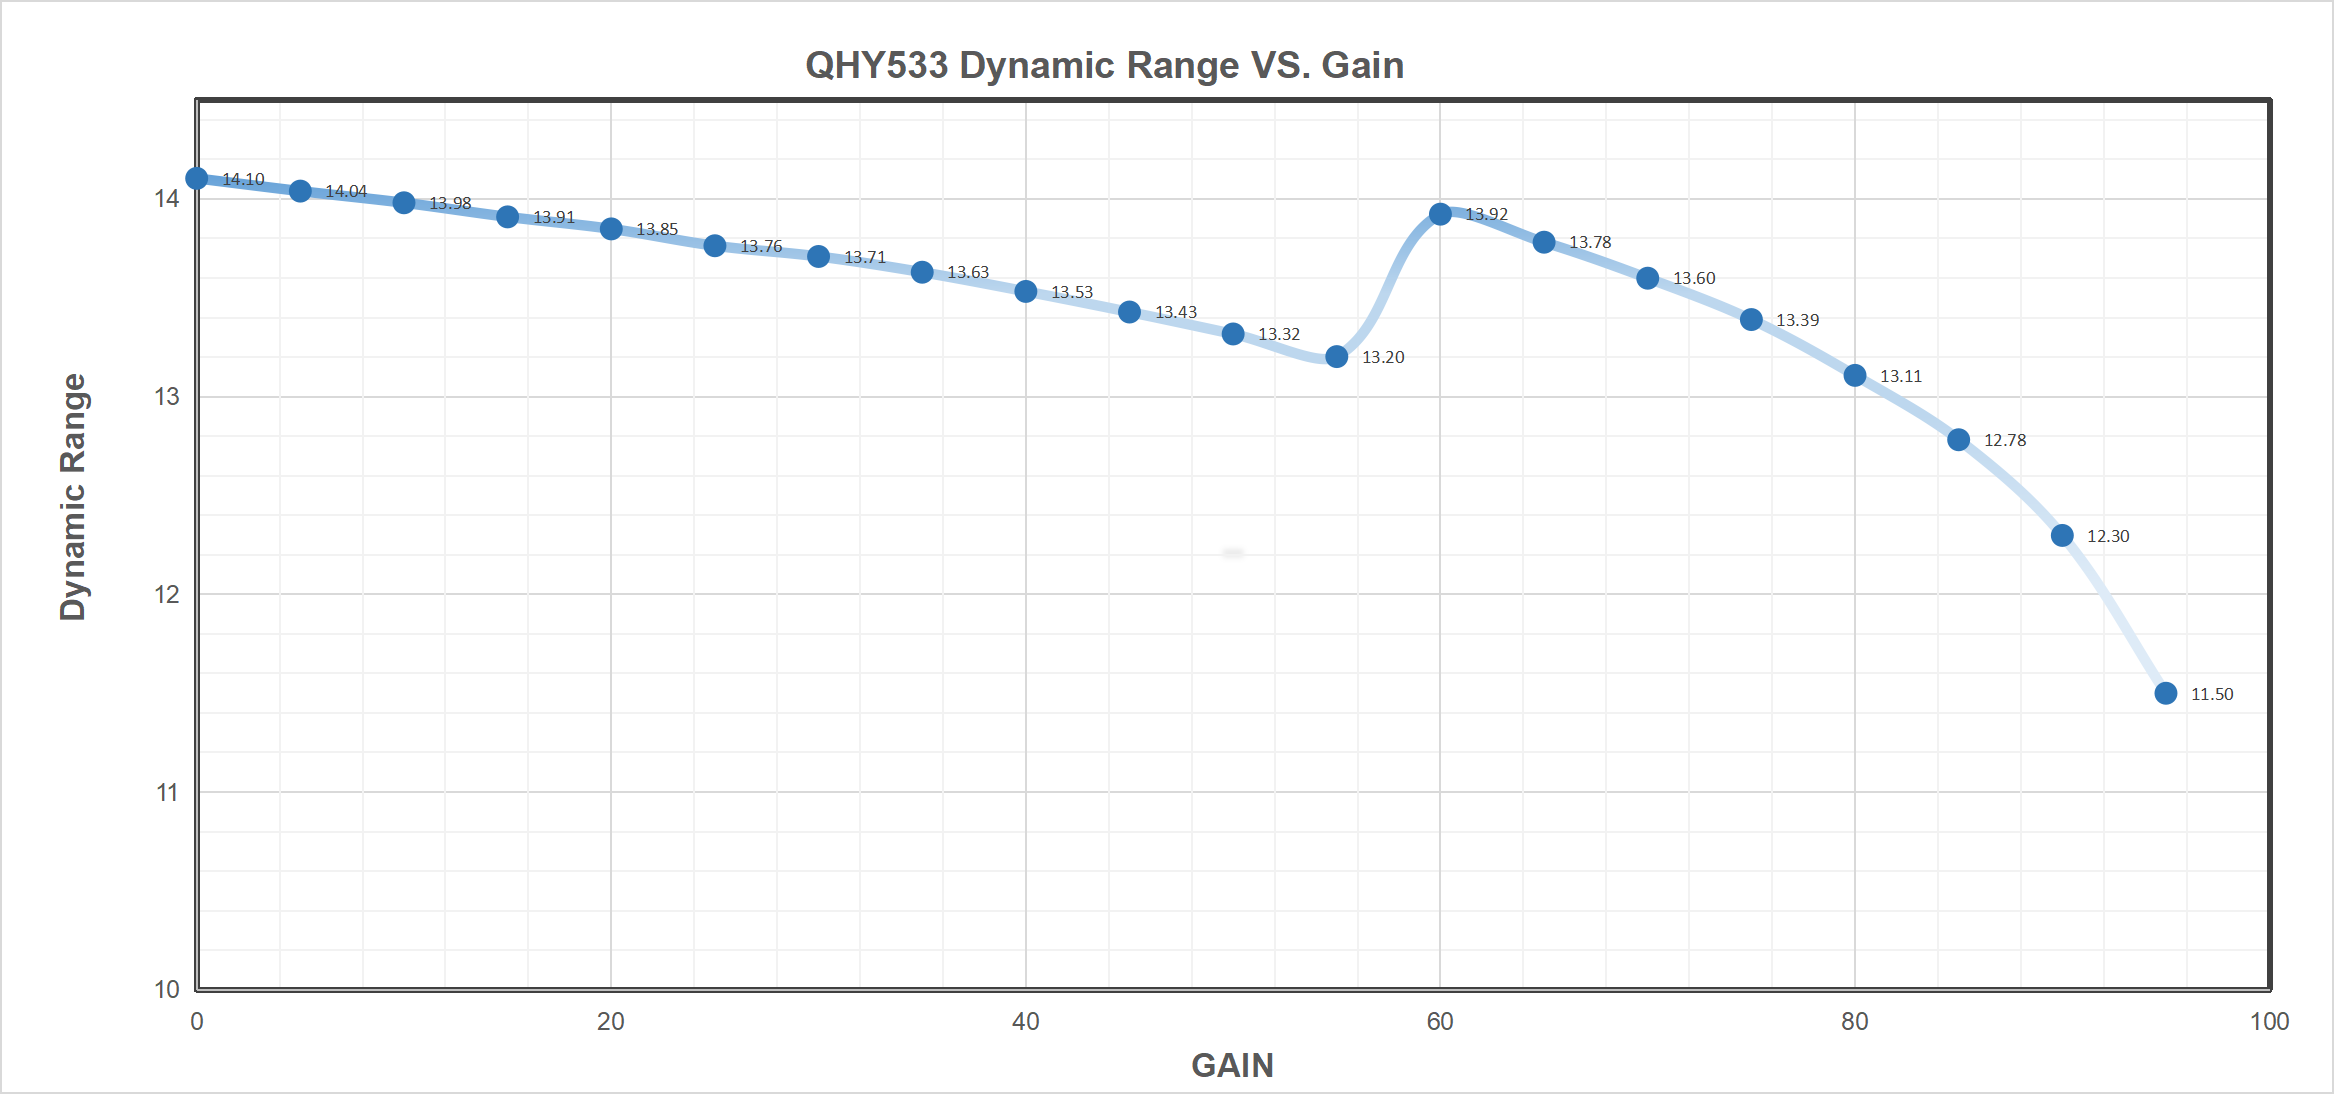
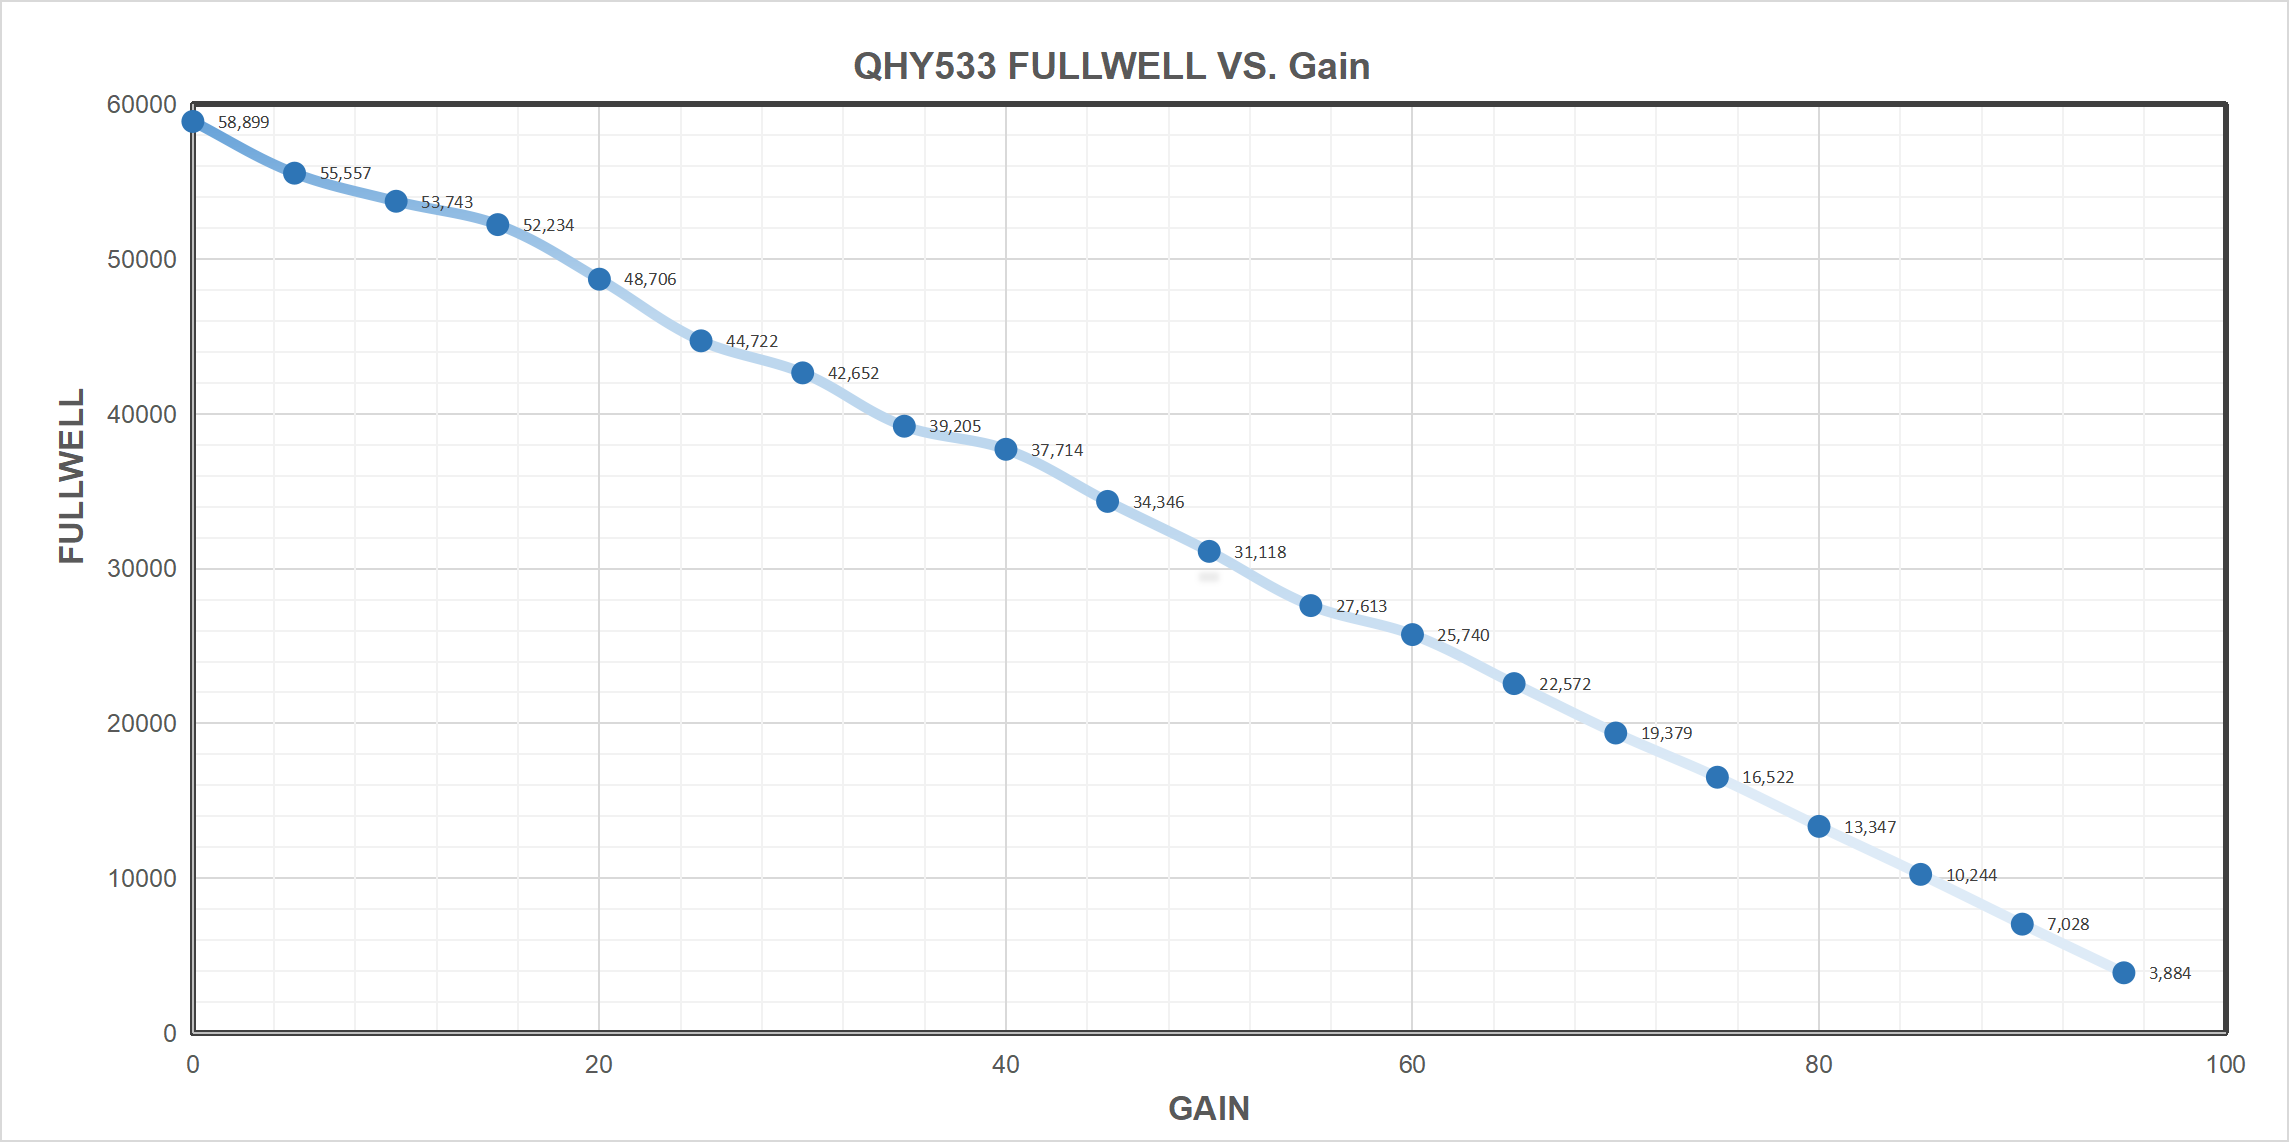
The recommended gain and offset values for the QHY533M as per QHYCCD are:
-
Gain: 76
-
Offset: 35
Resolution
The QHY533M has a resolution of 9 MegaPixels. This may not sound like much, especially to some older cameras with similar prices like the QHY163M (16.4MP). One thing to understand is that the number of MegaPixels is not the only thing that matters for astrophotography. The other main specs you need to compare when choosing an astrophotography camera are the dynamic range, the read noise, and the number of bits. Of course, the other specs like the QE, full well, and more are also important, but they’re a bit trickier to learn for beginners.
In this basic comparison, the QHY533M is overall better than the QHY163M in every aspect, except for the resolution.
Resolution matters if you plan on printing your images on large format paper. If your goal is to create gigantic prints of your images, know that they likely will not look clean. 9 MegaPixels is okay for small to medium prints, but you’ll want to get a different camera before you start getting huge prints of your work.
Talking about prints, be sure to visit our print store if you’d like a Galactic Hunter print in your home! 😎
SQUARE SENSOR
Scroll back to the list of general specs above and take a look at the pixel array line. Yes, the images taken with the QHY533M (and QHY533C) have dimensions of 3008 x 3028, which is more or less a perfect square.
Almost every camera sold (for regular daytime photography and nighttime astrophotography) has a rectangle format, but not this camera!
 The QHY533M’s square sensor compared to a regular camera sensor
Pricing
In our introduction for this post, we said that this camera was affordable. So how much does it cost?
The QHY533 comes in two versions:
-
The QHY533C – This is the color version of the camera
This One-Shot-Color camera is available HERE and costs $959.
-
The QHY533M – This is the monochrome version of the camera
This monochrome camera is available HERE and costs $1,159.
You do not need any additional product to make the color version of the QHY533 work. As for the monochrome QHY533M, you will need two additional items before you can use the camera as intended:
-
A filter wheel. We recommend the QHYCFW3S-SR filter wheel which is designed to work perfectly with this specific camera. It costs $279.
- A set of filters. If you are a beginner astrophotographer, we recommend not breaking the bank and getting the most affordable filters, usually 7nm ones. If in the future, you’d like higher quality filters (5nm or 3nm), we suggest you get these as 2″ instead of 1.25″ so that you can use them with full-frame cameras as well.
This LRGB set is what we used with this camera and costs $148. This Narrowband set is what we use and costs $425.
So in total, you can expect to spend $959 for the QHY533C, and a total of $2,011 for the QHY533M assuming you do not already have a filter wheel and a set of filters.
“Affordable” usually does not rhyme with “$2,011”, but in astrophotography, we could say that a great camera in that price range is considered affordable.
Imaging the Owl Nebula with the QHY533M
After processing the Orion Nebula from our first light with this camera, we decided to switch out the scope for our larger refractor, and image a much smaller, fainter, and more challenging nebula: Messier 97.
The Owl Nebula is a tiny planetary nebula that is close to the Big Dipper asterism. It is actually a great target for this camera because of the square sensor and the pixel size that allows us to get a nice close-up view without having to crop much.
Here you can see what each channel looked like (H / S / O). The nebula is very bright, especially in OIII.
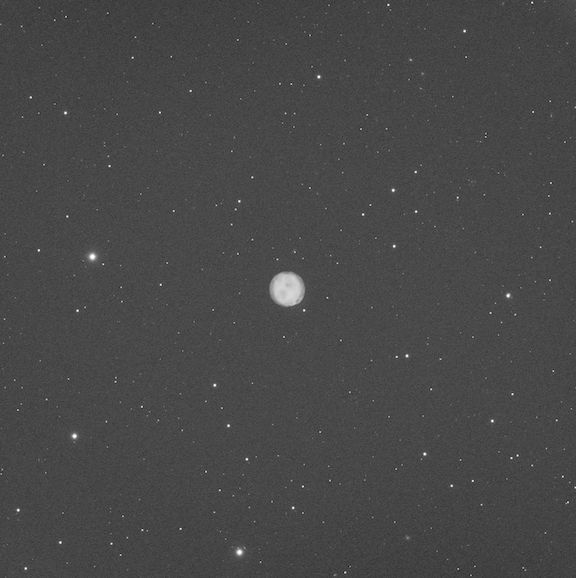
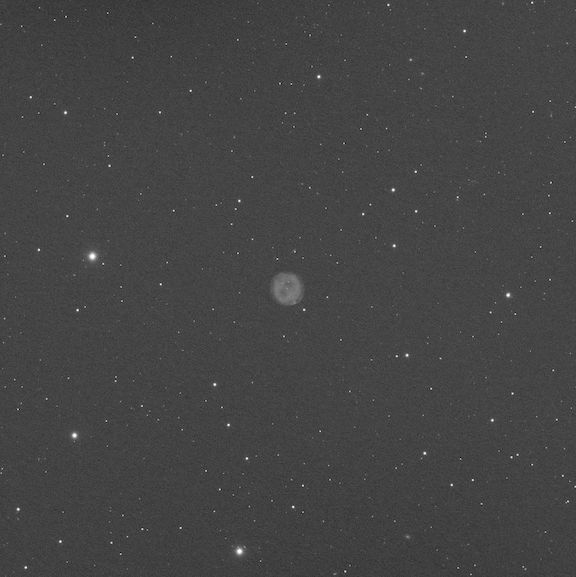
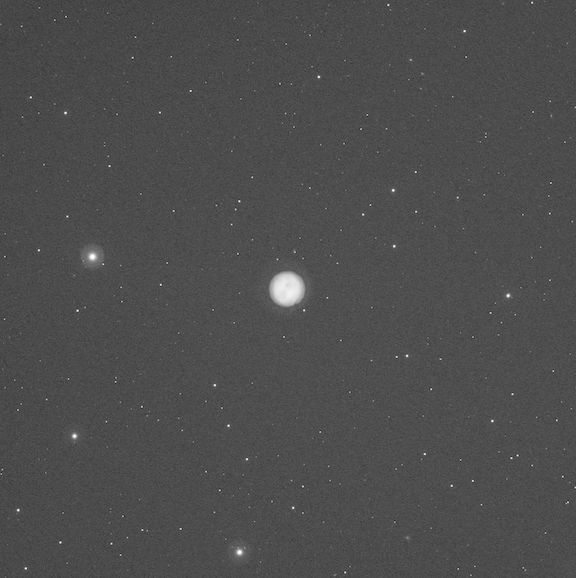
The night was good, we did not care about the angle of the camera at all because the target is small and round, and the sensor is square, so it really did not matter. We did 5-minute exposures at -15 degrees Celsius and used a gain of 76 and an offset of 35 which is what QHY recommends for the QHY533M. We gathered a total of 8 hours in SHO on M97.
And here is the final image. So 8 hours total from our Bortle 9 backyard using the QHY533M with our old 7nm filters. We would say that we are impressed with the result considering this is an entry-level camera and it did very well with the noise and detail in the object.
M97 in narrowband using the QHY533M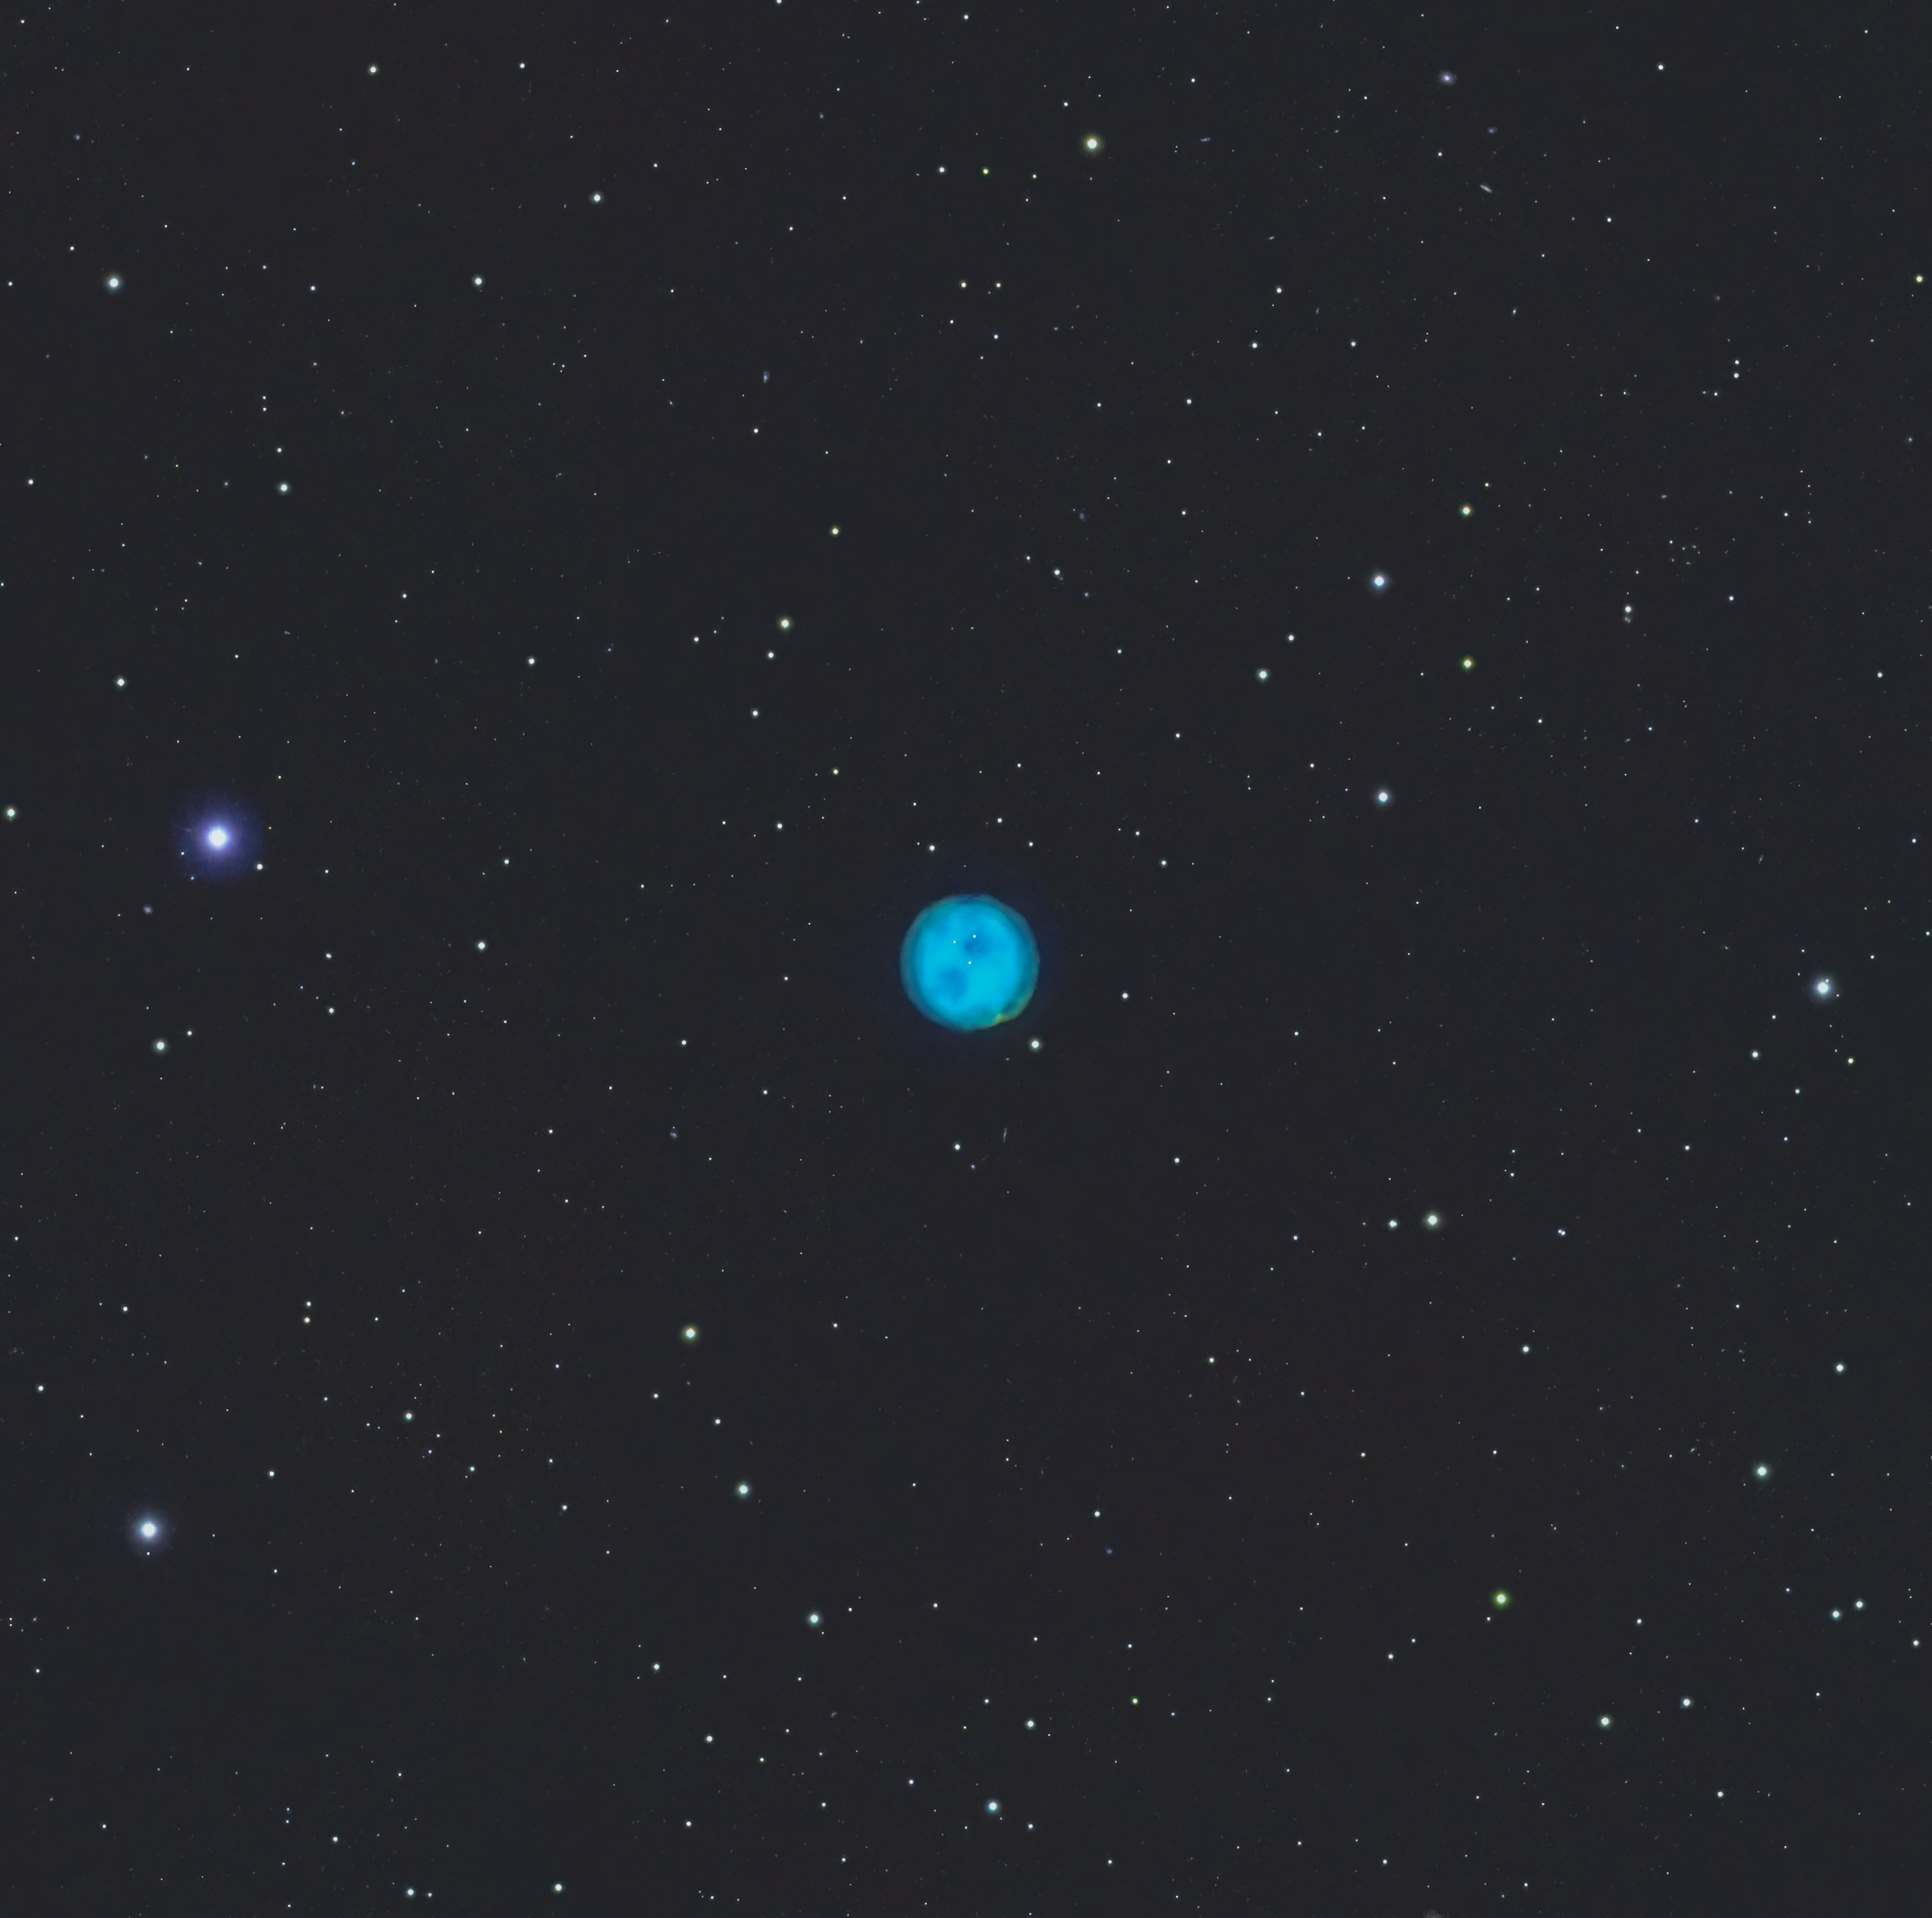
GEAR USED:
Camera: QHY533M
Telescope: Stellarvue SVX130
Mount:10Micron GM1000 HPS
Accessories: Moonlite Nitecrawler focuser / Pegasus Astro Ultimate Powerbox
Power: Jackery Lithium Battery
Processing: PixInsight
Total Exposure Time: 8 hours
Exposure Time per frame: 5 minutes
Gain: 76
Download our Raw Data from the QHY533M
We thought that the best way for you to tell if you like the quality of the images this camera produces is to give you the actual files! Click the link below to download.
https://www.galactic-hunter.com/post/qhy533m-review
In the zip file, you will find the following data:
-
Messier 42 Example Single Shots
300-second single shots on the Orion nebula with our narrowband filters from the backyard.
-
Messier 97 Example Single Shots
300-second single shots on the Owl nebula with our narrowband filters from the backyard.
-
Messier 42 Master Files
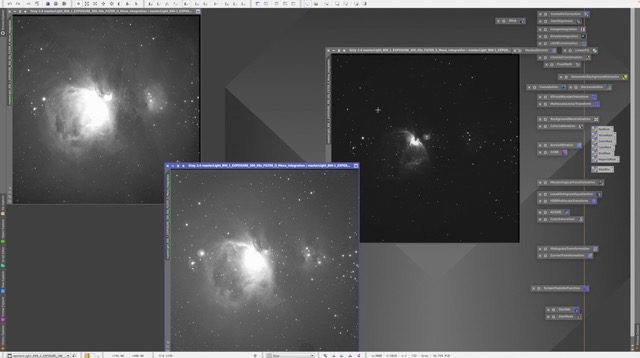
The master files we used to create our final image of the Orion Nebula seen earlier in this post. These masters for the S, H and O channels are ready to be combined and processed. They were calibrated with darks and flats, although the flats were not excellent and one dust spot still remains in the OIII channel.
QHY533M – Final Thoughts
What do we think about the QHY533M after trying it?
The Orion Nebula looks great for just 2 hours, and so does the tiny Owl Nebula which is a tricky target. The noise is not bad at all and the details are present all over the images.
It also felt very simple to use this camera, it is small and light, and the filter wheel is also very small.
Some key points about the QHY533M camera to summarize this review are:
-
It has a square sensor, love it or hate it, we really don’t mind it.
-
It is a 14-bit camera with a pixel size of 3.76 microns. The resolution is 9MP which is pretty low, although that doesn’t mean it’s bad. But if you intend to have huge prints of your images, then it might not be the best for that.
-
It has 0 Amp Glow
-
It also has an integrated dew heater
-
There are 3 ports in the back, a USB3 port, a power port, and a 4PIN port for the filter wheel
-
And lastly, it also has a great feature added which is this mounting ring in case you want to use the camera with a lens directly
-
The price is $1,159 which is very reasonable for a monochrome camera. Just don’t forget you’ll also have to get a filter wheel and filters for it!
If you are looking to upgrade to a monochrome camera and have a higher budget, our favorite camera of all time is the QHY600M, which we also reviewed HERE!
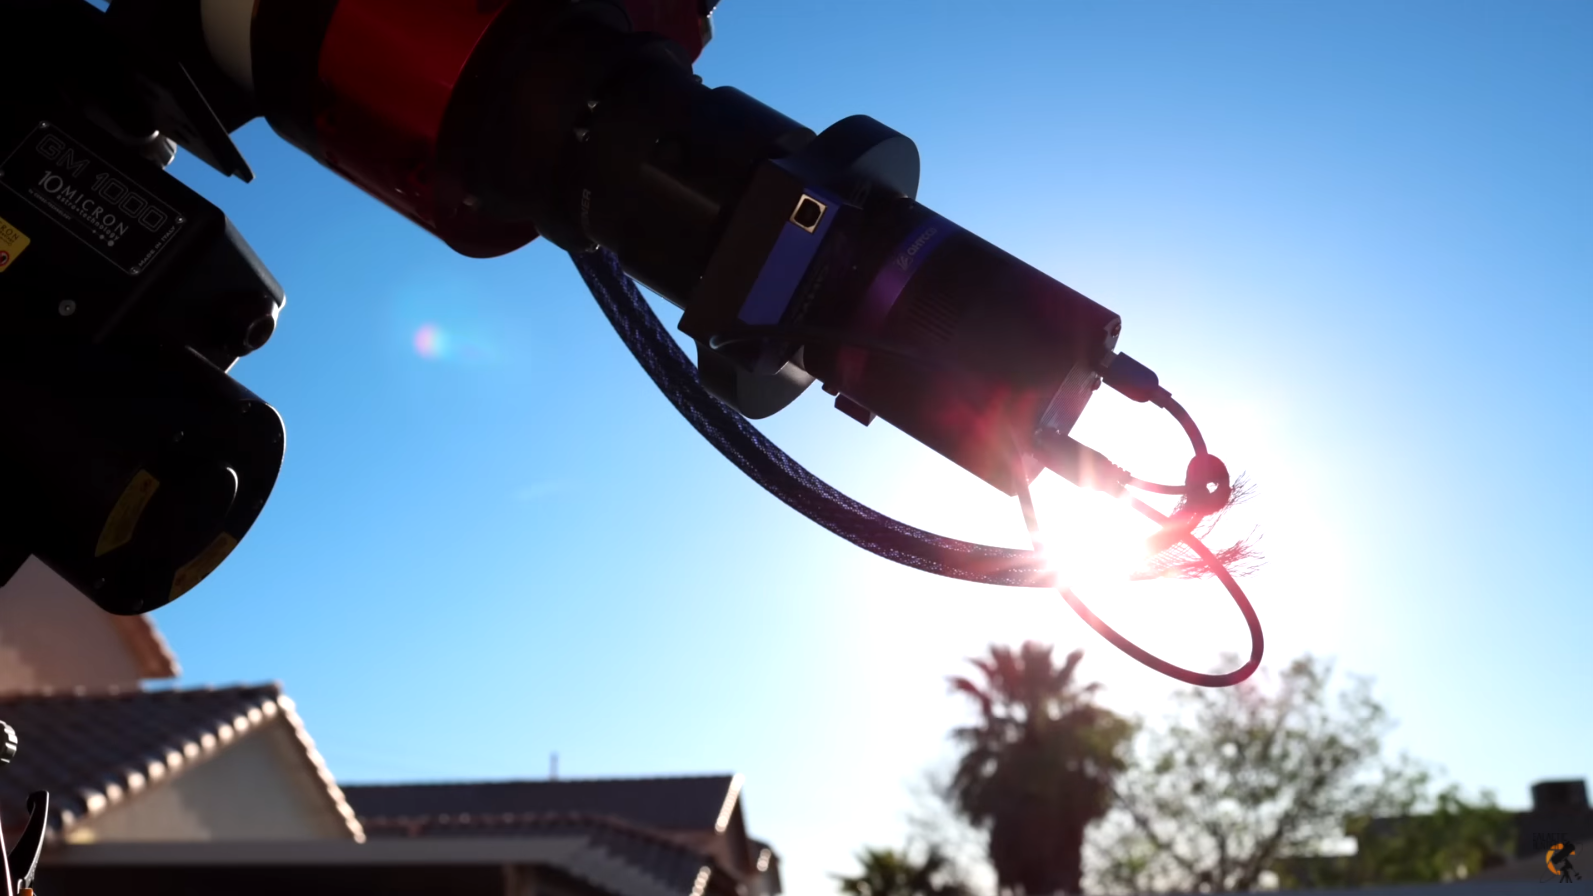 The sun rising behind the QHY533M and the filter wheel
The QHY533M is perfect as an entry-level monochrome camera, and the price is fair. The camera is very simple to use, lightweight and can yield awesome images. If you are not sure about this sensor, just look around on the internet at some pictures from the IMX533 sensor which is loved by a ton of other astrophotographers!