

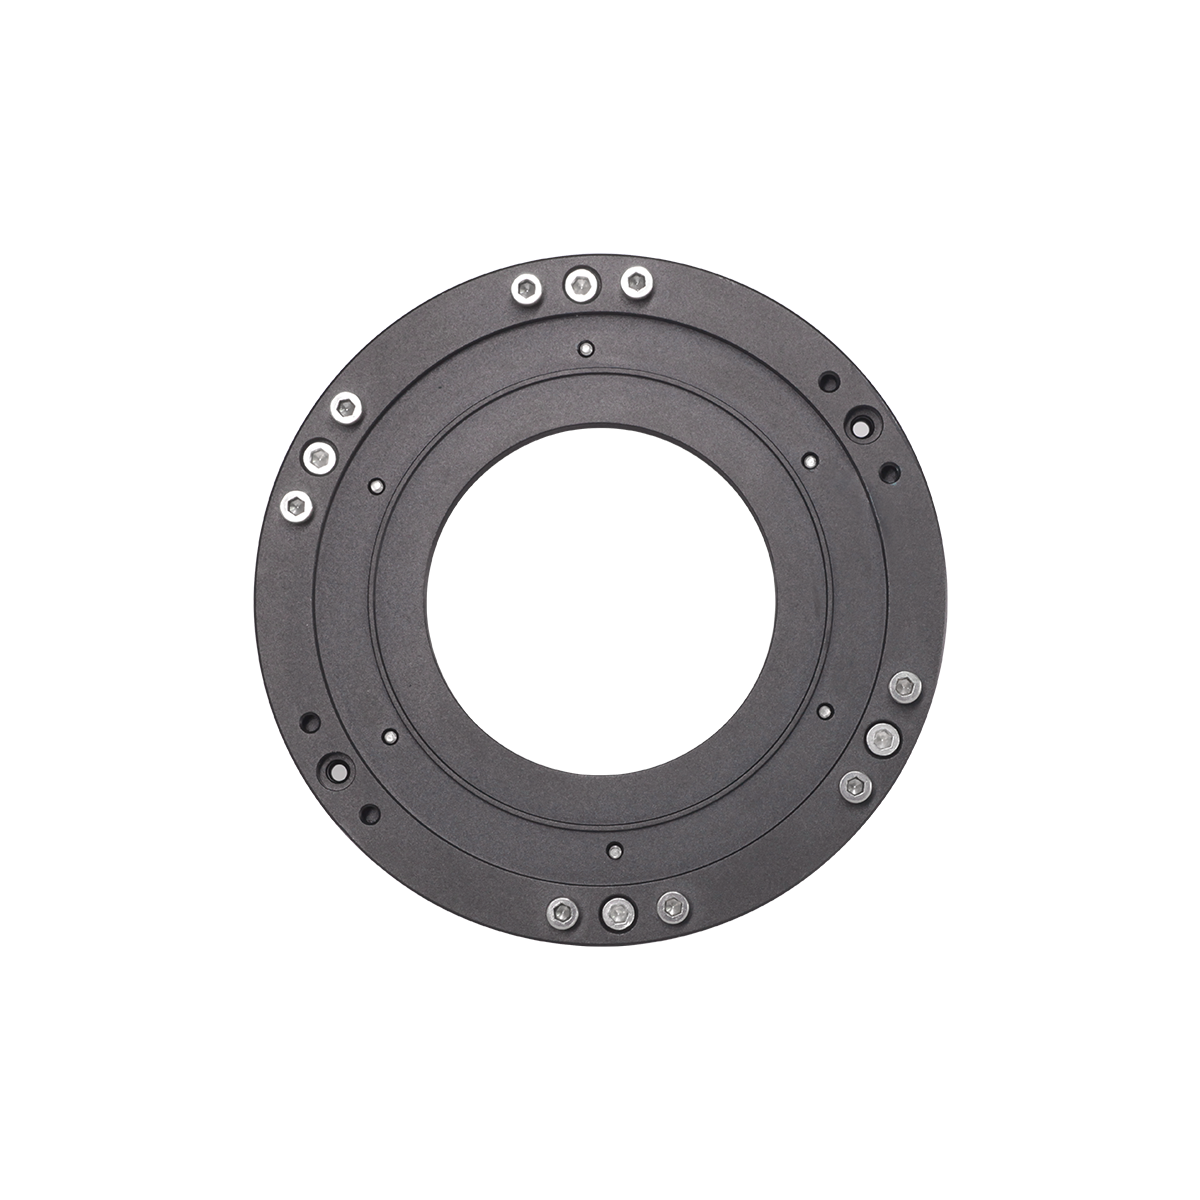
Features
With a rear adjustment design, even after installing a filter wheel, it can be easily adjusted and is suitable for most astronomers using the combo of mono camera+ filter wheel.
We provide six sets of adjustment points. You can choose either a three-point adjustment (equilateral triangle arrangement) or a four-point adjustment (rectangle arrangement).
Compatible Models
QHY600PH-SBFL
QHY268M all versions
QHY268C(short back focal length version after 2022)
PS: The adapter can work with QHY533 in theory, but this camera with a small sensor is used mostly by beginners, it is not recommended to use the adapter with it.
Unchanged Original Back Focal Length
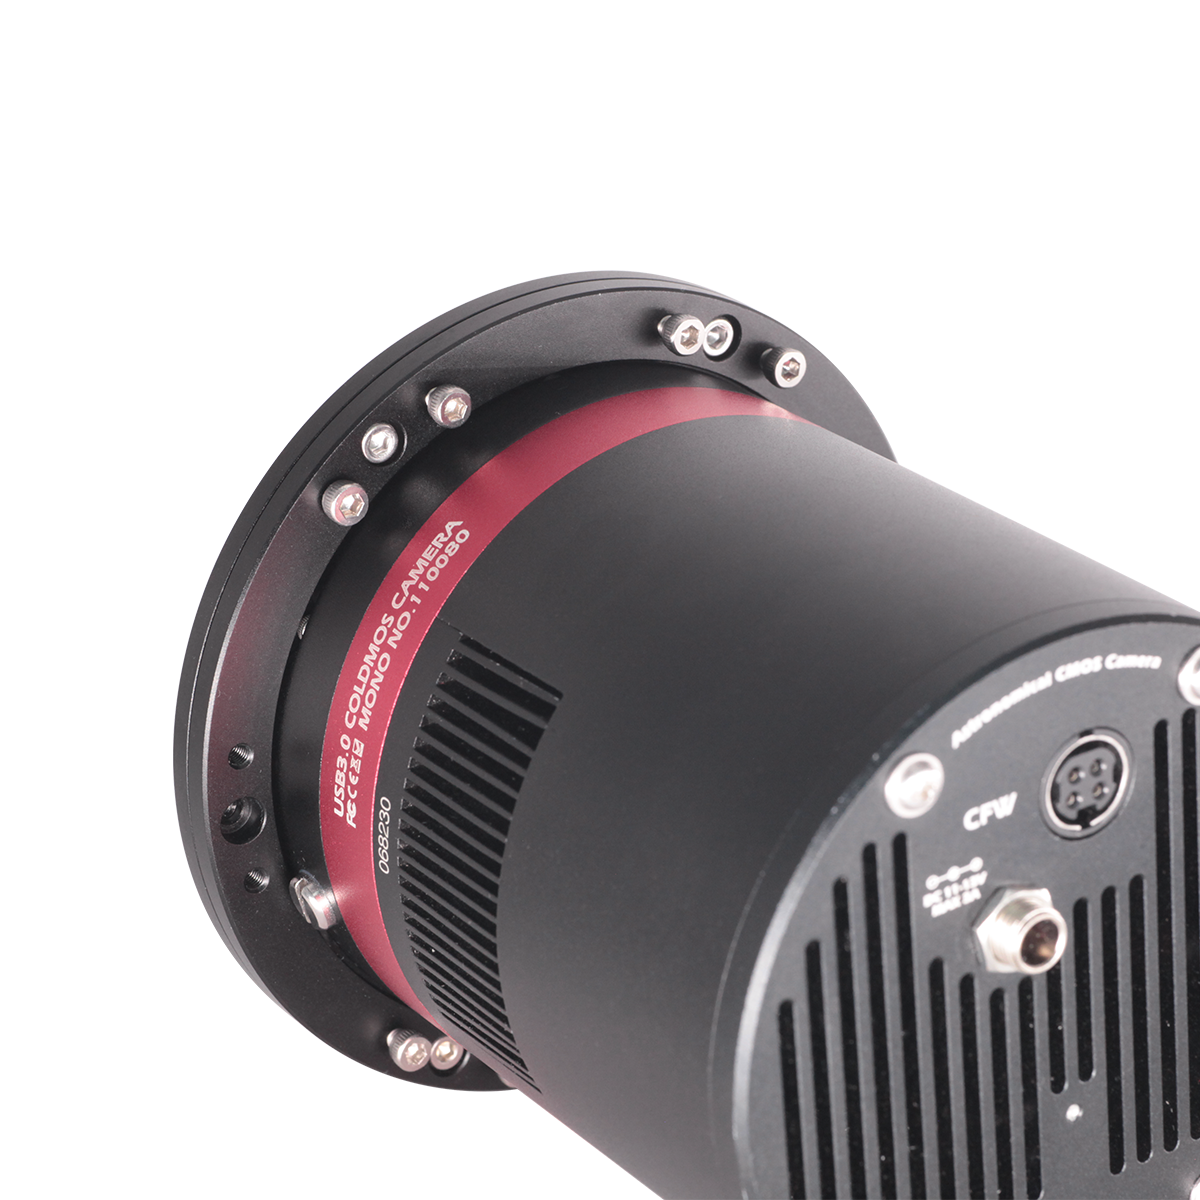
This tilt adjustment adapter is simple to install. Use a screwdriver to remove the original front end of the camera and replace it with the tilt adjustment adapter. Note that removing the default front end also means that the factory focal plane calibration is invalidated and you will need to calibrate the focal plane by yourself.
Again, this tilt adjustment adapter is perfectly compatible with the above models, and after replacing the original front end, the focal length increment will not change, so you can still keep the original adapter configuration, or adjust the adapters according to the standard adapter installation instructions.
Appendix: Tilt Adjustment Introduction
Introduction of Tilt Adjustment
Tilt adjustment is to make the camera sensor square to the whole optical system (optical axis). We hope what follows may help you.
For most amateur-level astrophotographers, Tilt adjustment is very difficult, so it is not recommended for beginners to adjust on their own, including QHY’s newly released tilt adjustment adapter, which is only recommended for astronomers with experience in tuning equipment. Fortunately, all QHYCCD cameras have been calibrated by professional high-precision instruments before leaving the factory.
S0 why the tilt adjustment structure is still retained? This is because not only the focal plane need calibration, the optical axis of the telescope also needs to be accurate. For example, a poorly calibrated optical axis, minor deformations caused by the unstable structure of the scope or by overloaded equipment, the use of adapters of poor quality, can all lead to problems with the entire optical system. We cannot ensure the stability of the whole optical system, so we offer some tilt adjustment methods for our users.
Before tilt adjustment, please make sure that the telescope’s optical axis is adequately calibrated. Besides, we recommend that you choose equipment with a higher optical tolerance. we do not recommend telescopes with vary small focal ratio. Though they can achieve “fast” capture, whether reflector or refractor, the optical axis calibration for focal ratio below f/4 is difficult.
Several Methods of Tilt Adjustment
1. Adjustment with copper foil (applicable to most equipment): After obtaining the distance and direction of the tilt position of the focal plane, copper foil is placed on the relatively lower part. Usually, the thickness of the copper foil is between 65um and 100um, and it can be adjusted with a maximum precision of 20-30um.
2. Adjustment with screws (Applicable to QHY268/QHY533/QHY600PH-SBFL and other products with the new front end): Loosen the 6 cross screws on the top end of the camera, and install a hexagonal socket bolt at the recessed corner of the focal plane measured by the software to elevate this corner. Then tighten the 6 cross screws and verify again with the focal plane analysis software.

3. Adjustment with QHY tilt adjustment adapter (additional purchase required): This adapter can replace the original front end of your camera, whlie the replacement does not affect the focal length. With a rear adjustment design, even after installing the filter wheel, it can be easily adjusted and is suitable for most astronomers.